Walthrough for Rogue Trader is a detailed written guide focused on the Main Quests campaign of the game, and recommeneded Side Quests that will ease up your playthrough. Walkthrough provides complete information about puzzles, relevant loot, decisions and objectives, significant NPCs, helpful Companions and more.
Warhammer 40K: Rogue Trader List of Quests
Main Quests
Prologue and Act 1
- By the Right of Blood
- Looking for Trouble
- Secrets of the Navis Nobilite
- The Starport
- Gleam of the Final Dawn
- Taste of Victory
- The Chosen Ones
- The Escape
Act 2
- Attack in the Silence of Mer-Segrit
- Blades in the Void
- Dreams and Stories
- Flame in the Dark
- Hunger's Hand
- Tattered Spirit
- On the Hunt for Knowledge
- Reclaim What Was Lost
- Rot
- Spiders in a Jar
- The Emperor and My Right
- Underworld
- Where the Shadows are Deepest of All
- World Shapers
Act 3
- Following Breadcrumbs
- Troubling Developments
- One Foot in the Grave
- Reunion
- The Chasm
- Strings of the Puppeteer
Act 4
- Hunting Grounds
- Lair of the Haemonculus
- Questions and Answers
- The Great Judgement
- The Lord Inquisitor and The Lord Captain
- The Siege
Act 5
- To Walk Bravely First into Darkness
Errands and Rumours
Errands
- New Blood
- Machine Spirit Keeper
- The Guide
- Defective Servitors
Rumours
- Warden of the Expanse
- An Unidentified Voidship
- Calamity on Industrial World
- Hotbed of Xenoheresy
- Stolen Stars
- The Naviica
- Lost in the Void
- Xenos on the Rampage
- Angels of the Emperor in the Expanse
- Cache in the Old Bridge
- Cache in the Former Lantern
- Inevitable Triumph
- Dumped Cargo
- Eye of the Magnetic Storm
- Unending War
- Unknown Mechanism
- Outpost in Need of Help
- Cache on Kiava Gamma
- Burning Worlds
- Voyage of the Kasballican Ship
- Who Left This Here?
- Tervantias's Masterpiece
- The Haemonculus's Prism
- Fall of Santiel's Pride
- Siege of Eufrates II
- Loathsome Discovery
- Path of Revulsion
- The Haemonculus's Gift
- Heavenly Chariot
- Beheaded Griffon
Companion Quests
- Aeldari in Distress
- Astray
- A Lucrative Opportunity
- Battle Sister's Personal Request
- Blood Ties
- Dark Echelons
- Duty of the Navis Nobilite
- Echo of the Past
- Let the Cycle Be Discontinued
- Mercatum Tabula Officiale
- Outcast's Duty
- Path of the Drukhari
- Rat Hunting
- Request and Response
- Secrets of the Cult
- Soulless
- Stranger Among Her Own
- The Door
- The Incident
- The Path We Lost
- The Price of Power
| This Walkthrough is a work in progress! You can suggest your findings while playing in the comment section or add them yourself by editing the quest pages. |
Warhammer 40k: Rogue Trader Walkthrough
ACT 1
Navigation
Click to jump to a specific section of the page
General Details
- ACT I
- Location: Personal Voidship
Relevant Characters
- Kunrad Voigtvir
- Theodora Von Valancius
- Abelard Werserian
- Edelthrad
- Warrant Sentinel
- Sister Argenta
- Idira Tlass
Bosses
- n/a
Items
Consumables and Other Items
- n/a
Equipment & Upgrades
Enemies
- Heretic Psyker
- Heretic Cutthroat
- Heretic Assailant
By the Right of Blood Walkthrough
Rogue Trader Theodora von Valancius desires to personally meet with the person recently brought aboard her flagship. A storm is brewing over the dynasty, so the Lord Captain has something important to share with her heir — if she ever gets the chance.
WARHAMMER 40K: ROGUE TRADER BY THE RIGHT OF BLOOD OBJECTIVES
- Follow Kunrad Voigtvir - the Master of Whispers serving the von Valancius dynasty, has graciously offered to escort the dynasty
heir to Lord Captain Theodora. - Talk to Theodora Von Valancius
- Destroy the out-of-control Servitor
- Find the Arch-Militant - The officers' deck is under attack by an unknown enemy, so Arch-Militant Mort has left to clear the way to the lift leading to the upper decks. The officer has not returned yet, so it is time to find out the cause of the delay.
- Check the Warrant Chamber - The Warrant Chamber has opened its doors for the dynasty heir! It is time to make sure the sacred Warrant of Trade is safe.
- Seal the Warrant Chamber
- Find a Weapon
- Accept Abelard's Aid
- Protect the Navigator - Idira a psyker in Theodora von Valancius's service, speaks of ill omens related to the Navigator's fate. The warp guide must be protected at all costs.
- Talk to the Navigator - The enemies in the Navigator's Sanctum have been eliminated, but the warp guide's condition gives cause for concern.
- Make it to the meeting with the heir - A servo-skull from the Warrant Chamber has relayed Edelthrad's message: the heir is alive and gathering people loyal to the dynasty to storm the bridge. It is vital to make it to this meeting to unite forces with Edelthrad and confront Kunrad.
ROGUE TRADER BY THE RIGHT OF BLOOD WALKTHROUGH
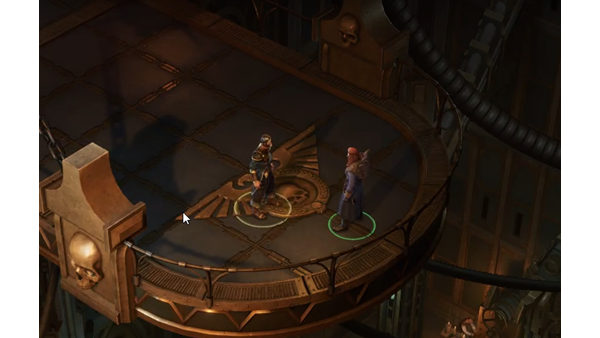
The game will start with the player meeting Kunrad Voigtvir atop a platform overlooking the cathedral of the ship, he will praise the temple and speak to you. You can answer him and introduce yourself too. After a brief conversation where you can inquire about his role as a Master of Whispers and the circumstances of your current situation he will direct you to follow him and meet Lady Theodora Von Valancius.
After a brief walk you will arrive at a trophy room of current Rogue Trader, a cutscene will be triggered showing a pair of servitors “malfunction” and start attacking the crew and yourself. This will trigger the start of the Combat tutorial, the servitor will continue killing crew members, and you will have to shoot it down.
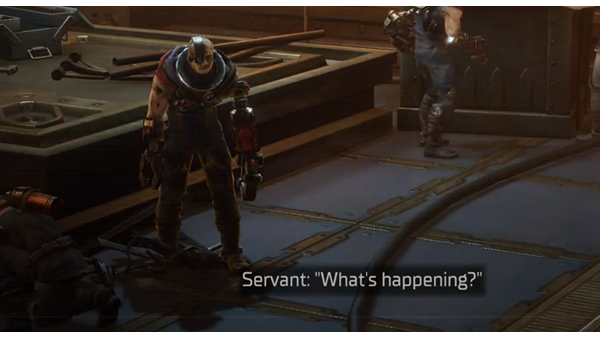
He will make a comment about the situation being very suspicious and urge you to move forward while he investigates. Before moving on you can inspect the many trophies of the room for a bit of lore on the ship and its master. After that you can exit the room and take on of the bridges leading to where the rogue trader is speaking with her subordinates.
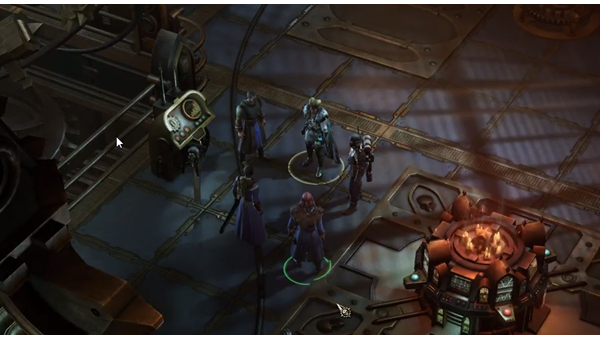
Here you can either interrupt her conversation or not, but she will ask your opinion regardless, she will ask the following:
“Consider this hypothetical situation. Aion VI. A new world on the fringes of the Koronus Expanse. High seismic activity, regular magma eruptions, metamorphic rock deposits, prospects for large-scale mining. The world is populated by natives who worship some heretical 'underworld spirits' that protect those who offer them sacrifices. Flights of fancy, you might say. But attempts to install ore extractors have failed for the second time — the mining crews sent to the planet's surface simply vanished overnight. My question to you is… What would you do with this poisoned treasure?”
The game will present you with several choices here, highlighting the Skill Checks in the conversation with a tutorial window:
[Lore (Xenos)] “Those 'spirits' could well be the natives' name for dangerous aliens — I would first verify if that is indeed the case and if the population of Aion VI engages in xenoworship.”
[Lore (Warp)] “There are ways to confirm whether What is happening on Aion VI is witchcraft or not. It might cost several psykers to do so, but it Will give us the answer.”
One of these answers will impress Theodora and give you the opportunity to chastise Edelthrad, after answering her question and conversing with him, he will leave. The Rogue Trader will ask you why did you approach her, answering directly will please her, if not she will scoff at your lack of mettle. You can converse about her background and the general politics of the starsector and then ask her how you should proceed which will trigger the next scene.
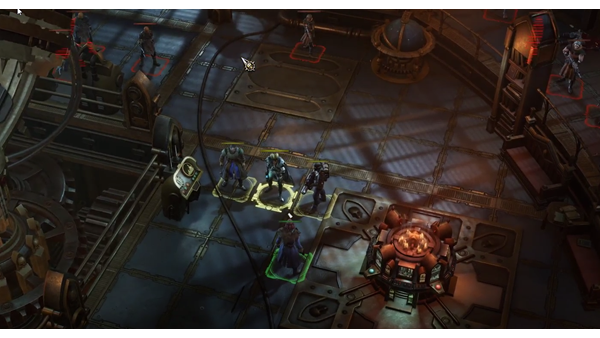
Several Heretic Cutthroats and a couple of Heretic Brawlers will surround the group and attack you. This fight is quite easy given that Theodora and her retinue are much more powerful than them, so just attack anyone when you have the chance and the fight should be over quickly. She will then ask you to find and help Mort initiating the next objective.
To find Mort just go up the stairs leading out of the room (this whole section is quite linear), there will be another brief conversation and Kunrad will join you. Theodora will ask him about the situation, which apparently is a planned mutiny, she will worry about Edelthrad. Your next objective will be to find him in Transitional Deck 18. Right after you separate from the Rogue Trader Kunrad will ask you if you are ready to go, here you can go back and explore if you so wish. When you agree to go he will immediately pull a weapon and take you out revealing he is the master schemer behind the revolt.
You will wake up in the chamber that contains the sacred Warrant of Trade, an item gifted by the God-Emperor to the Von Valacius Dinasty that states their status as Rogue Traders of the Imperium of Man. Voigtvir will reveal that he needs your blood to open the gene lock guarding the chamber since his is tainted by the Warp. During the conversation you will have a couple of Skill Checks:
- [Coercion] What sorry, pathetic excuse do you even have for your apostasy, you sordid. wretched piece of grox ****?
Something — either your tone or the venomous words — throws Kunrad off for a moment as hateful fury blazes from beneath the mask of a cold professional “Wretched? What do you know about wretchedness, Theodora's cur? Are you hoping to buy a grain of her indulgence with your blind loyalty? I know this delusion — but. thank the gods, it no longer has power over me. Humanity can rot I no longer serve mortalkind.
- [Willpower 40] (Fight the voice in your head) Get out! I am not your puppet!
-test if this opens the option for the weapons or not
After being spoken by the Warp voices you will be forced to approach the chamber, here you can make a Tech Use 30 to recognize the device as Archaeotech (Technologies that predate the current age of man, usually stemming from the Age of Strife or earlier). The device will speak to you, recognizing you are in danger and ask you if you need help. It will then proceed to shoot and burn the heretics, foiling Kunrads plan. When he sees he has failed he will teleport offscreen and leave you to enter the chamber.
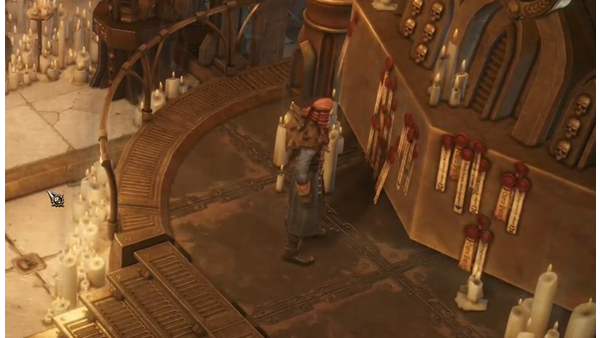
Here a cutscene will play reading a piece of the warrant of trade and later a Vox-Skull (the Warrant Sentinel) will address you and try to escort you to safety, you can ask it to communicate with Theodora, but communications are oneway only with her. To exit to the next zone you will have to seal the chamber and follow the skull out, where Abelard will find you and after surveying the scene of carnage that unfolded ask you for explanations. He will be reticent but eventually believe you about his treason. And hand you a Weapon and an Armour to defend yourself. (Starting with the Officer Archetype the starting equipment will be a Sniper Rifle and an Armoured Bodyglove as well as a Medikit)
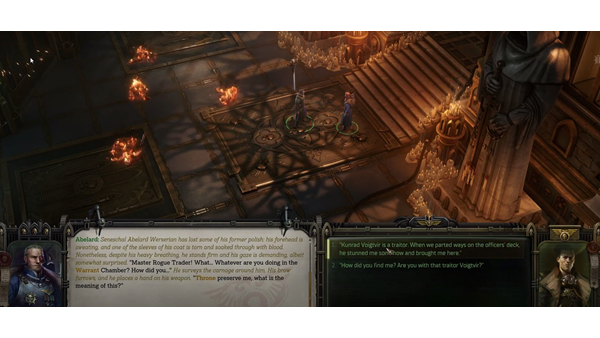
After providing you with equipment you will find yourself surrounded by enemies again, 6 Heretic Cutthroat to be exact, you can position yourself and Abelard away from them since they all wield melee weapons and mow them down as they come, when they reach melee range make sure to send him forward since he excels at close combat. After taking care of the heretics, loot the bodies to find 6 Swords and a Laspistol and then proceed to the Navigators Sanctum.
On the way to the navigators' sanctum you will find Idira Tlass, Theodora's personal psyker, you can have a brief conversation here where she'll tell you about her powers and comment on your Darkest Hour. After the briefing, you will continue to the Navigators Sanctum to face the cultists trying to kill him. There are two Heretic Sharpshooters, a Heretic Psyker and two Heretic Brawlers. Make sure to take use the cover offered by the terrain, and you should be good since it's not a difficult fight. You can loot a couple of Axes, a Psychic Axe and a of Scrappy Autoguns from them.
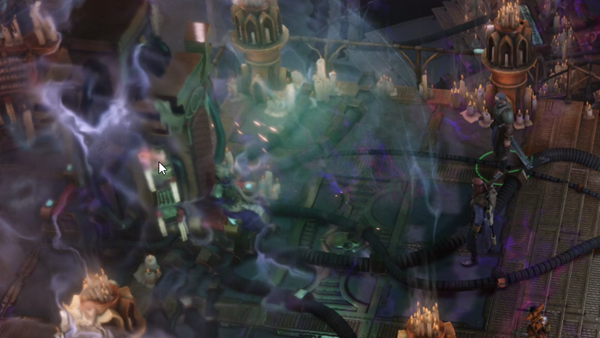
After dealing with the enemies you will find the navigator barely holding himself against the demons of the immaterium, he fused to his chair and is now doing his bet to hold the warp at bay. He tells you to go and that he will be ready to translate back into realspace when the the helmsman gives the order. You can now exit and go to the Officers Deck.
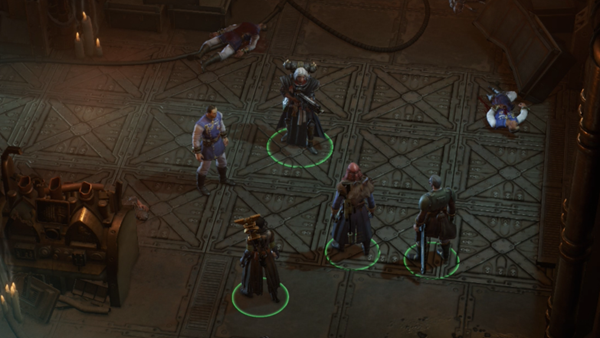
Before anything you will be shown a cutscene of Sister Argenta arriving to a group of pinned members of the crew and shooting all heretics while chanting praise to the emperor. She will then question who you are, you can pass a skill check here:
- [Lore (Imperium)] 'What is a warrior of the Adepta Sororitas doing abord a Rogue Trader's ship? Your orders serve the Ecclesiarchy, do they not?"
Abelard: "Sister Argenta is a guest of the Lord Captain." Abelard shoots her a quick glance. "And that story deserves its own time and conversation — under more appropriate circumstances."
When you exhaust the conversation she will join your party. You can then loot a couple of crates near the injured and continue the mission by interacting with the door to the mess thats facing the hallway.
When you enter the mess hall, you will face a mix of Heretic Assailants and Heretic Cuthroats. Make use of the cover the table provide to win this fight and divert their attention to Abelard by sending him to the frontlines whenever you can. Using Idira Tlass's Lightning Arc is a strong move to use against the enemies if the attacks are chained. You can loot more Swords and Scrappy Autoguns from them. After the encounter, make sure to loot the area for items before opening the door on the left side of the room which requires a skill test.
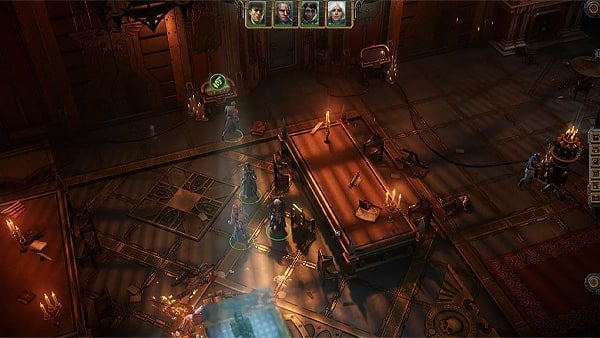
Upon unlocking the door, you'll find a store room where you can loot various goods, including a vault that contains x3 Melta Charge and x1 Operator's Gloves. Return to the hall after clearing the room and head up the stairs where you'll find another iron door that you can unlock with Demolition. Pass through the opening and go east towards the group of deck enforcers to trigger a dialogue cutscene where the Rogue Trader must now make a decision. The choices are as follows:
- (Dogmatic) [Walk through the Fire] "The Emperor will guide the righteous on their path."
- (Heretical) [Accept the offer of help] "Take my pain away. And give me power."
- (Iconoclast) [Get the people off the bridge] "I will not leave my people in harm's way!"
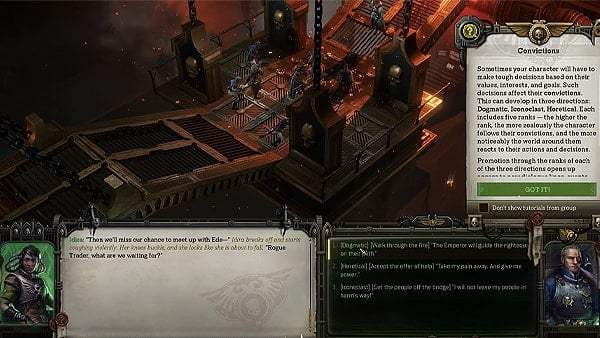
For this walkthrough, we've chosen the Iconoclast choice (this causes an objective failure of "Make it to the meeting with the Heir"). Your character will instruct the deck crew and party members to fall back and look for an alternate way to reach your objective. Head to the west side of the room and approach the railings at the center where you'll see an option to "Crash the platform". This requires a Ballistic Skill. Cross the platform to trigger another cutscene dialogue and acquire a new objective "Reach the Secret Lift".
After the dialogue cutscene, go straight, make a right, and you'll see a door on the left-hand side. Unlock it and you'll find the secret lift that can take you to the Lord Captain's Quarters. When you arrive at the captain's quarters, a new objective will unlock which is to find Theodora von Valancius. As you head inside the study, you'll find Lady Theodora dead, inspect her body to update the quest log. Make sure to examine her body, the arch-militant's body, the shards by the desk, and the papers. After the dialogue, loot the vault next to the murder scene to find x1 Rogue Trader's Cloak before heading to the voidship bridge.
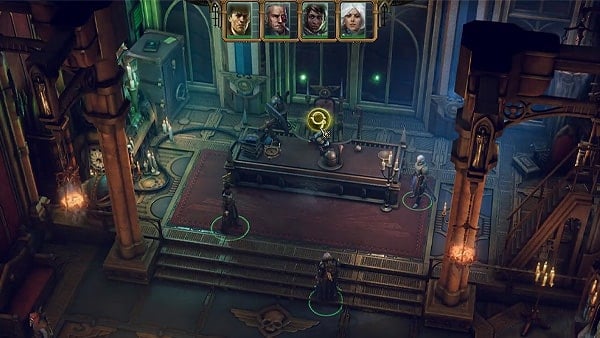
As you exit towards the voidship bridge, you'll be ambushed by a group of heretics, cutthroat, and the Combat Servitor. To prepare for battle, position your characters behind the furniture to take cover against ranged enemies. A good spot is to position Abelard upfront by the small round table so he can get up close when it's time for him to attack. Make sure to loot the bodies to find items such as Grace of the Oblivious, Laspistol, and Sword — if you're done clearing the room, exit to the voidship bridge.
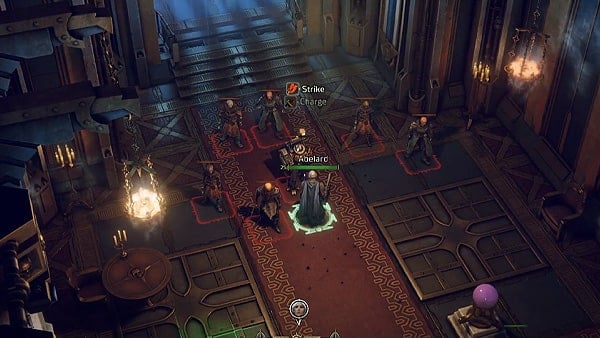
A cutscene will trigger when you head west after entering the voidship bridge. Another battle will also trigger where you need to defeat the warp creature. As always, before you start the battle, position your units behind cover to have a defensive advantage. After slaying the beast, you'll acquire a new objective which is to speak to Master Helmsman, you can find him by the central console in the same room to begin the ritual where you'll take over the place of Lord Captain — this formally completes the quest and unlocks the following quests
- Looking for Trouble (Main Quest)
- New Blood (Errand)
- The Guide (Errand)
- Warden of the Expanse (Rumour)
Looking for Trouble Walkthrough
A matter of the utmost importance led the Interrogator of the Inquisition, Heinrix van Calox, to the Rykad System. The Rogue Trader's duty as a loyal servant of the Imperium is to find the Interrogator and aid him in his mission. Since his whereabouts are currently unknown, it may be easier said than done.
WARHAMMER 40K: ROGUE TRADER Looking for Trouble Objectives
- Visit Rykadi Philia, the prison planetoid: The prison planetoid in the Rykad System may have caught the interrogator's attention.
- Land on Rykad Minoris: The Interrogator must have with Rykad Minoris. Perhaps the planetary governor knows of his present whereabouts or planned course of action.
- Make contact with the Navis Nobilite station
ROGUE TRADER Looking for Trouble Walkthrough
ooking for Trouble begins, after the last bloody conflict within the premises. The area was a little bit organized, and the main character assumed the role of the leader. This main mission is all about picking your next destination and there will be a handful of paths to choose from. Abelard on the other hand recruited new crew members for your group. Go ahead and choose any dialogue you prefer until you reach the option "I am ready to start the briefing" to proceed. Abelard then will call all the newly recruited crew members.
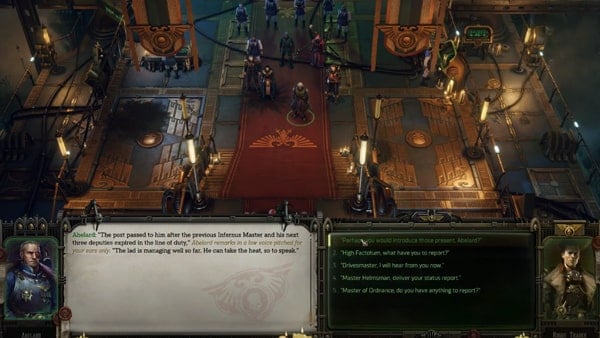
As you do this the new crew will come in and Abelard will start introducing them. Eventually, you'll get a list of dialogue options. Go through all of the options you're given and as you do you'll get some new activities to do. The crew members will inform you of the things that the group needs to prioritize to progress. Like having a Navigator for instance. Engaging in a dialogue with the Master of Ordnance will reveal his hostile demeanor. At this point, you can choose to spare him or opt for immediate execution. Following the "Iconoclast" path in this walkthrough, I'll spare him. Your decision here will earn you a "+1" on Iconoclast.
You can still engage all the dialogues that you haven't selected. Once you're done go ahead and dismiss the crew to progress. In the subsequent dialogue choice, if you retrieved the Handwritten Letter With a Seal from where Theodora was found dead, a new dialogue option will be available. It doesn't appear to have a significant impact on the situation.
After the said event, we'll get an update on our main quest, but we'll also have Argenta appear alongside Idira. Argenta here will give you a new companion quest. At this point, checking your quests will reveal that our main quest comprises several objectives, mostly tied to the tasks mentioned earlier. When you're prepared, proceed to interact with the Koronus Expanse Map located in the center near where Abelard is located to access the space map. You can engage in different activities if you select your next destination. The following available paths for us are as follows.
MAKE CONTACT WITH THE NAVIS NOBILITE STATION
To fulfill this objective, complete the task titled "The Guide." Click on the provided link for detailed information. This task occurs at the Eurac V location on your map and will also initiate the main quest "Navis Nobilite Secrets " which closely aligns with the aforementioned errand. Both will be accomplished simultaneously.
VISIT RYKADI PHILIA, THE PRISON PLANETOID
In this objective, you need to approach the planet on the southern side of the sun and land there. The designated planet is Rykad Philia. It's important to mention that this action will activate another main quest which is "The Chosen Ones." if you decide to go down this path.
LAND ON RYKAD MINORIS
Rykad Minoris is situated on the eastern side of the map. Before proceeding there, there's an unidentified void ship to the south. Approach it first and engage in a conversation. They advise you to pass by and essentially ignore them, revealing themselves as pirates. You can either attack and destroy what remains of their ship or inquire about the truth and initiate a trade with them.
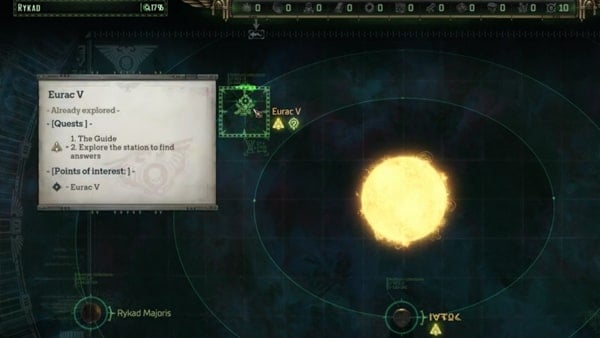
In this guide, our initial destination is Eurac V. Begin by landing on the planet above, Rykad Minoris, which is Eurac V. Upon landing, a scene with Sergeant Malgar unfolds, indicating they are currently under fire and providing additional information. I chose to pat him on the shoulder to portray a more benevolent Rogue Trader, deviating from the norm. Following our conversation, a new main quest, "The Starport," will commence. Be sure to click the link below to access and complete it.
Secrets of the Navis Nobilite Walkthrough
The Navis Nobilite station is not responding to any signals, but the augur arrays have detected biological signatures in the main chamber. The Rogue Trader's only option is to perform an emergency docking and personally investigate.
WARHAMMER 40K: ROGUE TRADER Secrets of the Navis Nobilite Objectives
- Explore the station to find answers
- Restart the elevator
- The elevator control rod can be rebuilt in the laboratory using blood and a sacred mechanism.
- The power to the elevator must be restored using the cogitator in the guard room.
- Return to Felek
- Bring the monster to Felek
- Kill Felek
- Leave the station
Rogue Trader Secrets of the Navis Nobilite Walkthrough
After the events of the prologue Quest By the Right of Blood, you'll find yourself trying to resolve a few issues in order to get your voidship back in shape and get you back on track in your new duties as the head of the family. One of these issues is replacing your Navigator who perished in the recent struggle. Luckily, you ended up in the Rykad System, where potential Navigators can be found in the Navis Nobilite station. Unluckily, the station has repelled any means of communication and is not responding to any signals. Secrets of the Navis Nobilite will begin after you travel to and select the Eurac V station on the system map. Secrets of the Navis Nobilite also runs in conjunction with the Quest Looking for Trouble, as the Eurac V station is one of the potential places to search for the Lord Inquisitor's Interrogator.
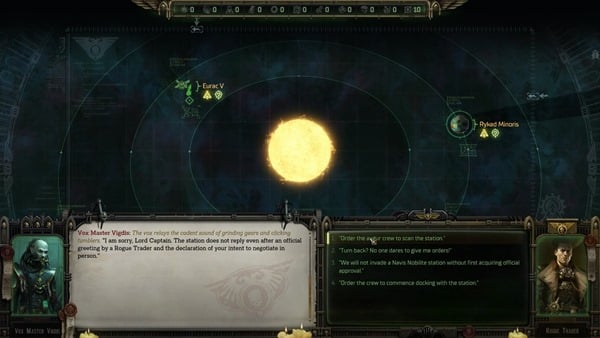
You'll be apprised of the current situation by your new Vox Master Vigdis. After exhausting the dialogue options, you'll have no choice but to dock the station without permission and see for yourself why the station is not responding, despite your augurs finding bio-signatures within. When you're ready, dock the Eurac V and explore it with your chosen party members.
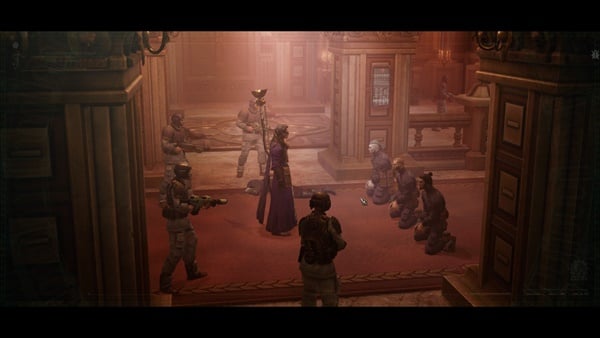
As you do, you'll be treated with a cutscene of a Felek Orsellio interrogating some captured Navis Bodyguards. Getting nowhere with them, the bodyguards will be executed as you enter and speak to Felek yourself. He'll be extremely wary of you and order you to not take another step or else face his wrath. His description reveals that he is also a Navigator. You'll have the following dialogue options to respond with:
- [Answer in High Gothic] "I am Rogue Trader von Valancius. And I am no enemy of the Navis Nobilite."
- "Abelard, if you would be so kind."
- "Desist, brother! It was the Emperor's will that brought me to this abode."
- "Keep talking to me this way, and I will make you swallow your own tongue!"
If you choose the first option, he'll introduce himself in turn as the Keeper of this station and proceed to say that you are not on the list of allowed visitors. You'll have the following dialogue options to continue the conversation with:
- "Provide me with a Navigator, and I will immediately depart the station."
- "I came here in search of a Navigator, so you are coming with me."
- "I am looking for the Lord Inquisitor's Interrogator, one Heinrix van Calox. Do you know anything about his present location?"
- "What is happening on the station? Where did all these corpses come from?"
If you choose the fourth option, Felek will give you a rundown of what's happened so far. It seems he was betrayed by Theobald Orsellio, his closest friend and second Keeper to the station. They've also captured and have begun torturing a Lady Cassia, who seems to be very important to the station. He'll backhandedly ask for your aid, giving you the following options to respond with:
- "What kind of help are you talking about?"
- "I still have questions concerning the situation on the station."
- [Take him by force] "I do not care about your mistress. I am looking for a Navigator, and you will do."
- [Attack] "Your words are rife with disrespect, and I will not tolerate it."
If you choose the first option, he'll admit to his weakness and the bleakness of the current situation, for him and his people. However, you may be able to save Lady Cassia in his stead. To reach her, you'll have to recreate a relic with two parts and he will give you one of them. You'll also have to turn the elevator's power back on to reach her. You can then ask the following questions:
- "Why should I help you?"
- "How do I remake the control rod?"
- "So how am I supposed to power the elevator."
Asking the first question will confirm that they can help you find a Navigator should the present crisis be resolved. To remake the control rod, you'll need to reach the laboratory with Lady Cassia's vial of blood. The elevator can be powered by entering the right command sequence through the main cogitator. You'll now have the following additional choices to conclude the conversation:
- "I still have questions concerning the situation on the station."
- "The woes of your House upset the balance of power in this part of the galaxy. I will help you if not for the sake of profit but for the good of the Imperium."
- "It will be an honour to save the Lady Navigator from her woes."
- "The Rogue Trader's aid will cost House Orsellio. But you should rejoice, for your mistress will live."
- "I will rescue your mistress, but in return, I require that House Orsellio sign a contract with my protectorate."
You can get more information about Lady Cassia and the station's situation through the first option. Any of the other choices, apart from taking him by force or attacking him, will conclude the dialogue and let you on your way.
Loot the area as necessary and then head to the left of the depowered elevator to jump over the fallen shelves. As you move forward you'll get a tutorial on Traps and disarming them. Make sure to do so as you explore the area, and don't just rush in willy-nilly. As you move forward, you'll eventually engage in combat against a Squad Commander and some guards. This fight shouldn't be difficult, but if you can, try to aim to take down the Guard Medicae first to prevent them from any healing. As always, keep your characters behind some cover, and you should be able to defeat all the Enemies without any issues.
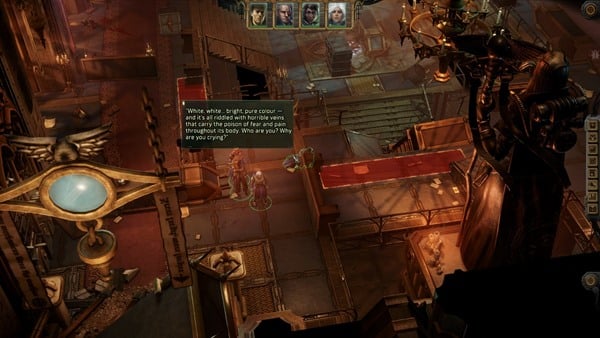
Once all of them are dead proceed to loot as much as you want. The desk near a large statue and some disheveled bookcases have some Meteorite Chunks, while a chest on the shelf contains a Ripper Autopistol. There should be a book you can grab to the left of a large door which will be the Pontius Cipheus Gelacius, "On the Training of Worthy Servants at the Court of the Navis Nobilite." Further past to the right of the door should be the Intercepted Conversation Between Security Officers. Head back to the door and open it. Disarm the trap right past it before you proceed. You'll find some rubble on your right hiding a corpse that's carrying a Warp Seer's Goggles.
Open the first door on your left and loot the room, but be aware of the trap right in front of you. The door to the right opens to another small room which is connected to the hall you were just in. Across it is some debris you can clear to grab the Noble Silk Gloves hiding with the corpse underneath. Head back to the room across and then move forward to watch a scene showing a guard suddenly turning on the others because of some "whispers" he was hearing. After he dies, you'll be free to loot the room as necessary. There's a Data-Crypt H-41-OK on a desk in the corner of the room. One of the dead guards is carrying the Research Notes of Navis Laboratorum Custodian Fortunata Orsellio, Part 13.
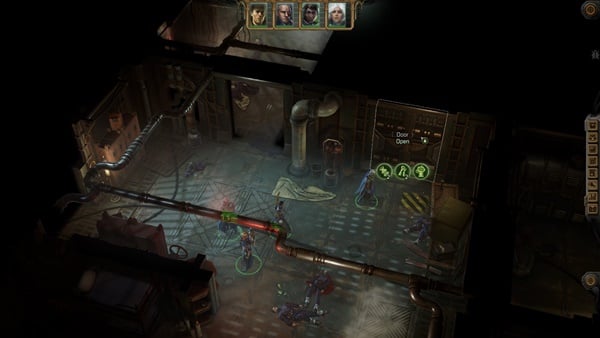
Unlock the door on the right for some more loot. Notably, there's a Carapace Chestplate and a Longlas inside the locker. The room on the other side will contain people also suffering from the Archenemy's influence. Head out of this room and move forward into another one containing the cogitator spirit you'll need to awaken to get the elevator working. Do so and then you can read the logs if you want to get some cryptic information on what's been going on in the station, as well as someone everyone calls "the Child." Switch to the main chamber controls and then choose the sixth option to open the main door in the previous chamber, which leads to the laboratory. Next, click on elevator controls and choose to activate the elevator.
Head to the laboratory and loot everything in the first room. You should be able to acquire the Data-Crypt K-O4-OH, a Flesh Sample, a Psy-Crystal, some Biogel, some Black Water, and some Unidentified Acid. Open the door and move forward to the next part of the laboratory. Immediately to your right should be the Research Notes of Navis Laboratorum Custodian Fortunata Orsellio, Part 12. On the ground beside Lady Cassia's Medicae should be the Laboratory Journal H-4045LS. You can use the many ingredients you've found thus far, guided by the research notes and journals, to mix and match them to gain some items using the interactables in this room.
First off, you can input Psy-Crystal in Transducer to get the Crystal Dust. Then, put Data-Crypt-H-41-OK into Data-Crypt-Connector, a Mutated Flesh Sample in the Tissue Flask, Biogel in the Catalyst Flask, and Crystal Dust in Reagent Flask to get six Adaptive Antidote.
Additionally, you can put Adamantium in the Transducer to get the Adamantium Dust. Then, put Data-Crypt-K-04-OH into Data-Crypt-Connector, a Flesh Sample in the Tissue Flask, Unidentified Acid in the Catalyst Flask, and Adamantium Dust in Reagent Flask to get six Elixir of Wrap Neutrality.
To progress the Quest, click on the part of the machines with the option to 'Remake the control rod.' Once you have the control rod, head back to where you met Felek and speak to him. Idira will have another one of her trances here and you'll have the following options to respond with:
- "Tell me more - what paths?"
- "Who is who? Who do you see behind the masks?"
- "Thank you, everything is clear now."
- "Thank you, I did not understand a single word."
- [Ignore the psyker]
Asking for more information will yield little to no clear results, as is usually the case with vague visions. Afterward, you'll have the option to either hand over the elevator key, keep it for yourself, or try and ask more questions about what happened here prior to your arrival, guided by the journals and notes you've read thus far. You can ask the following if you choose this option:
- "Who is the 'Child' mentioned in the documents and reports found on the station?"
- "The madmen I fought were convinced that we were the traitors."
- "The servants alone cannot be blamed for what happened on the station. Most corpses I discovered were either unarmed or feeble."
- "I trust you, Felek Orsellio. Let us rescue your mistress."
Asking the first question reveals that the 'Child' is Lady Cassia herself, at least to the low-born. If you then choose to make a statement about the servants, he'll rebut that naturally they were led by traitors belonging to higher stations within the facility. You'll have a new option to straight up say that you don't trust Felek, while the previous option will then be replaced by an implied accusation - too many things that transpired required special commands that only a Keeper of the Station, had access to. He will rebut that Theobald is also one such Keeper. If you've exhausted all the logs you could view at the cogitator previously, you'll have two new options that either accuse Felek further or contribute to Theobald's innocence. He'll keep trying to dismiss the accusations no matter what you say, naturally. If you straight up accuse him, he'll come forward, revealing a zealous desire to protect their house from the destruction that Lady Cassia seems capable of bringing to them. You'll have the following options to respond with:
- "What are you babbling about? I know nothing of this Tisiphone or monsters of any kind."
- "You could not be more wrong. But the idea of destroying your House becomes more appealing with every word you say."
- "Felek, you are obviously quite mistaken. I came here to get myself a Navigator, nothing more."
- [Attack] "And you will pay for your lies with your life."
If you choose the first option, he will seemingly sincerely apologize and reiterate his desire to protect his household from this Lady Cassia. You can choose the option to have her become your Navigator to free his house from her destruction. He'll give you a Glowing Stone that will supposedly depower her and allow you to take her. Finally, you'll be allowed to take the elevator up to meet her for yourself.
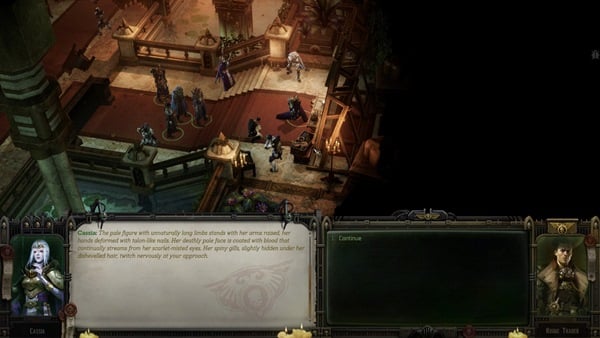
You'll find her, as well as her charges, succumbing to her powers. You'll undergo an automatic Willpower test here to check if you will as well. You'll have the following options to start your encounter with her:
- "Abelard, is this...?"
- "What vile creature is this? Argenta, rid the world of this heresy."
- [Requires: Iconoclast - Follower] [Overcome the crushing despair] "I know why I am here... and so I will stand strong against any illusion!"
- [Persuasion 40] "Lady Cassia, I am here to help you. Please, calm yourself."
- [Coercion 40] "By the Emperor, if you do not stop your sorcery immediately, I will shoot you in the head!"
Choosing the third option grants you Iconoclast +3. You help rouse her from her trance and allow you to have a conversation with her. She'll ask you who you are. If you go straight with the first option, she'll actually answer you quite respectfully, and then proceed to faint. Theobald will awaken from his own trance and come to her aid. He's still affected by the whispers, and understandably protective, resulting in a violent disposition. He'll also demand to know who you are and you'll have the following options to respond with:
- [Persuasion 35] "At present, I am trying to determine what is happening on Eurac V."
- [Commerce 35] "I mean you no harm. I came to seek the Navigator's aid."
- "In the name of House von Valancius I sentence you and this monster to death!"
If you choose either of the first two dialogue options and pass them, you'll gain 20 Experience. He'll calm down enough for you to make an actual introduction. Choose any option to get more information, and progress the conversation, all apart from attacking them. Finally, you can choose to either dispose of Felek, leave them to their own choices and consequences, or dispose of both Felek and Theobald and forcibly take Lady Cassia. Choosing the first option will end the conversation and allow you to move freely. Loot the place as necessary. When you're ready, head to the elevator and activate it. Theobald, Cassia, and the loyal followers will all gather around for a final bout.
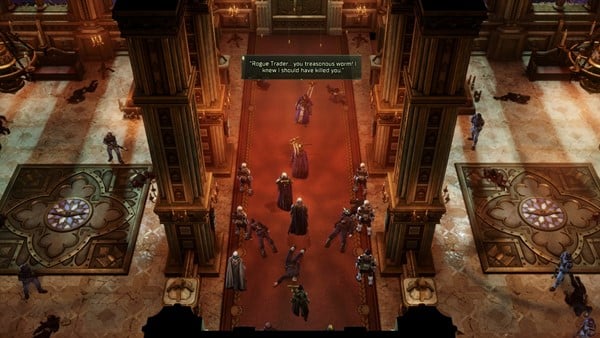
You'll have a lot of help for this fight, especially if things have transpired as we've detailed in this guide. You'll outnumber Felek's guards by a lot, so just keep under cover as always, and fight back. Even Felek won't really be too much of a problem. After the fight, Theobald will die due to sustaining irreversible damage. Cassia will lament his death. You'll have the following options to progress:
- "I regret that we had to meet under such circumstances."
- "Enough tears. You are coming with me - now."
- "Forgive the urgency, but we should leave the station immediately. The systems are unstable and may fail at any moment."
- [Say nothing]
Regardless of your choice, she'll ask you what you're planning to do with her. All three options will have her come with you, but the first option will put emphasis on a contract first and foremost, and highlight it more as a bargain for getting her out of this station. If you choose the third option, she'll express her worry over the servants that are still here in Eurac V. Regardless of your choice, she'll eventually relent and see that it's an honour to accompany a Rogue Trader. Loot the place as much as you want. When you're ready, head back to the voidship bridge.
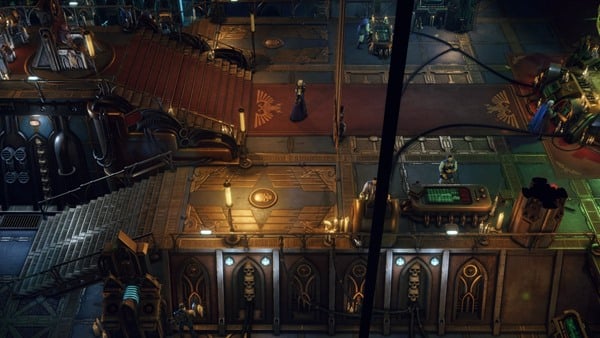
Back at the ship, Cassia will wish to speak with you alone before anything else. Depending on how you recruited her, she'll thank you for her rescue. She'll then say that she's ready for the communion ritual to officially become your voidship's Navigator, to which end she requests panting materials. From here, you can ask for more information about this request, as well as the ritual itself, and assure her that you'll have the materials delivered to the Sanctum Navis. After a bit of a harrowing description of the events that occur during the rite, she proves successful and bonds with the voidship. Your Vox Master will congratulate you but also remind you of the myriad of tasks still at hand. For now, however, Secrets of the Navis Nobilite will be completed.
The Starport Walkthrough
Rykad Minoris welcomed the Lord Captain not with fanfare and a grand parade, but with explosions and the sounds of battle. Still, this changes nothing — the Rogue Trader still needs to find this world's governor and request the necessary supplies and crew for his voidship.
WARHAMMER 40K: ROGUE TRADER The Starport Objectives
- Reach the command centre: The governor of Rykad Minoris is commanding the planetary forces from a fortified bunker. The only way to reach it is through the Star Thoroughfare, which is controlled by the rebels.
- Find out what is going on: The flames of rebellion have engulfed the streets of Rykad Minoris, making traversing them a dangerous endeavour. The Lord Captain must push through the war-torn city to learn what other wicked events are unfolding among the shadows of
the burning capital.- The rebels talk in raptures about Aurora, the mysterious leader of the rebellion.
- Heretics believe in the "Final Dawn " — a strange event that will soon bring doom to this world.
- The rebels captured a vex-station, which they used to eavesdrop on the planetary defence Forces‘ communications.
- The rebels have performed blasphemous sorcery and blinded one of the heretics with an enormous lens.
- Blind madmen aimlessly roam among the ruined streets.
- Meet with the governor's convoy
- Destroy the ancient cannon
ROGUE TRADER Starport Walkthrough
When you first land on the planet send help from the ship to Sergeant Malgar. It will help in the final quest of chapter 1.
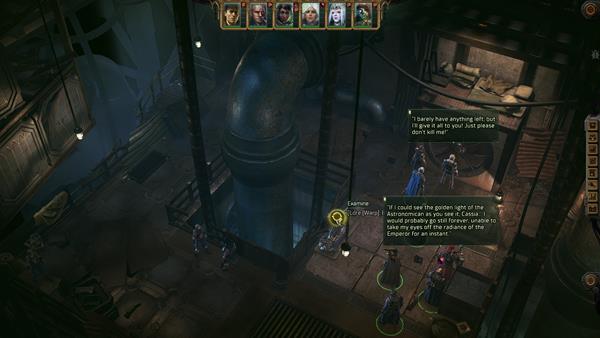
Once you enter the Sewers, head to the northwestern corner and initiate a conversation with the man lying on the ground to trigger a combat encounter with the Herald of Tzeentch. The non-aggressive NPCs will turn hostile and attack you. Dispatch these enemies while focusing long-range attacks on the Herald of Tzeentch.
As you defeat all foes, search the corpses for the following items:
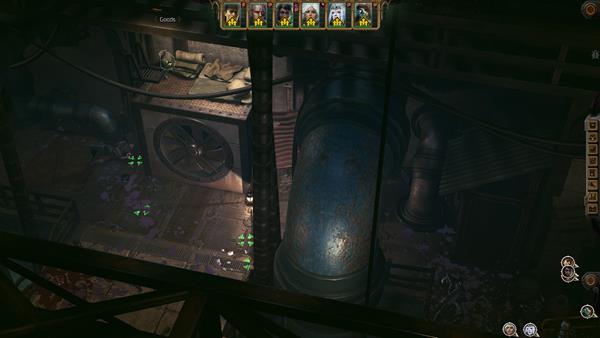
Explore the northern area to discover a Goods bag above an air-conditioning unit. Return to the previous area and exit through the northern entryway. Once outside, ascend the stairs.
REACH THE COMMAND CENTRE
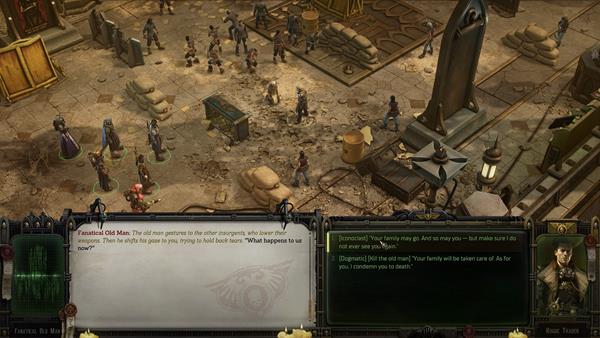
From the stairs, turn right until a scene triggers, revealing and Old Man and some individuals holding people hostage, some of them family members. After some questioning, decide whether to let the Fanatical Old Man (Iconoclast) go or kill him (Dogmatic).
- "[lconoclast] "Your Family may go. And so may you — but make sure I do not ever see you."
- [Dogmatic] [Kill the old man] "Your Family will be taken care of. As For you, | condemn you to death."
If you spare him, the hostages will leave, and the old man will disappear in the opposite direction, granting you Iconoclast +3.
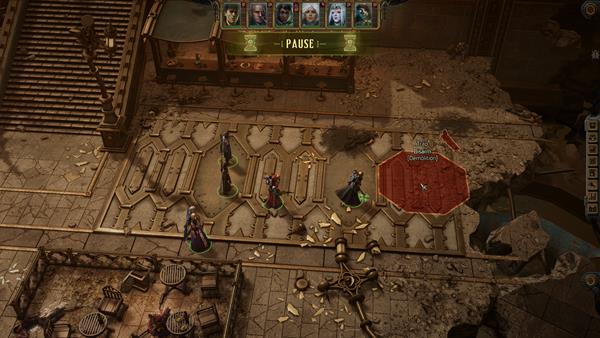
Proceed south, where you'll find a corpse in the eastern corner surrounded by traps. Disarm the traps to loot the corpse.
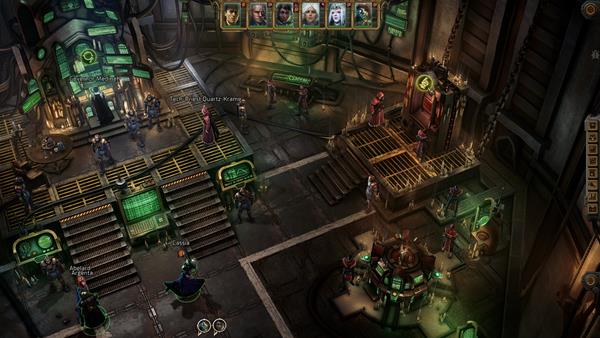
Head back to the location where you encountered the Fanatical Old Man, traverse that area, and descend the southern staircase to arrive at the entrance of the command center. Cross the bridge to find the Governor Medineth. Before talking to him, go to the device on the northern side. Passing the [Tech] Check grants +28 Experience and access to various dialogue options.
Additionally, talk to Tech-Priest Quartz Krame for trading and a tutorial about it. Once you finish trading, talk to the Governor Medineh and as you do you'll see a [Commerce] Check appear.
- [Comerce 45] "I need Fresh crew to replace those killed in the attack on the ship. And I need maternal compensation."
If you succeed in passing the Check you'll get +28 Experience and Profit Factor Gained +2.
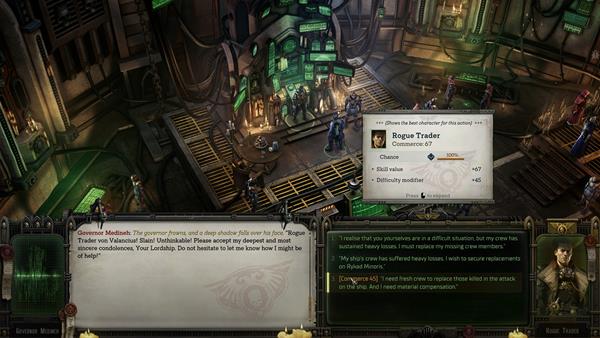
Continue the dialogue about crushing the insurrection for an update on the "Find out what is going on" quest and +77 Experience. Inform the Governor about Sergeant Malgar's heroic act and Kunrad Voigtvir von Valancius's betrayal. Inquire about Heinrix van Calorx's location; the Governor reveals Heinrix went to the Hallowed Electrodunamic Cenobium. This updates the "Looking for Trouble" quest, unlocking the "Gleam of the Final Dawn" Main Quest.
Gleam of the Final Dawn Walkthrough
Interrogator van Calox headed to the monastery of the Adeptus Mechanicus that guards the sacred archeotech reactor. According to the Governor Medineh, rebel forces have been spotted in the vicinity. The Rogue Trader needs to head to the religion to assess the situation and locate the agent of the Inquisition.
WARHAMMER 40K: ROGUE TRADER Gleam of the Final Dawn Objectives
- Head to the monastery
- Reach the reactor
- Interrogator van Calox thinks the monks are hiding somewhere near the circular cogitator
- Find the surviving monks
- Commit Sabotage
- Destroy the safety system control altar
- Utter the Lutany of Actuation from the command throne
- Order the distribution servitor to raise the output to peak values
- Talk to the Rescued Tech-Priest
- Deal with Aurora
- Return to the landing area
- Talk to the governor
ROGUE TRADER Gleam of the Final Dawn Walkthrough
The quest begins in the middle of a conversation with Governor Medineh at the Command Center. It can begin while progressing through Looking for Trouble, Request and Response & The Starport. The Dialogue will mention Heinrix van Calox an Interrogator of the Most Holy Inquisition. You will have the option to ask about his location or bring up the Tech Priest Quartz-Krame. Pasqual will announce his participation in this next objective and the dialogue will continue with Governor Medineh. Complete the dialogue to get started on the objective.
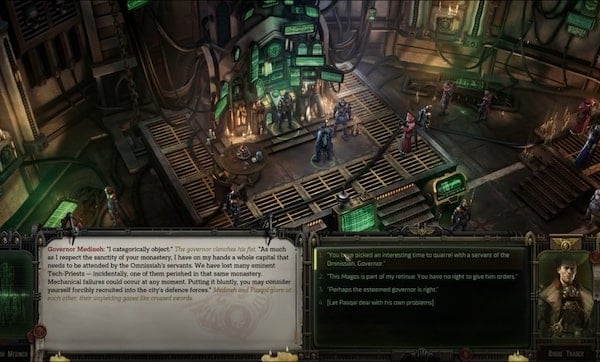
The first objective of the quest is to head to the monastery and Reach the Reactor. The Monastery of the Adeptus Mechanicus is located on Ryakad Minoris. Players will be able to simultaneously progress through the Looking For Trouble Main Quest in Chapter One, which tasks players to Land on Rykard Minoris and Investigate the Adeptus Mechanicus Monastery on Rykad Minoris.
- Head to the monastery
The monastery of the Adeptus Mechanicus is situated on the secluded territories gifted to the Priesthood of Mars, away from the hives of Ryakad Minoris. Due to the scale of the planetary rebellion, dropping from orbit is considered the optimal way to reach the monastery.
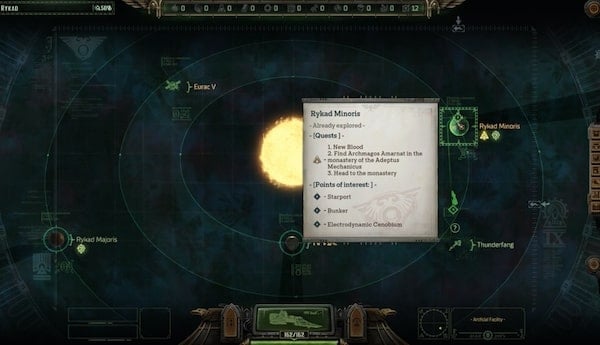
Travel to this Location via the ship to view the Map and select Ryakad Minoris. You can now travel to Electrodynamic Cenobium which is where the Monastery is. Once you land, you are free to loot the area since you arrive. Continue toward the Monastery and explore the area. When you're ready, head up the stairs and open the gates to the Monastery. Be ready for combat as you may be Ambushed by a number of priests once you enter and explore the Monastery.
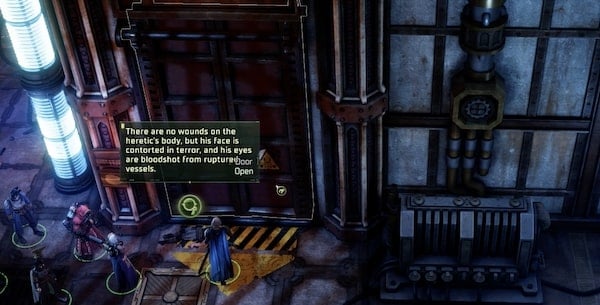
Once the area is cleared, approach the red gate. Once you open the set of doors to begin the cutscene with Heinrix van Calox.
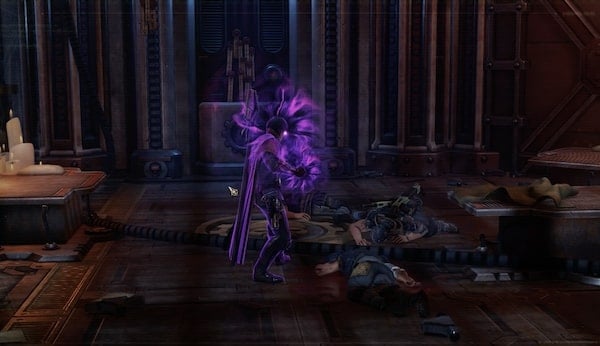
The Quest will be updated once you choose 'End Dialogue.' Heinrix can now also join your party for the next parts of the quest.
- Reach the reactor
The Adeptus Mechanicus monastery's defenses have been breached: immediate intervention by the Rogue Trader is required. According to the acquired data, a sacred reactor is hidden in the depths of the temple complex captured by the rebels. Only protecting the relic's control panels from the heretics will ensure its safety.
- Interrogator van Calox thinks the monks are hiding somewhere near the circular cogitator
- Find the surviving monks
Loot the room and then exit and loot the surrounding area, but beware of any traps and hazards. Consider leveling up your team. Then consider exploring the area and opening doors to reveal chests. Open the set of doors at the opposite hall for some loot. This will lead you to a gate and a Data-Altar of Sacred Analysis.
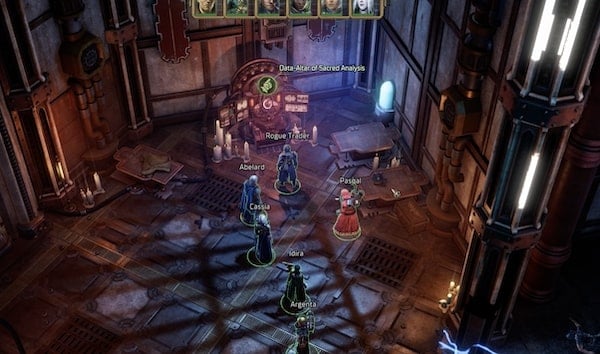
Interact with it and it will activate. It will begin to recite some words to the First Galvanic Hymn and you will need to complete it by responding.
- "Let us sing this canticle to.."
Answer: 2. ".. the Omnissiah, from whom the holy discharge springeth forth."
- "Let us fill our souls with gratitude toward--"
Answer: 5. "... the arcane keyt hat closeth the circuit."
- May the unity of the sacred charges power...
Answer: 4: "..the immortal Reason that hath created the spark"
Once it has been announced that you have learned the pilgrim's ways, you can end the dialogue and the door will open for a chest of Goods (Pinpointing Visor, and an Arc Rifle ). Refer to the map for all other Loot locations in the Monastery.
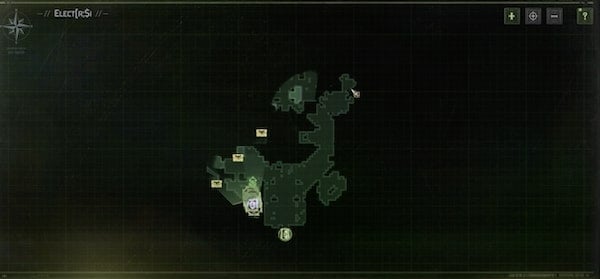
As you continue to venture, prepare for any sudden battles against any Cultists you encounter. Head down the hall with the glowing round circles on the wall. This will periodically emit electricity so be careful as you pass them. This is where you may encounter a cultist battle. Once you clear the way, continue down the hall and enter the next room. There will be a Tech-Priest in a room full of machinery here.
- Commit sabotage
- Destroy the safety system control altar
- Utter the Lutany of Actuation from the command throne
- Order the distribution servitor to raise the output to peak values
According to Magos Haneumann, an act of technological sabotage is the optimal way to destroy the large group of heretics and rescue the captured Tech-Priest.
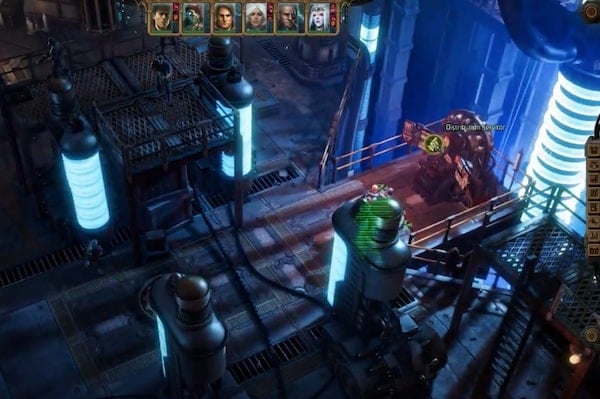
Make your way toward the Distribution Servitor. Interact with it complete the dialogue and order it to raise the output to peak values to update the quest. When prompted, try to conduct a restart ceremony.
Just by the Distribution Servitor is another mechanism. This is the altar. When prompted, select [Cause the altar to overload]. Across the altar is the third contraption, the Lumenodeoconis Command Throne. Interact with it. You will need to convince Pasqal to Sit down on the throne and recite the Litany of Actuation using Persuasion or Toughness.
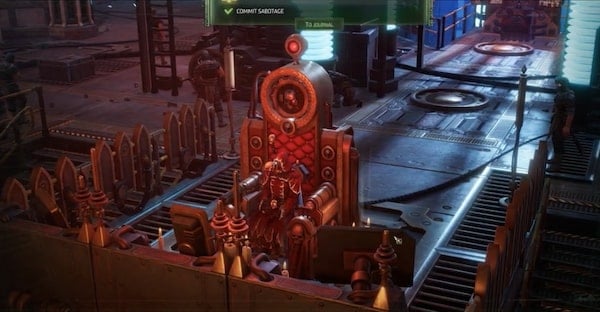
Doing all three tasks will successfully complete the Commit Sabotage objective.
- Talk to the Rescued Tech-Priest
The Tech-Priest rescued by the Lord Captain may have useful information on how to keep the archeotech reactor safe.
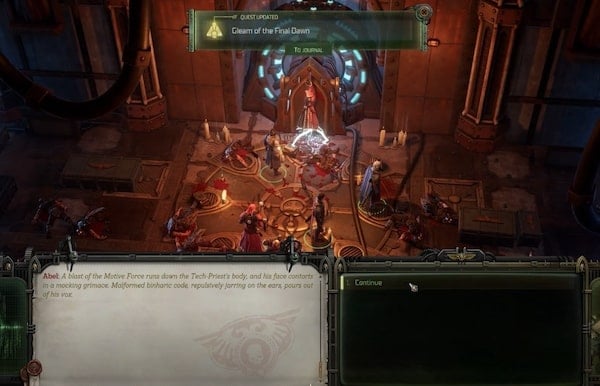
Examine the Tech-Priest in front of the throne to update your quest. This action could also complete Request and Response. As you leave the area, be careful for the next battle. You will then be tasked to Deal with Aurora. You will need to speak with Aurora and choose your path which will include an Iconoclast option. After your interaction, you will need to engage in combat. You will be faced with 24 opponents for this battle against a number of cultists and electro-priests. Though there are a large number of opponents for this interaction, they will be relatively easy to clear since they have basic stats.
Focus your attacks on the electro-priests to increase your turns. Try to strategize your character positions to get close to them and keep an eye out for opponents positioned in groups so that you can deploy any attacks that affect a larger range. Use your AoE attacks to maximize damage output and quickly clear the area. Clear the Battle to continue and your objective will be updated.
Before you are released to continue, a dialogue will commence with Aurora at the control panel. Continue through the Dialogue. You will eventually have an interaction option.
- [Lore (Xenos) 30] [Inspect the control panel damage by Aurora]
- Remove Aurora's Mask
- Observe the Interrogator
- "Will you be finished soon, Master van Calox? I cannot stand being made to wait."
You will gain experience as you progress through this dialogue. If you choose to inspect the control panel you will have some additional observation and interaction options
- [Heretical] Surreptitiously take the sword shard
- [Dogmatic] "Heinri, take a look over here. Is this by chance what you are looking for?
- [Iconoclast] Toss the shard into the depths of the reactor.
Choosing the Dogmatic response will earn you Dogmatic +1. Soon after you can go ahead and end the dialogue to continue.
- Return to the Landing Area
You will be tasked to Return to the Landing area. Head back to the ship and another scene with Heinrix will play out. Finally, your final objective will be to return to the Command Center to speak to the Governor.
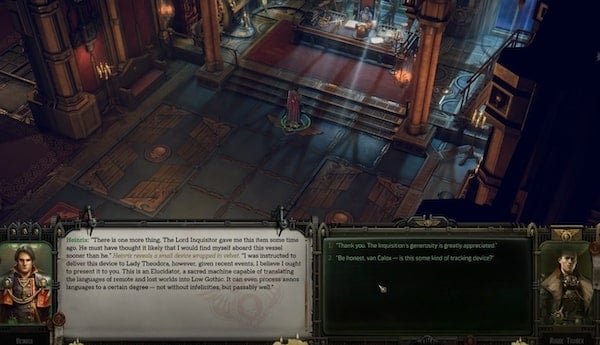
- Talk to the Governor
Return to the Command Center to speak to the Governor Medineh. This will also begin the taste of Victory and complete the Gleam of the Final Dawn as well as New Blood.
Taste of Victory Walkthrough
The world of Rykad Minoris and its governor want to honour the Lord Captain with an ancient ceremony - the Triumph.
WARHAMMER 40K: ROGUE TRADER Taste of Victory Objectives
- Deal with unfinished business before the triumph.
- Fly to the Star Thoroughfare
- Talk to the Master of Ceremonies
- Board the prepared vehicle
ROGUE TRADER Taste of Victory Walkthrough
After completing the main story Quest Gleam of the Final Dawn, you can keep talking to Governer Medineh in the Bunker on Rykad Minoris and he'll express his desire to have you undergo an ancient ritual of theirs called the Triumph, to honour all the help you've given them. You'll be given the option to complete any unfinished business. If you haven't already, you can complete the Quest The Chosen Ones first, by heading to the small prison planet Rykadi Philia. When you're ready, select the option that tells him that you're ready for your triumph to progress the Quest and receive your next objective.

You'll see that your next objective will be to 'Fly to the Star Thoroughfare.' Simply exit out of the Bunker the way you came in to head to the Star Thoroughfare. Outside, you'll be greeted by two columns of the governor's subjects, ready to celebrate your greatness as you walk past. At the other end, the Master of Ceremonies is waiting. Move forward and talk to them to get an explanation of what exactly this Triumph ritual entails. Choose the first dialogue option to have them start explaining. It seems that it will be a celebratory march with your party toward the starport, with carefully-chosen citizens scriptedly singing your praises as you bring the lifeless body of the enemy you'd just vanquished with you.

At the starport, the governor will be waiting to greet you, along with a pyre prepared to burn the corpse you'll be bringing along. You'll have the choice of starting the flames of the pyre yourself or to give the governor the honors, to show the people the strength of your new alliance. There will be a third dialogue option here where you can convey your disapproval of a choreographed and scripted affair and how you wish for ordinary people to speak to you sincerely. The Master of Ceremonies will be surprised but will relent with this request. By their leave, you can head up the stairs to a crowded plaza, click on the large tank, and begin the ceremony.
Various people who survived chapter 1 such as private Camille Regias and the frightened rebels will be present at the ceremony.
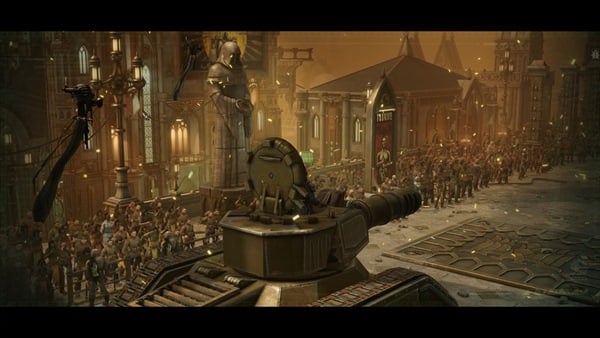
A cutscene will ensure as your crew marches through the streets, with you waving at the people from atop the tank. At the end of the march, the Master of Ceremonies will announce that the citizens wish to bring you gifts. You'll have three dialogue options as you suspect something terrible is about to happen. If you choose the second dialogue option and order the guards to usher the people away, they will begin to do so after a moment of confusion. A vestige of Aurora will suddenly appear by her corpse and cry "Behold the Final Dawn," as cultists appear and start killing everyone in sight. A cutscene ensues where a dozen ships will be seen doing something to cause the system's star to disappear.
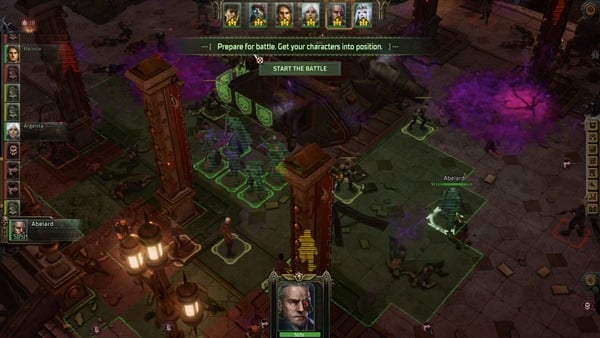
A battle begins against the cultists. This fight shouldn't be too hard, but watch your party member's health bars and keep everyone topped up. Avoid the violet miasma that will be covering some parts of the battlefield, as merely passing through them will inflict damage. Attacks that can hit multiple Enemies at once can make this fight quicker, as there will be quite a number of them. At some point, you'll have to contend with a few reinforcements as well, which you can plan for accordingly as they'll be entering the fight through the stairs at the sides of the battlefield.
After the fight, you'll be contacted by your Vox Master from aboard your ship. After some opinions, your comrades and the people around will be looking to you for direction. If you choose the option to ask if anyone knows what's going on, Heinrix will say that there's a growing presence of sorcery which is certainly unheard of in realspace. If you choose the Iconoclast dialogue afterward and prioritize the people as you head to the starport, the citizens will say they'll follow behind you as you fight on through. This option grants you Iconoclast +1.
This begins the final Quest for the first act of the game, The Escape.
The Chosen Ones Walkthrough
Rykadi Philia, the prison planetoid, is corrupted by heresy. Despite his noble lineage, its warden has succumbed to heresy and rebelled. Is this place hiding any other sinister secrets?
WARHAMMER 40K: ROGUE TRADER The Chosen Ones Objectives
- Find Evayne Winterscale
- Find Warden Casteglia
ROGUE TRADER The Chosen Ones Walkthrough
The Chosen Ones will be available as a Quest as soon as you're able to scan the small asteroid below the star in the Rykad System. After scanning, you'll find the prison as the only landing spot for your voidship and you'll have the option to explore it. When picking out your crew members, note that there will be traps to disarm as you explore the place, so bring someone who can disarm them.
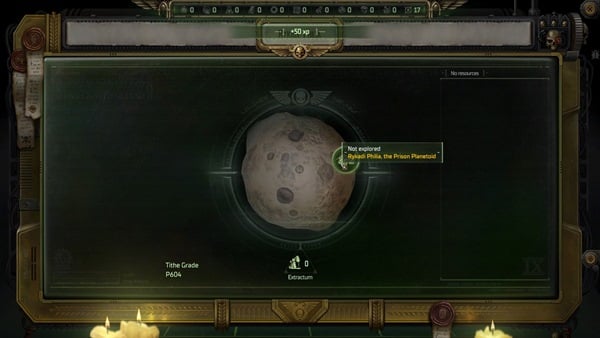
Right as you land, there'll be some goods above you to loot. Shortly along the path, you'll meet Pilot Raquel who'll have mixed emotions of relief and fear as you approach her. You'll have the following dialogue options when she asks you who you are:
- "Abelard, teach this riffraff the proper way of addressing her sovereign."
- "Tell me about this planetoid."
- "What happened here?"
- "I have no time for long-winded talks. Brief me on the situation ahead, and do be concise."
- "Is this prison riot connected to the planetary rebellion?"
Note that these are the dialogue options if you visit Rykadi Philia after completing the Quest Gleam of the Final Dawn. You'll understand her current disposition if you choose any of the options that prompt her to tell her story. Apparently, a prison riot had started, led by the prison warden himself. The pilot herself was carrying the very heir to the Winterscale Rogue Trader empire, who rushed to the prison planetoid to try and diplomatically resolve the situation. You'll have the additional dialogue option to ask why he would do so rather than simply give the order to slaughter. Apparently, upon hearing the news that his childhood friend, Warden Casteglia, had committed this heresy, Evayne Winterscale wanted to try and settle things peacefully. Unfortunately, Evayne's group went ahead into the prison and hasn't been communicated with ever since. You can keep asking her questions to get more information if you want. When you're done, you can choose to dismiss her.
Additionally, she'll ask about her lover. If you've finished the Quest The Starport, and depending on your choices there, you'll be able to tell her that you either saved Jasper or respond to her in silence to imply his demise.
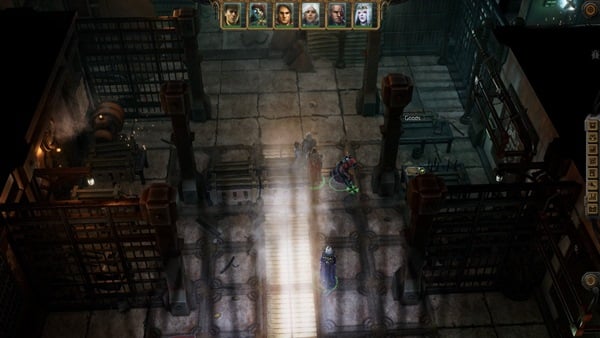
Past her will be an empty guardhouse. Open the sliding gate and move forward. Before the broken pathway will be the entrance to the barracks. When you're ready, head inside. Explore and interact with the search points as you want, but be careful of the traps. Disarm them with the right party member. On the tables on your right as you move forward will be the Prison Diary of Aati Shan, Part One. You can read it to get some insight into what kind of place the prison is, and what kind of man the Warden is supposed to be.
When you're ready, move forward past the tables for a fight against some of the rioting prisoners. Before you do so, try to spread out your party, as your enemies will be able to throw grenades at you from afar. Use cover and hit back from afar as well, especially the targets behind the gate. The fight shouldn't be too hard, but be mindful of grouping up. After the fight, there's an opened gate to the left past the tables with some goods you can pick up. Head back and then move forward. Turn left first and examine a poster on the wall to tear it off and reveal a hole inside hiding some more goods, notably including an Improved Autopistol. Explore this large room as necessary. On one of the bottom bunk beds, you'll find the Prison Diary of Aati Shan, Part Two.

Enter the doorway past the beds, to the right, to find yourself behind the gates that were protecting some of your enemies in the previous fight. Loot them as necessary. Turn left at the closed gate to enter a room with piles of corpses. Loot the dead prison guard for the Prison Guard Key. Across the body is a table that has the Prison Diary of Aati Shan, Part Three. Read it to see how the Warden took a turn for the worse, leading to the prison riot you now have to resolve. Head back to the locked gate and open it with your new key. Open another locked gate to the right with Tech-Use this time and then do the same on one of the lockers for some goods, notably including a Lasgun. Move forward along the corridor. You'll be stopped by a group of prisoners and fanatics. After spouting the usual zealous nonsense, the prisoners will kill the other three from behind, revealing that they were just playing along with the others. You'll have the following dialogue options to respond to their plea for parley:
- "Give me a reason not to execute you on the spot."
- "I came across a voidship in the system belonging to your associates. They told me some interesting things about you and your planned escape."
- [Attack] "Consider your request denied. Now die!"

If you choose the second option, they'll acknowledge that their plans have been revealed and that while they were waiting for their friends to enact their escape plan, the whole riot situation happened, and they do not want any part of it. You'll have the other two options to respond with this time. If you choose the first option, they'll claim to be model inmates who just want to serve the rest of their time after the riot business is dealt with. You'll have additional options to choose from now, one asking for information about the riot, and another asking for more reasons to not execute them where they stand. The information they give about the warden and the riot will confirm any suspicions you have from reading the diary entries you've picked up thus far. If you ask for what you get in return for sparing them, they'll claim to be able to help you get some valuable goodies when you visit Footfall Station. If you verbally choose to spare them, they'll give you the location to find, and the person within it to seek, along with the message to give to get you on the fence's good graces.
Afterward, you'll have the following options for what to actually do with them:
- [Heretical] "You may go."
- [Iconoclast] "I shall not leave you here to die at the hands of the warden's henchmen. Go, tell my pilot that it is the Lord Captain's order that you be sent to my ship. You will join my ship's crew. You have my personal pardon as a Rogue Trader."
- [Dogmatic] [Attack] "I have changed my mind. By His name, I will not let heretical riffraff such as yourselves leave this place alive!"
Choosing the second option will have them give you a somewhat skeptical look before they run off to take you up on your offer. You'll get Iconoclast +1 for your choice. Move forward to a room with better lodging and Demolish or open the steel door to gain access to a large dresser. The desk on the left is hiding a Medikit, a Gas Cloud Grenade, and a Diviner's Staff. The large dresser will contain some usual cargo along with a Saturated Cape and the Foehammer. Use the exit near the dresser to head out to the main level. Build a bridge if you'd like to, for a shortcut back to the entrance of the area.

When you're ready, open the gate and move along the path past the corpses. At the end of the path will be a lift you can use to head down to the open pit. At the pit, follow the path down to find the Warden Casteglia, seemingly doing something on Evayne Winterscale who's lying on an operating table. After some ramblings, notably mentioning Aurora, he'll take notice of you and acknowledge who you are. You'll have the following dialogue options to respond with:
- "How do you know who I am?"
- "Who is that on the table?"
- "Step away from the hostage at once!"
- "What madness have you wrought in this prison?"
- "Why did you mutilate these people?"
- "That pit... there is something special about it, is there not? An item of value was once buried there. Now tell me, Warden: what was the item and who took it from here?"
- "Aurora was felled by my hand. You have nothing to hope for. Surrender."
- "Aurora was felled by my hand. You will fall as well."

Note that this set of options appears if you've defeated Aurora during the Quest Gleam of the Final Dawn. If you choose the first option, he'll call you the enemy of truth, and the first choice will be replaced with asking who it is that's on the operating table. If you choose that option, he'll confirm that it is Evayne Winterscale on the table. If you ask about the pit, he'll tease that you are already too late with regard to the item you're inquiring about. If you reference killing Aurora, he'll confidently laugh and tell you that you've only felled her mortal flesh, but she persists in another form. Note that he'll consider any mention of Aurora blasphemous, and he'll call on his allies to start a battle. The riffraff he's with isn't anything to fear. The warden also won't be doing too much on his own. However, if you get his health low, he'll teleport to the Unholy Lens and heal all the way back up to full. It's in your best interest to destroy the Unholy Lens first and then pile onto the warden. If you can dish out enough damage quickly enough, you might able to bypass the Unholy Lens and just kill the warden faster than he can use the device to heal up.

After the fight, you'll all approach and help the Winterscale boy on his feet. He'll meekly introduce himself to you while still bleeding from his mouth. You'll have the following choices to respond with:
- "What have they done to you?"
- "Conserve your strength. You are wounded and need help."
- "I must take my leave. I will see to it that assistance is provided to you and that you are escorted from here."
- "I must take my leave. Your pilot will take you to Governer Medineh."
- [Finish him off] "I cannot be certain that you aren't infected by this corruption as your friend was. Accept your death!"
He'll explain what you already know if you choose the first option - he tried to use diplomacy, in contrast to his father's ways. Exhausting all other options, apart from killing him, will complete the Quest. Loot the area and pick up goods as necessary.
When you're ready, head out to the main level and make your way back to Pilot Racquel. Inform her that you've resolved the situation and that she is to help the tortured Evayne Winterscale make his way to your voidship. Time to head back to the Governor in the Bunker at Rykad Minoris. Now that you've completed everything else to do in the Rykad System, it's time to talk to the Governor and begin your Triumph ritual, and begin the Quest Taste of Victory.
The Escape Walkthrough
Rykard Minoris is falling to the relentless assault of the Archenemy's forces. Despite the Lord Captain's best efforts, the heretical prophecy of the Final Dawn has come to pass. Those who do not want to be devoured by the Ruinous Powers must flee the planet.
WARHAMMER 40K: ROGUE TRADER The Escape Objectives
- Reach the starport
- Find a shuttle
- Protect the shuttles
ROGUE TRADER The Escape Walkthrough
Contact with the Lord Captain's voidship has been lost. The only way off the planet lies through the starport which has intact shuttles
Plays must be prepared for the countless battles of The Escape which begins following the completion of the Taste of Victory. Players will be able to complete a few objectives from The Chosen Ones while completing this quest. To prepare for this quest, players must be prepared to undergo a number of battles. A combat interaction will begin after the short scene during the ceremony featuring the Lord Captain's grand entrance on the vehicle prepared for him by the master of ceremonies. A short dialogue will follow that implies an impending event.
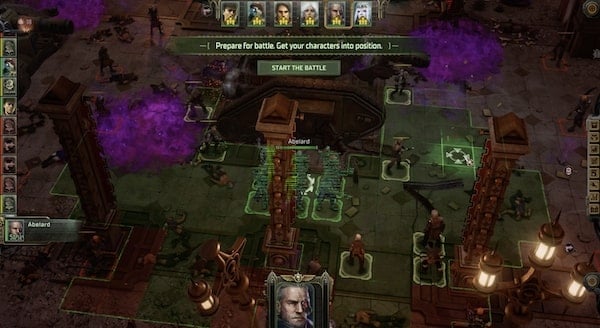
The starting position will have you surrounded, so you will need to get your characters into position to spread them out while covering your back. Use the pillars in the area as cover and take note of the positions of allies. This first battle will pit you against a total of 18 opponents mostly made of Acolyte and Anointed Cultists among others. Begin the fight by facing those in isolated positions to clear them out one at a time. Quickly deal damage to gain momentum. Focus on one section at a time and slowly you'll be able to clear the area and complete the battle.
Following the battle, a dialogue will begin and you will have some dialogue choices:
- Does anyone have any idea what just happened?
- All we can do now is try to make it to the starport.
- [Iconoclast] We're not abandoning people in distress. Everyone can come with us.
- [Heretical] I am under no obligation to save anyone. It is every man for himself.
- That's it. let's move out!
This is when the quest really begins, and you will be tasked to escape and reach the starport.
- Reach the starport.
Loot the area following the battle. as you start to leave another scene will begin. Then as you continue toward the starport, another battle will begin. You will face a number of Cultist battles. Clear them the same way and use elements in the space for cover. Reach the other end and move on to the Starport to complete the objective
- Find a shuttle
The starport has been overrun by heretics and refugees, making it hard to find an intact shuttle. Still, it is the most viable way of leaving the planet.
At the starport, you will need to search for a working shuttle. Note that once you complete this objective, another battle will begin soon after.
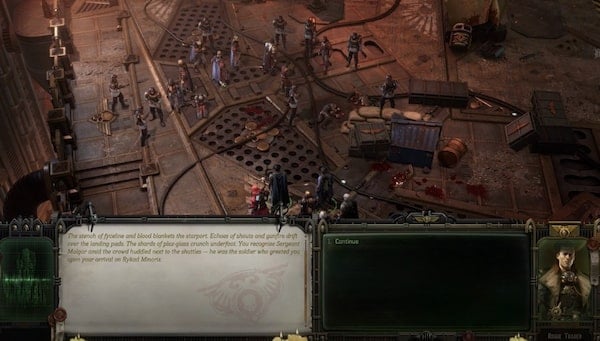
A dialogue sequence will begin first and eventually, you will have a few options when deciding what to do next.
- You are acting like an executioner. You think you have such a right?
- [Dogmatic]
- Malgar, now is not the time to massacre each other. It is not the first time I have done the impossible -- I will get everyone out of here, including your men.
- I agree. Let us save your people and escape this place.
- [Persuasion] Another in your position could have forgotten that the Emperor protects all of His subjects/ But surely not you. It is your duty to help anyone you can
- I care nothing for these people, just get them and my retinue off this planet
- [Point your weapon at the sergeant] You will drop your weapon servant, or I will end you like. a rabid dog.
If you choose Persuasion and succeed, Sergeant Malgar will agree and you will gain experience. You can then end the dialogue, the next objective will be activated and the cutscene will begin.
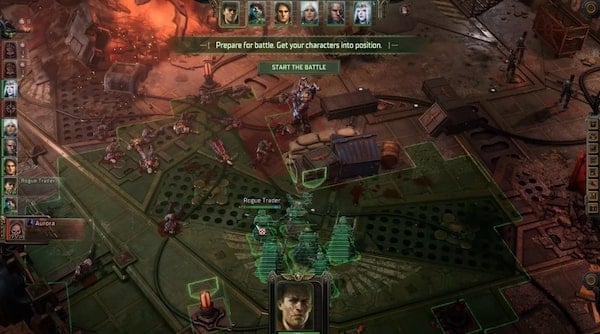
- Protect the shuttles
Another battle will begin against Aurora. This time you will only face 8 opponents but Aurora will be hard to clear. spread your characters out and try to focus your energy on Aurora. Beware of her attack conditions. Aurora's Hatred will allow them to unleash hatred against the last attacker when being attacked. If you have any available ranged attacks, use them on the other cultists. Look out for any opponents positioned together and aim to use larger AoE attacks to quickly clear them out so you can continue to focus on Aurora. Once she is cleared, you should be able to quickly finish off the rest of the battle. Keeping them away from the shuttles will eventually trigger the next objective. This can occur in the middle of combat.
- Evacuate on the Shuttle
The heretic has been purged. Now the Lord Captian can leave Rykad Minoris on the remaining shuttle. The recommended course of action is to grasp this opportunity without delay.
If you are still engaged in combat, clear the rest of the battle so you can loot the area and successfully approach the shuttle. Leave to the voidship bridge to begin the next scene. This will complete the quest.
ACT 2
General Details
- ACT II
- Location: TBA
Relevant Characters
- TBA
Bosses
- n/a
Items
Consumables and Other Items
- n/a
Equipment & Upgrades
- TBA
Enemies
- TBA
Attack in the Silence of Mer-Segrit Walkthrough
Achilleas Scalander has reported new information about the planned attack. The xenos are already preparing to strike - the Rogue Trader must act immediately.
WARHAMMER 40K: ROGUE TRADER Attack in the Silence of Mer-Segrit OBJECTIVES
- Arrive in time to help the voidship - The Drukhari must not be allowed to destroy a voidship carrying valuable cargo. The merchant needs military support.
ROGUE TRADER Attack in the Silence of Mer-Segrit Walkthrough
As you travel any system, Vox Master Vigdis interrupts the Lord Captain with an emergency call. She states the coordinates of a drukhari attack vessel have been revealed.
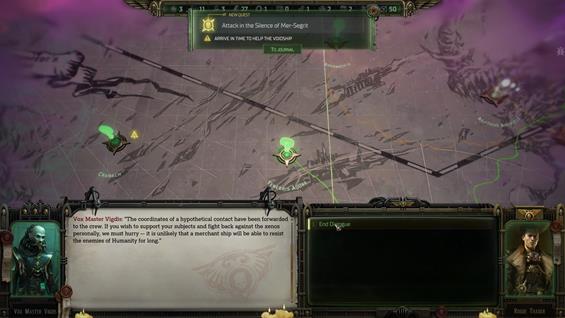
Travel to the Silence of Mer-Segrit system, and once inside, there will be an army of Drukhari voidships on the left side of the screen.
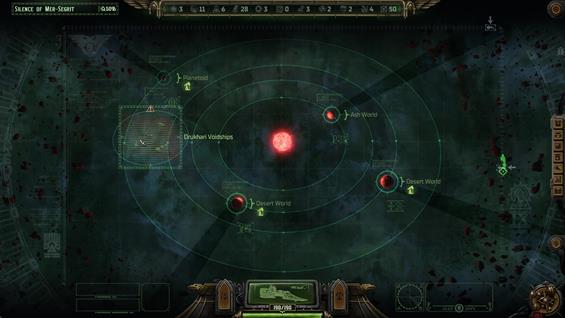
Enter the battle to face x3 Immortality Denied Destroyer and x2 Last Hatred Frigate.
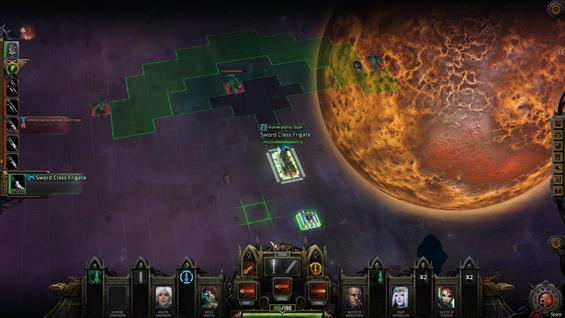
Finish the battle to earn x2600 XP for the voidship, x5 Ghostplates and +119 Scrap.
After the battle, Vox Master Vigdis gets in contact again, and the quest will end. You get +483 experience points.
Blades in the Void Walkthrough
The worlds of von Valancius protectorate are being terrorised by enemies of Humanity -- xenos carrying rapid strikes on colonies and trading vessels. The Rogue Trader must prevent any further plundering of the dynasty's holdings and launch a counterattack.
WARHAMMER 40K: ROGUE TRADER Blades in the Void OBJECTIVES
- Forge a path to Vheabos VI
- Find out what is happening on Vheabos IV
- Destroy the xenos and their minions
- Wait for a response from Dargonus
- Stop the Xenos Raids on your holdings
- Answer the call for help from Grantis
- Explore the Systems Cinerus Maleficum nebula
- Examine the Mysterious object
- Stop the boarding party
- Explore the plasma drive chambers
- Return to Dragonus
- Defend the Von Valancius Palace
- Return to the ship
ROGUE TRADER Blades in the Void Walkthrough
After completing Attack in the Silence of Mer-Segrit, Blades in the Void will update. Please check that link to learn more about what you have to do to complete Attack in the Silence of Mer-Segrit.
- Forge a path to Vheabos VI
According to Achilleas Scalander, the xenos raids may have struck the penal world of Vheabos VI. This report requires further investigation.
Visit the Mortus Acies system, and you will discover the Vheabos VI planet.
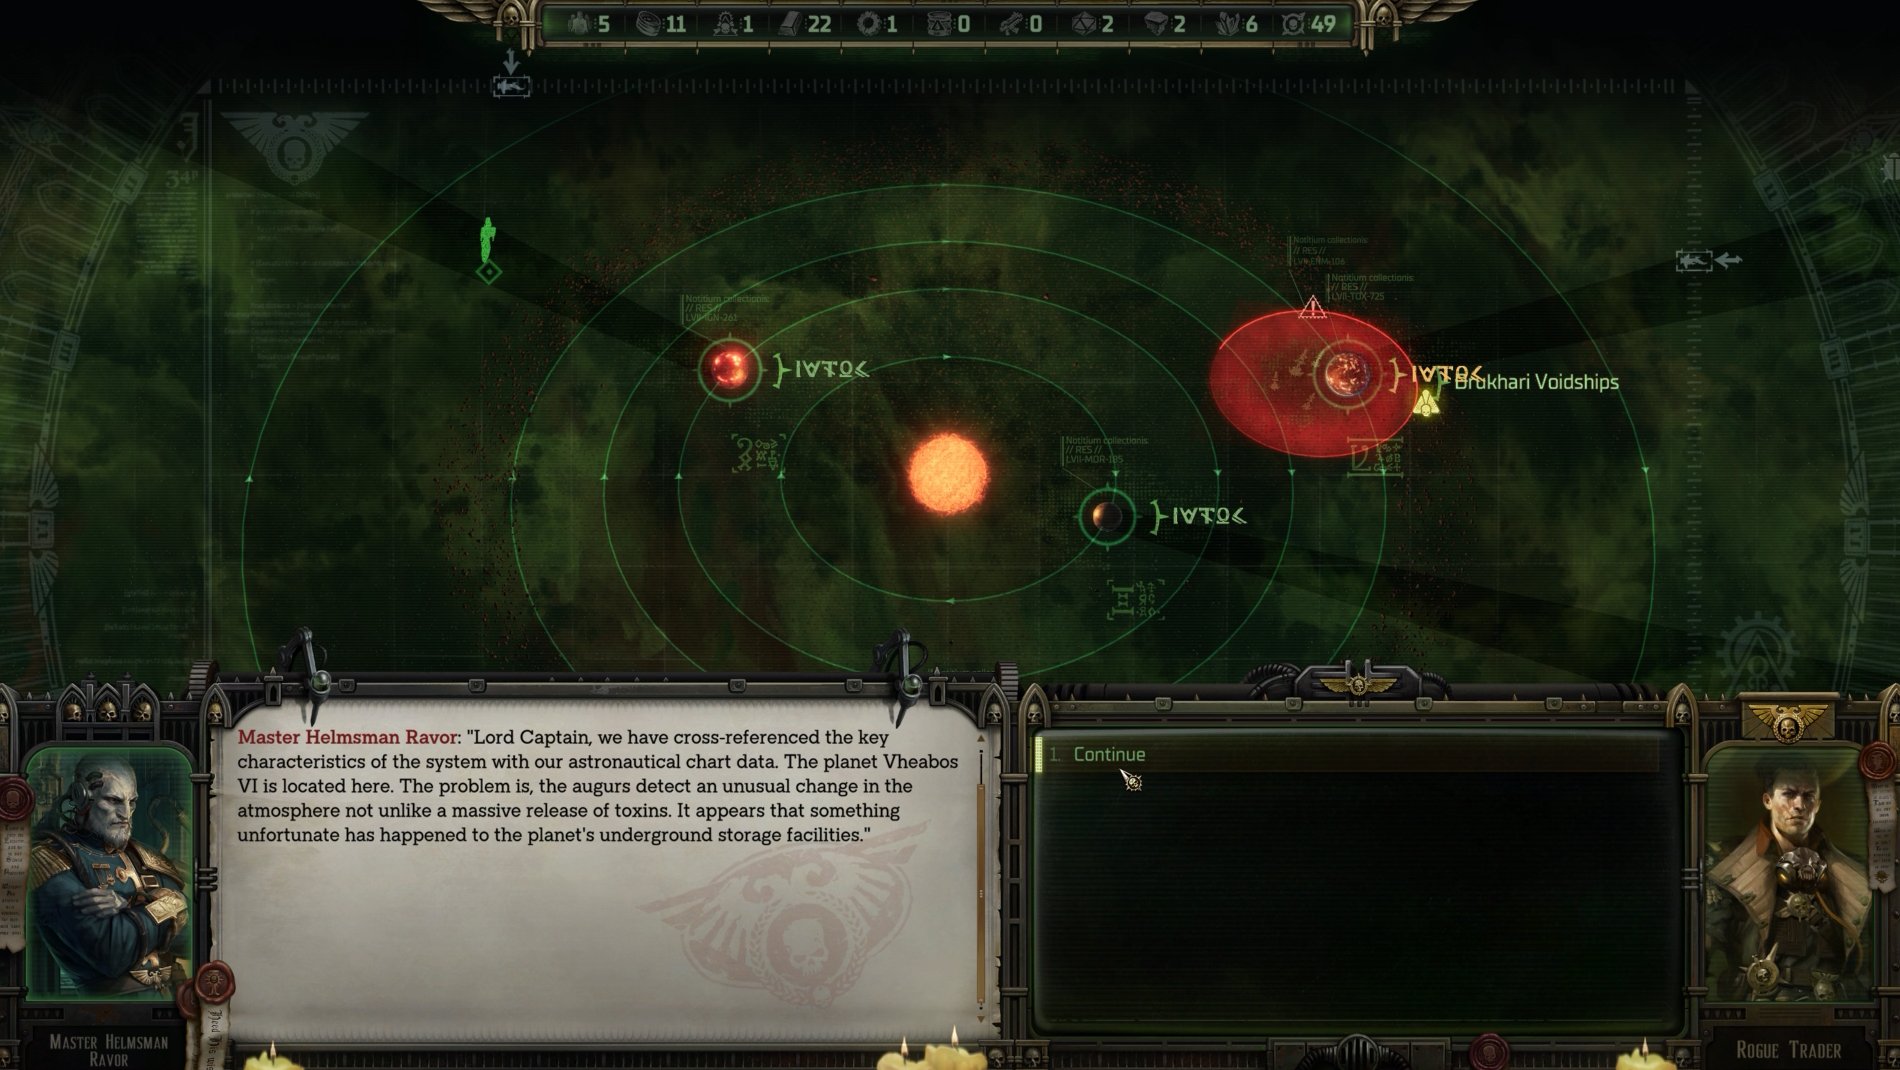
- Find out what is happening on Vheabos VI
Preliminary scanning revealed a catastrophic change in the planet's atmosphere and devastation of infrastructure on its surface, and it also detected the presence of enemy vessels. Reconnaissance must be carried out immediately to ascertain the situation on Vheabos VI.
Before landing on Vheabos VI, you will need to engage in a battle against x2 Last Hatred Frigate. Once you defeat them, you will be able to visit the planet.
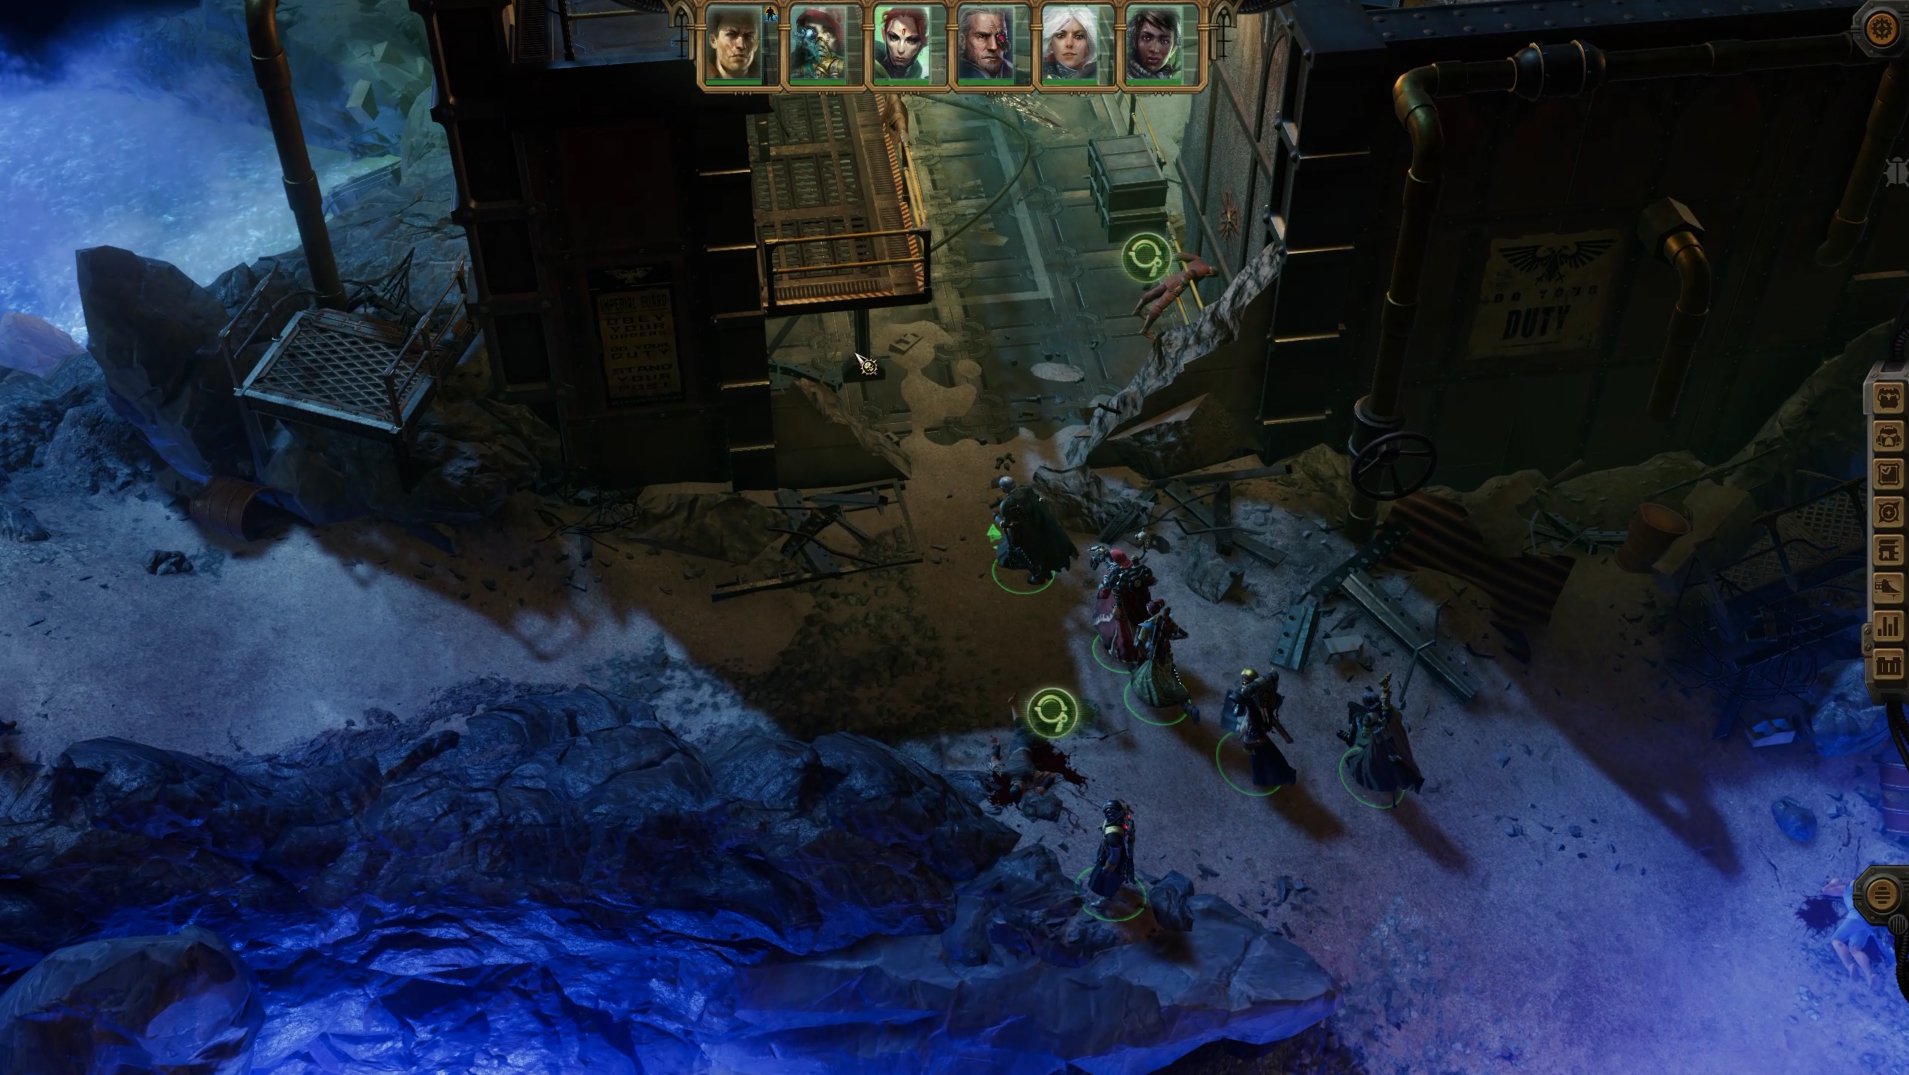
- Destroy the xenos and their minions
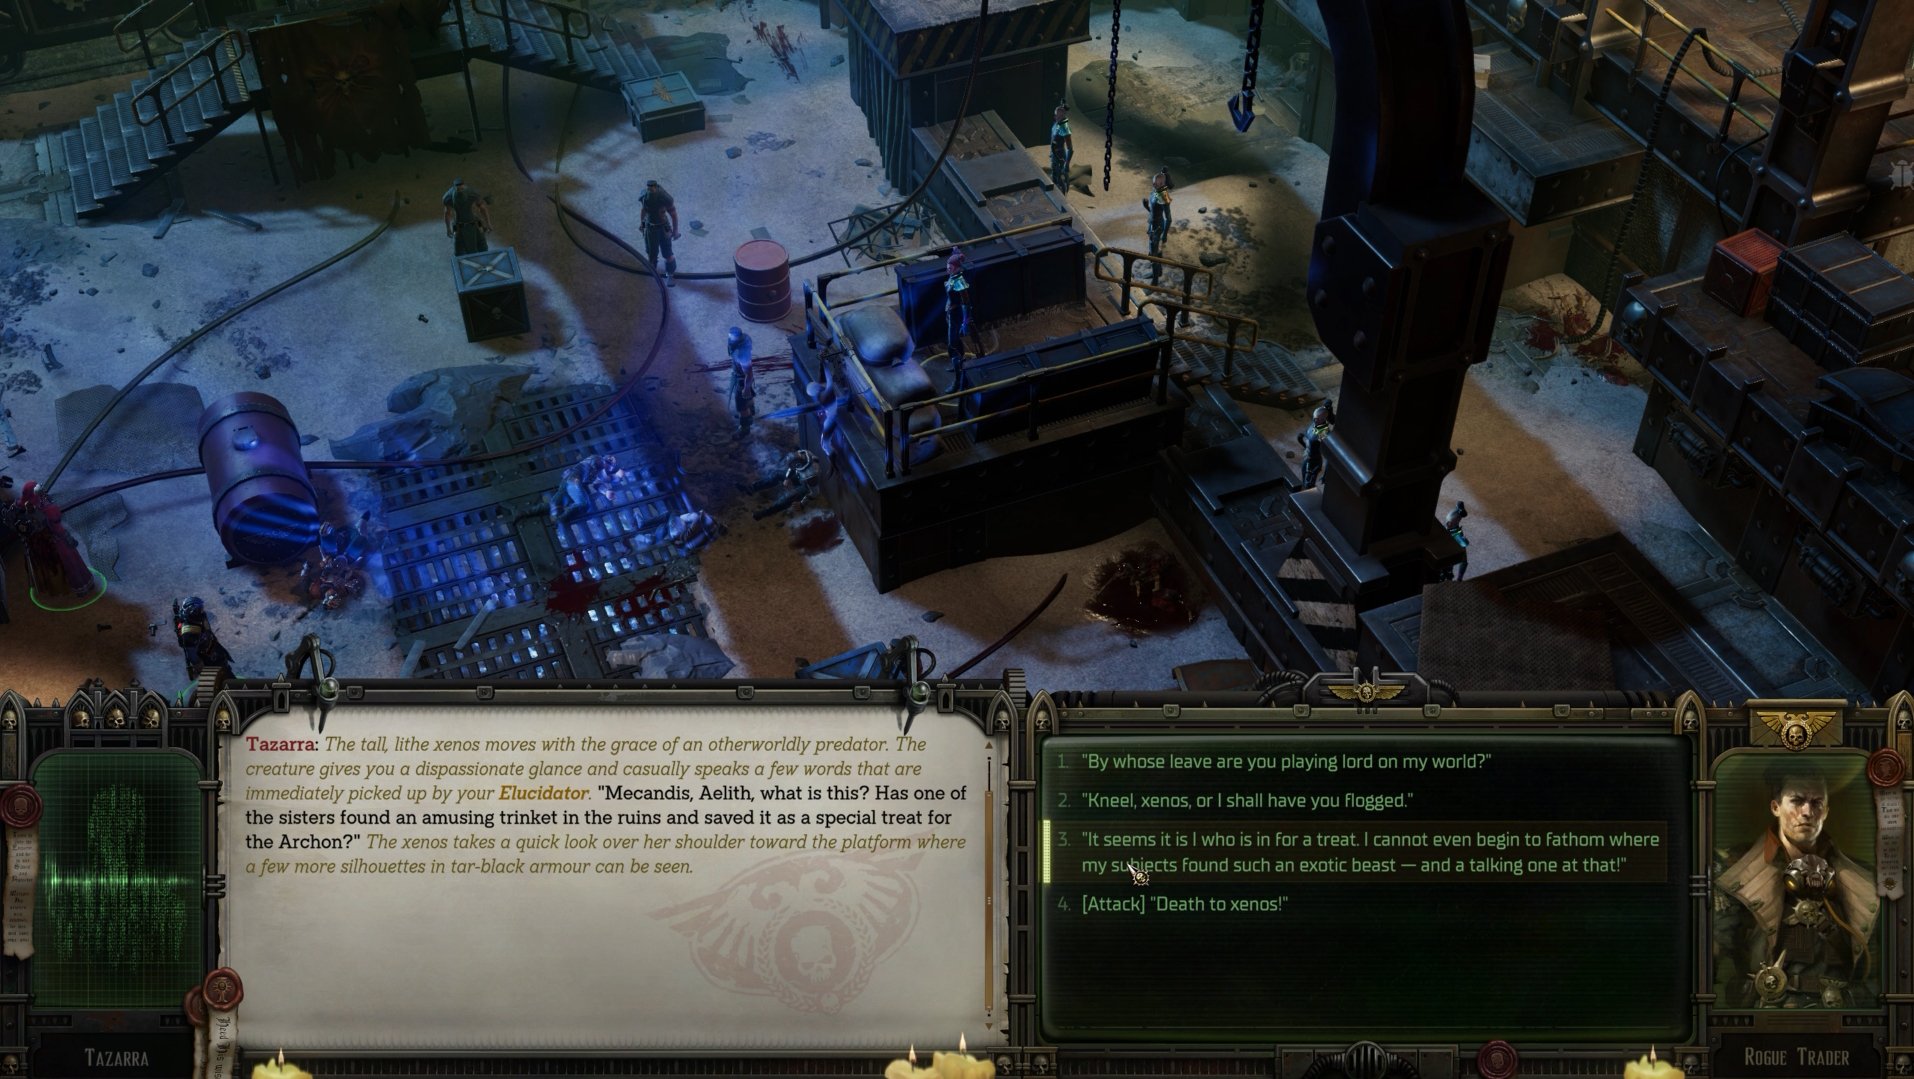
Set out on your exploration until you cross paths with Tazarra. Engage in a battle against a group of Gladiators led by her. Kill them to complete this part of the quest. Loot the corpses to obtain x6 Poisoned Hekatarii Blade, x1 Blast Pistol, x2 Splinter Pistol, x6 Wych Armour, x1 Hunter Carapace and more.
- Wait for a response from Dargonus
Vheabos VI has been purged of xenos, but the raid leaders evaded capture. Information about the pillaging of Vheabos VI has already been sent by the Astropathic Choir to Dargonus. A response may take some time to arrive, and it would be unwise to spend it waiting on the poisoned penal world.
- Stop the xenos raids on your holdings
Achilleas has directed his spy network to discover the xenos' future plans and hunt down the leaders who were detected on Vheabos VI. Before any new information is found, attacks on the colonies and trading vessels must be stopped to avoid any further damaging the von Valancius.
- Answer the call for help from Grantis
Achilleas has reported an attack on a world belonging to the Winterscale dynasty. Heading the raid is apparently one of the xenos leaders who has been carrying von Valancius holdings. This is an opportunity to strike blow against an enemy and learn more about a rival.
Players will need to travel to the Palatium Stellos. This planet may not have been scanned yet, but it will be marked with a quest objective marker, so you will know where to travel. Once you get there, you can begin the scan and Grantis will be added to the worlds of the Expanse. When you arrive, you will be at the Governor's Camp. Follow the main path to advance and there will be a few bodies ahead you can observe. Watch out for any traps before you step. The path should take you south and turn west where you will encounter a few goods chests before finally reaching the camp as you turn north. When the path begins to curve north, prepare for battle.
Once you reach the camp, it will pan towards Marazhai and begin a dialogue. The objective will be completed in the middle of the dialogue. You will have the option to continue the conversation or [Shoot the xenos] or [Draw your Weapon] later on if you choose not to shoot the xenos. Eventually, Marazhai will state that the conversation is over and will initiate the attack despite your response.
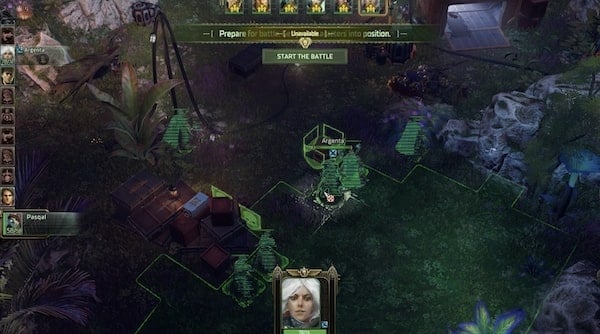
Get your characters into position and begin the battle and clear the xenos battle to continue. You will be up against a Kabalite Blademaster, warrior and other xenos opponents. There will be plenty of places to take cover. Position your melee attackers near individual opponents and position your. ranged warriors behind walls and crates. Pan over the whole arena to locate those hiding behind objects and clear them out. Loot the areas when you have cleared the battle and explore the rest of the governors camp for all other loot crates before you exit this location. When you're ready, head back to the voidship so you can begin exploring the systems fo the Cinerus Maleficum Nebula.
- Explore the systems of the Cinerus Maleficum nebula
The xenos Marazhai dares to give the Rogue Trader an ultimatum-- Fight a final battle in the Cinerus Maleficum nebula or continue fending off raids. It would be unwise to agree to terms set by enemies of Humanity, but it is permissible if it will mean an end to constant attacks.
Open up the inerus Maleficum nebula map to fulfill the objective. Upon exploring the planets of the Cinerus Maleficum nebula, you will also find a Mysterious object marked on the map. While viewing the star rmap, the objective will be updated and you will be tasked to travel to the mysterious object.
- Examine the Mysterious object
From the map, there will now be a marked Mysterious Object. Players can travel there from voidship to fulfill this objective.
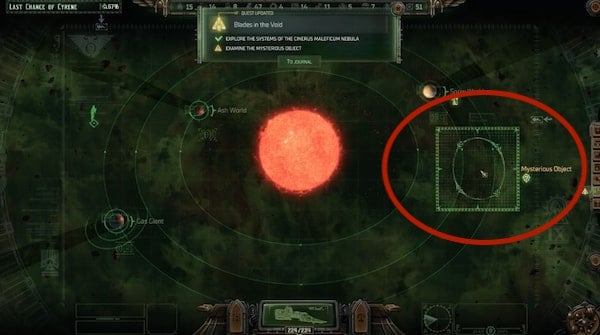
The objective will be complete upon arrival. A ship battle will begin immediately. This should take you into a grid system where you can position your ship in a ship battle. You will need to clear the surrounding ships. Take your ship closer to view the nearby ships and focus your attacks to clear one ship at a time while waiting for the others to approach. Be patient with your attacks.
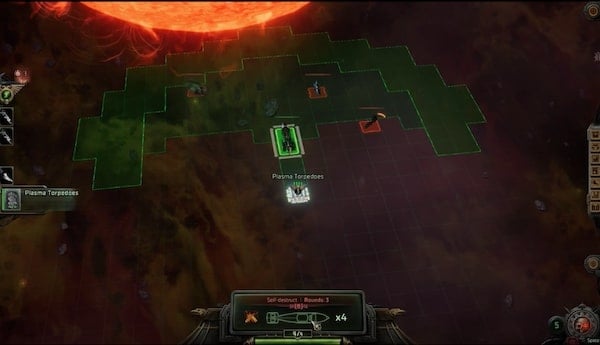
Once the battle is cleared a dialogue announcement will begin stating that a xenos boarding party has landed on a ship and are heading towards the plasma drive. End the dialogue and you will be able to choose the party members you wish to take to aid in the next battle within the Plasma Drive Chambers. Once you have arrived in the chambers, the objective will be updated.
- Stop the boarding party
You will need to go ahead and move forward to look for the boarding party. When your own party arrives, you will have the choice to head straight or take a right down the stairs. You will already find some of the boarding party members here including a Kabalite Specialist. A dialogue amongst them will then begin immediately followed by a battle. They will be spread apart so focus your attacks on clearing those closest to you. You will need to maneuver your members around the machinery in this area and they will take a few turns to approach. Watch out for the members on the second floor as they will be able to shoot at you from a move if you're not behind cover. Stand behind pillars, machines or crates to stay out of range of their ranged attacks. If you have a clear shot or available ranged attacks, you can try to aim your attacks to those on the upper floors. Those with a more limited ranged can be used to clear out those within the same floor. Clear out all the members of the boarding party to complete the objective.
- Disarm the Explosive Device
Your next task in the Plasma Drive Chambers will be to Disarm the Explosive Device. Loot the area. Head to the upper floors where the charge is. There should also be a goods box that you can loot. A surviving crew member will then also begin a dialogue talking about a man in officer's uniform. Choose your responses until you need to make a decision:
- [Iconoclast] [Let the officer slip into the hallucination] I think I hear your son calling you
- [Heretical] Leave. the officer between the two worlds] I want to watch the scum suffer
- [Dogmatic] [Excuse the traitor] In the name of the Emperor, death to all heretics.
Choose the fate of the surviving crew member and you will get + points for the Conviction it aligns with. Your interaction here will also advance in the quest and will have completed the task to 'explore the plasma drive chambers.' You will still need to disarm the explosive device. There will be a device at the corner that you can interact with to examine the charge. After examining it, you should now be able to defuse the charge with Demolition. This will complete the objective.
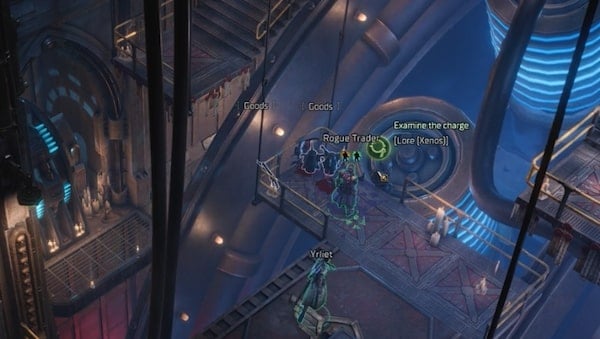
- Return to Dargonus
The rendezvous point set by zenos turned out to be a trap. The Rogue Trader must return o Dragonus immediately to regroup and clarify the situation.
From the Plasma Drive Chambers, return to the Voidship bridge to return to Dargonus Mundus Valancius. View the whole map of expanse and look for Mundus Valancius so you can travel straight to Dargonus from there. On your way back to Dargonus, you will need to face Drukhari Voidships (x1 Dark Mirror Light Cruiser, x2 Immortality Denied Destroyer). Once the battle is cleared, you will gain some XP, Scrap, and additional loot.
Finally, travel to Dargonus. It should have an active objective marker on it. Select your party to travel to Von Valancius Palace. A dialogue will soon begin with Clementia Wrserian. Complete the dialogue and another scene will immediately begin.
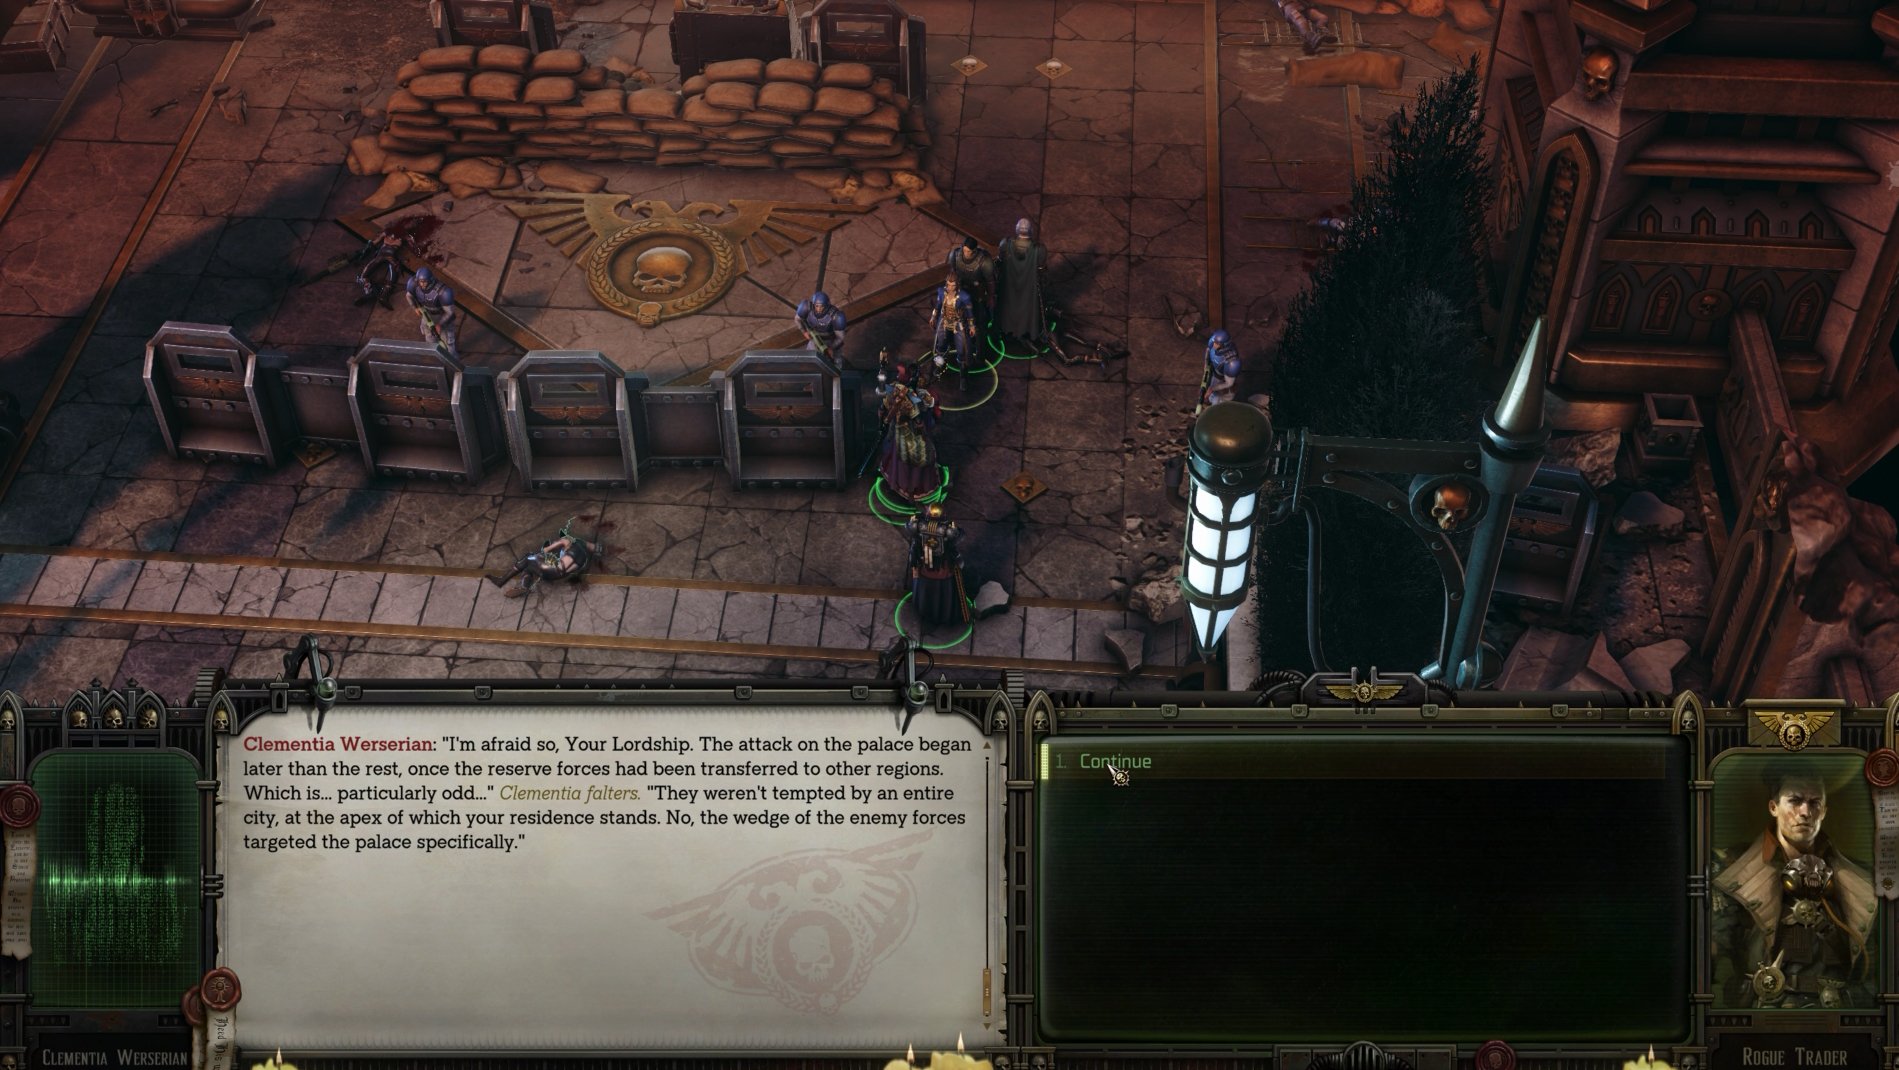
- Defend the Von Valancius Palace
A fight will erupt nearby and you will join in another battle. When the battle is cleared, loot the area. There will be a few loot crates nearby, but make sure to watch out for traps on the ground. When you are done with this area, the path will take you straight north. Be ready for an additional combat against Tazarra and her crew. Afterward, loot the corpses to obtain x1 Bloodthirster, x3 Heavy Leather Armour, and more.

- Return to the ship
Upon successfully returning to the ship and speaking with Vox Master Vidgis, this quest will be marked as completed.

Dreams and Stories Walkthrough
WARHAMMER 40K: ROGUE TRADER Dreams and Stories OBJECTIVES
- Look for a cache by the windows in Dock Alpha-Rho - The hint mentions a small quay and large windows - that sounds like part of Footfall's Void Dock Alpha-Rho
- Look for a cache in the old tunnel in the Shadow Quarters - The hint mentions "a tunnel in the shadow of a bridge, a bridge in the shadow of the great statue." It must be referring to the Shadow Quarters.
- This part of the Shadow Quarters is currently under quarantine due to a possible outbreak of disease.
- Examine the cogitator by the statue of Footfall's founder - The hint mentions a cogitator and a statue in the Small Temple. Footfall's Atrium was once supposed to be the nave of the Little Cathedral.
ROGUE TRADER Dreams and Stories Walkthrough
During Dreams and Stories, players have to visit certain areas in Footfall and interact with them to find notes that point towards other areas.
First, you need to find the cache in Shadow Quarters and Atrium.
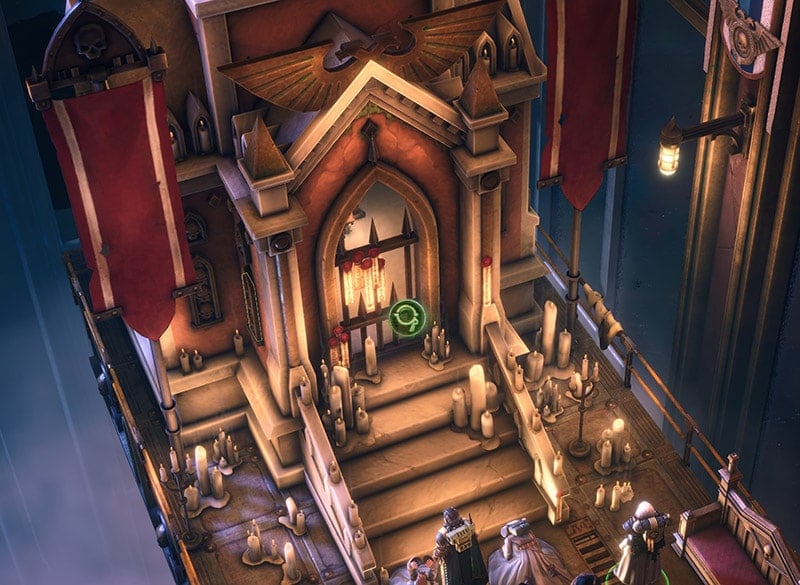
THE FIRST NOTE
The clue to quest Dreams and Stories can be found in the restaurant area.
THE SECOND NOTE
The second note can be found in the Shadow Quarters. This area is off-limits upon arrival on Footfall. After clearing the Janus planet, it will become available, and players may explore it. Head to the area in the following picture, pass a demolition check to be able to loot the cache. It points towards the statue of the Founder of Footfall, and a small temple.
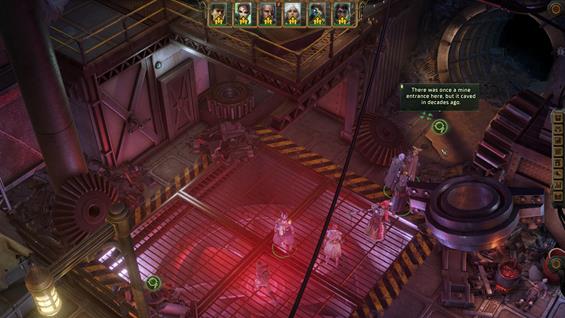
Head to the Atrium, to find the third note.
THE THIRD NOTE
Return to Atrium, and use the computer (Realizing design) near the founder's statue to claim your reward.
Flame in the Dark Walkthrough
An attempt to establish first contact with Kiava Gamma in the Cranach system provoked a hostile reaction. The Lord Captain must review the situation on the planet and take necessary steps to reassert the Rogue Trader's control over the industrial world.
WARHAMMER 40K: ROGUE TRADER Flame in the Dark OBJECTIVES
- Make planetfall on Kiava Gamma
- Find out what is happening in the industrial world: Kiava Gamma's manufactorum continues to operate, despite the presence of enemy Forces in the system. More information is needed to assess the situation.
- Eliminate Fabricator-Censor Cubis Delphim
- Find a way to the heart of the Manufactorum
- Return to the ship: The Vox Master is awaiting orders regarding the fate of this world
ROGUE TRADER Flame in the Dark Walkthrough
The Flame in the Dark Main Quest will start once you've reached the Cranach System. There are a lot of objectives and quests that an individual can do while progressing and most of the time Quests branch out and connect other quests as well. In these guides, we are trying to reorganize the quests on a level that one can follow easily. Now starting with the first objective.
MAKE PLANETFALL ON KIAVA GAMMA
Located in the southwestern region of the system, scan the planet and proceed to land at the "Manufactorum." Ready your party, as the upcoming events will lead you into a series of battles. Upon landing on Kiava Gamma, prepare to explore the Manufactorum's dark halls.
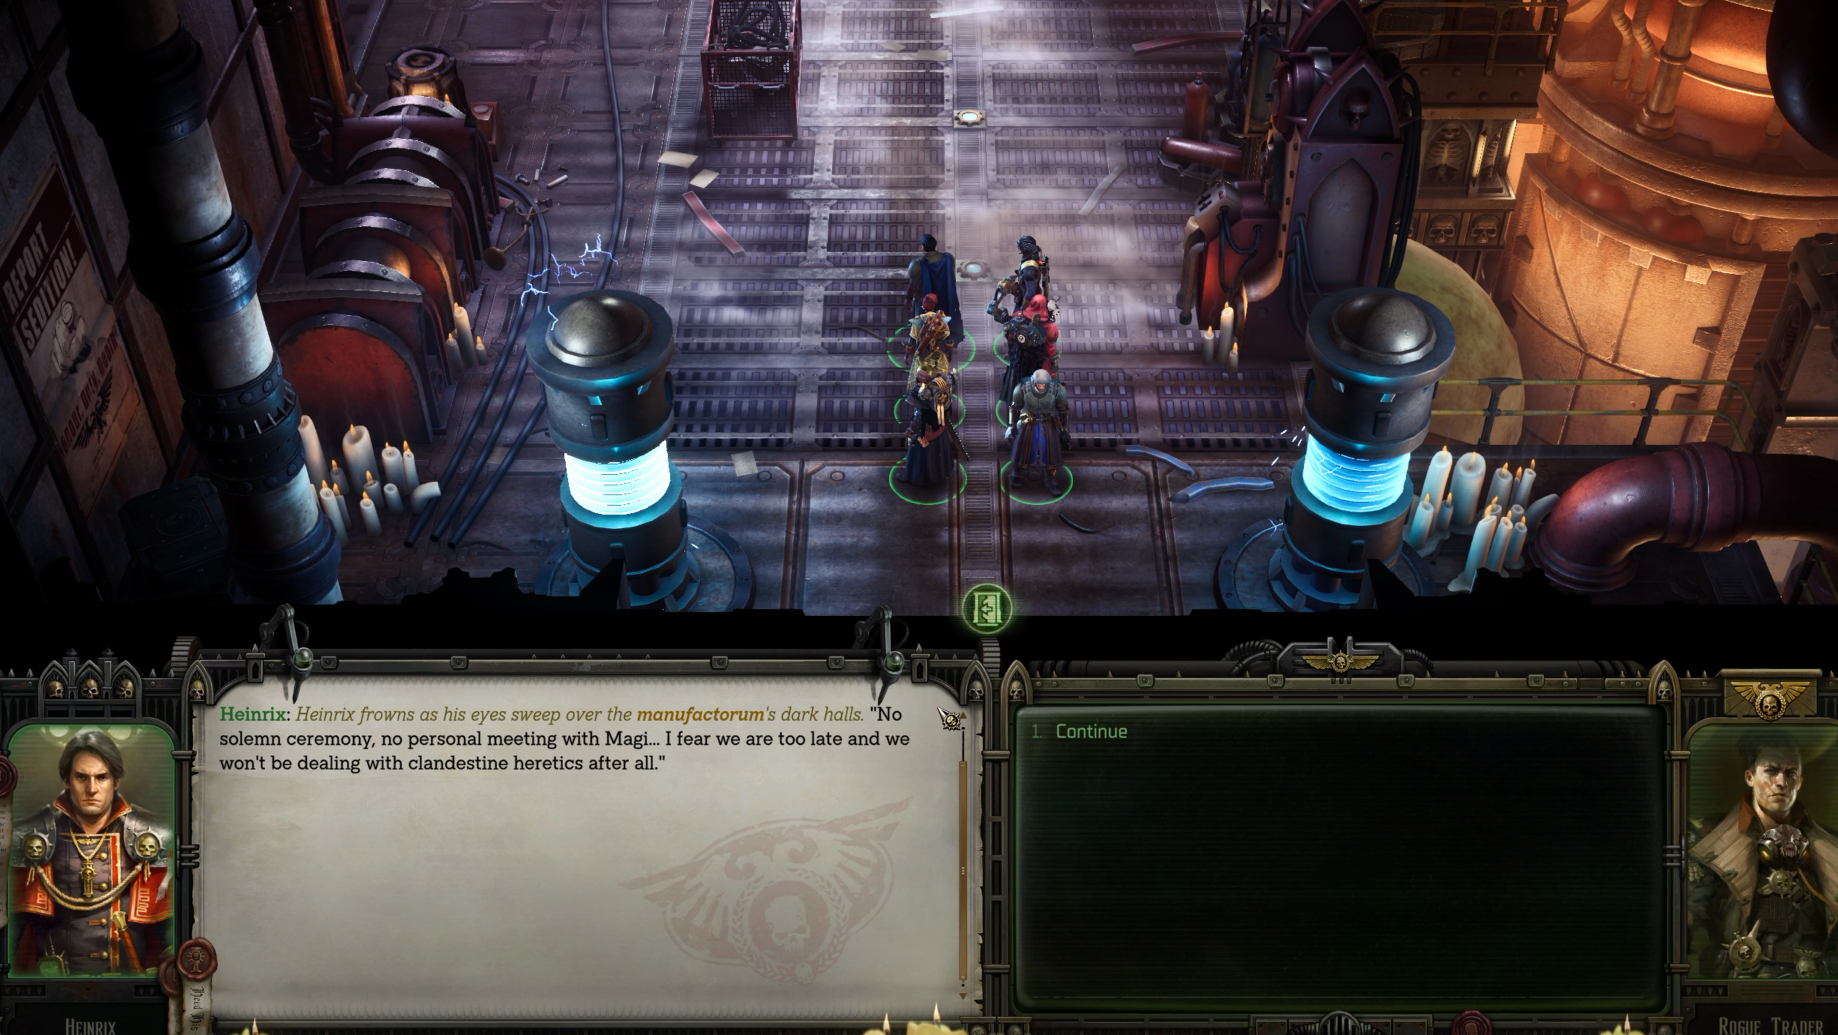
FIND OUT WHAT IS HAPPENING ON THE INDUSTRIAL WORLD
You will find a group of Corrupted Servitors in the room on your left. When one of them attempts to reach you, you'll need to pass agility and medicae tests. These five corrupt servitors will come in handy. It's recommended to save your progress in case of any mistakes later on; this allows you to go back if needed. The Servitors can be highly beneficial in the upcoming events, so it's advised to enlist their help. You will be able to do so following these dialogues.
- What do you find so appalling about this custom?
- [Observe the servitor] (try passing the Agility check afterward. If you don't you'll take around 7 dmg.).
- Find the source of the repeating clicks.
- Requirement: Medical -25, Cut away the tumor-forming on the spinal cogitator. This is the important one. If you fail the check you'll have to fight them.
- Um... follow your default programming?
Once you pass them, the servitors will move aside. There will be some goods you can pick up, including a Multikey. Proceed to the cogitator's panel; if you pass the logic test, you can trick the system and access the hidden data about The Fabricator-Censor. Leave the room and continue exploring the building, you will find The Sixteen Universal Laws: The Misteries' tome. Afterward, you'll face a Corrupted Magos. Now that's settled, head back outside the servitor room and proceed north to initiate a scene with a Tech-Priest. This marks another crucial choice. Any of the dialogue options will eventually give you the choice to either have him adhere to his protocols or attack him. Regardless of your decision, you will end up in a fight against him and several other Tech-Priests. However, your choice determines the location of the confrontation. If you decide to fight the tech priest in your current location, be ready for a battle and eliminate all kinds of threats. You will be dealing with a handful of Corrupted Servitors and tech-priests. This is going to be an easy fight regardless since you do command five Servitors. Use this to your advantage. If you choose to interact with him, pass an Awareness test, and select the option: 'The fabricator-Censor is a traitor to the Imperium and Humanity. I will not comply with any protocols approved by him' the quest will be updated. Subsequently, you will have to engage in a battle against the Corrupted Magos, a Magos Heretek, and a group of eight servitors (four volatile servitors and four corrupted servitors). After defeating them, loot the dropped items, including a Krak Grenade and an Omnissian Axe.
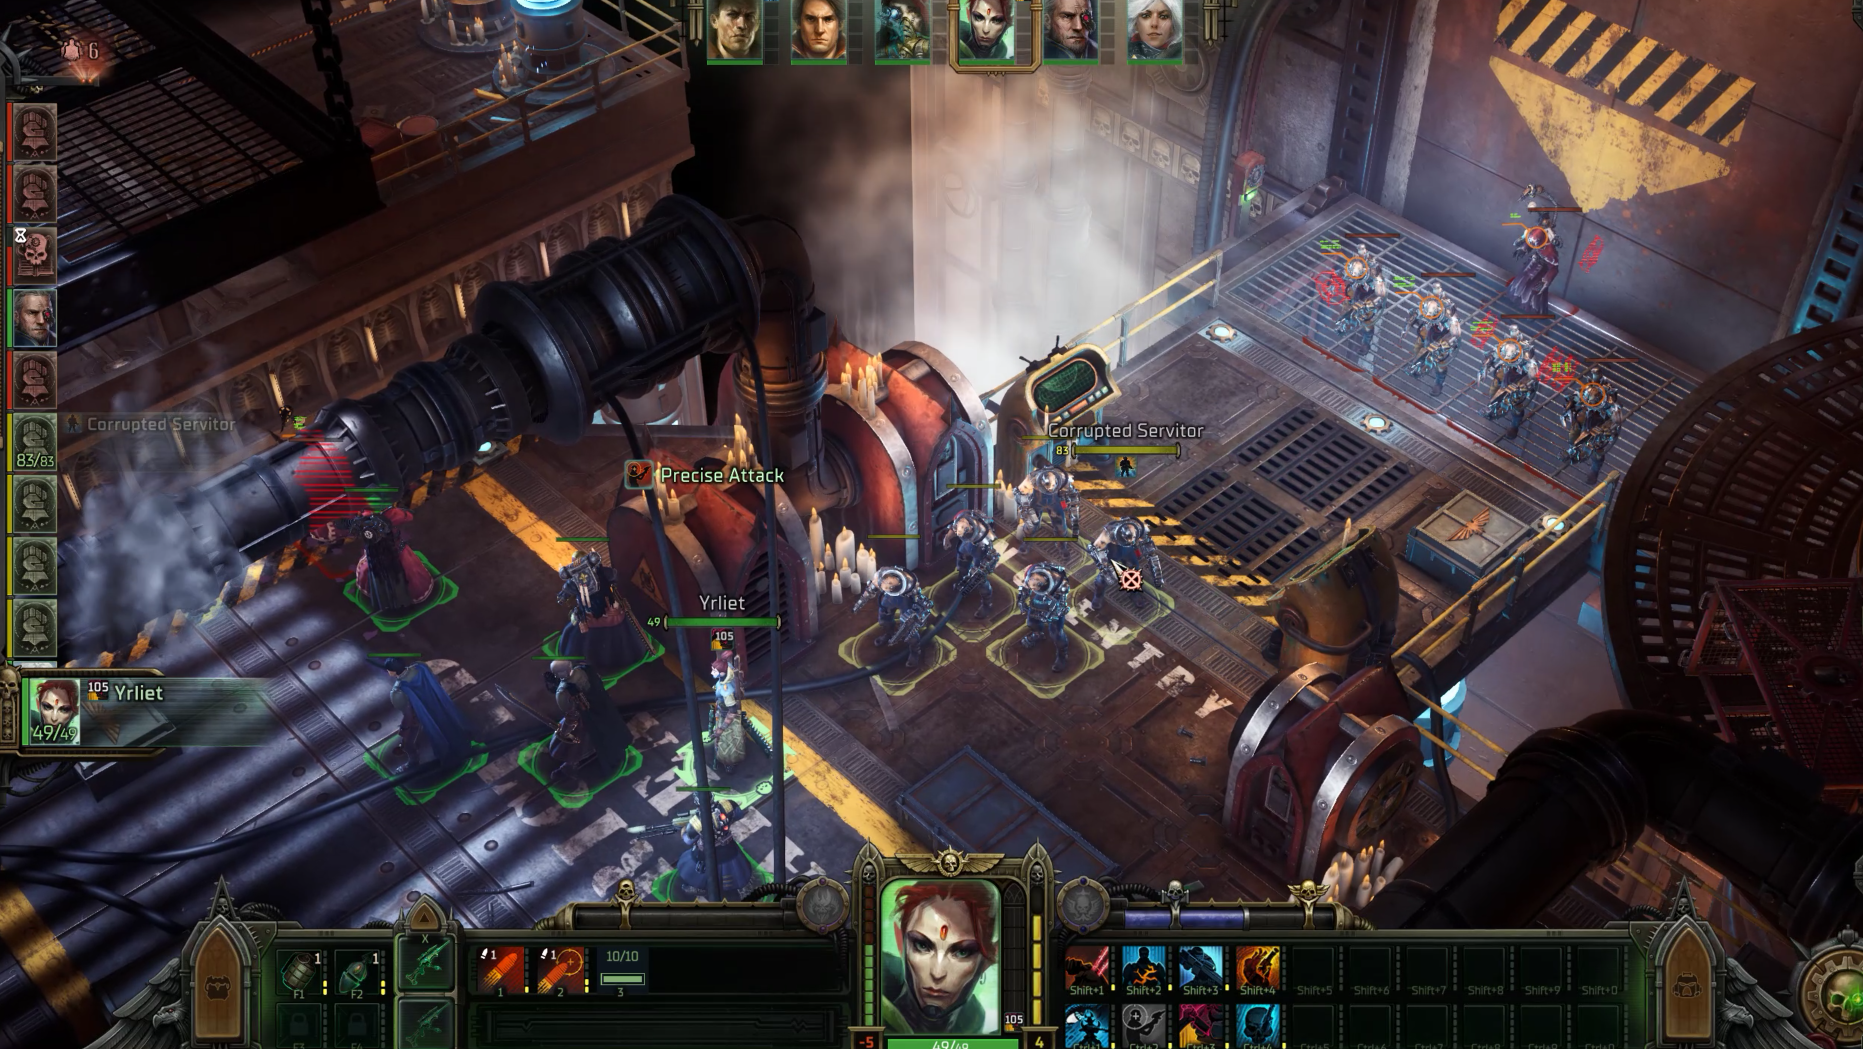
After the fight we need to backtrack to where we encountered the first Tech-Priest. If you engaged the enemies there, there's not much to do. However, if you go upstairs, you'll need to find an alternative route since the elevator is no longer functional. Be cautious as you navigate an area filled with scalding steam, causing potential injuries to your party members. Unfortunately, the Servitors will be stuck upstairs, but there's a way to bring them down, even without the working elevator. Return to where the Tech-Priest was. If your party members suffered injuries from the steam, head back to your ship to heal automatically before returning.
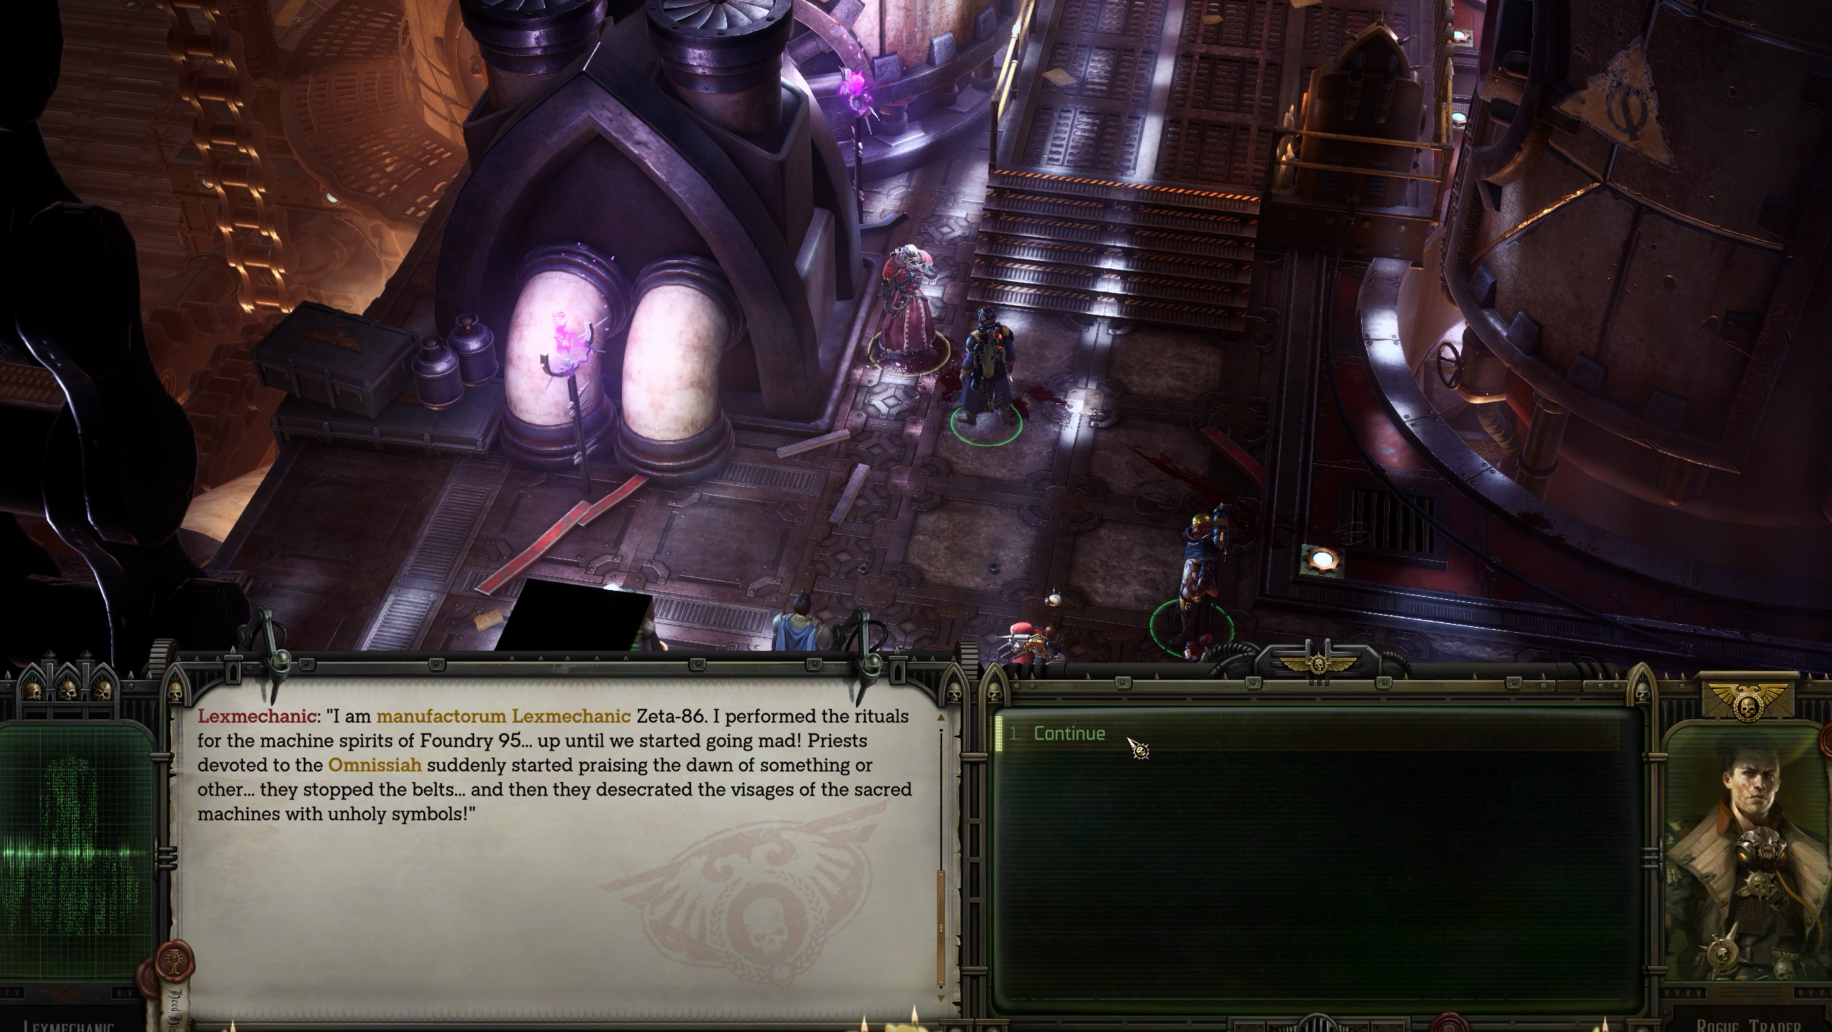
ELIMINATE FABRICATOR-CENSOR CUBIS DELPHIM
Continue exploring the left wing of the building to discover more goods. Soon, a cutscene featuring Fabricator-Censor Cubis Delphim as the protagonist will begin. Moving forward from the Tech-Priest, head north to trigger a scene with Fabricator-Censor Cubis Delphim, the main antagonist of this planet. Ask him everything, and eventually, he'll depart, bringing forth several enemies. You are not going to engage in a battle so relax. Proceed to the next floor where you'll discover additional goods to collect. Talk to the Lexmechanic to obtain information about the Fabricator-Censor, the sacred machine and the corrupter cogitators. Subsequently, the Secrets of the Cult Quest will be updated.
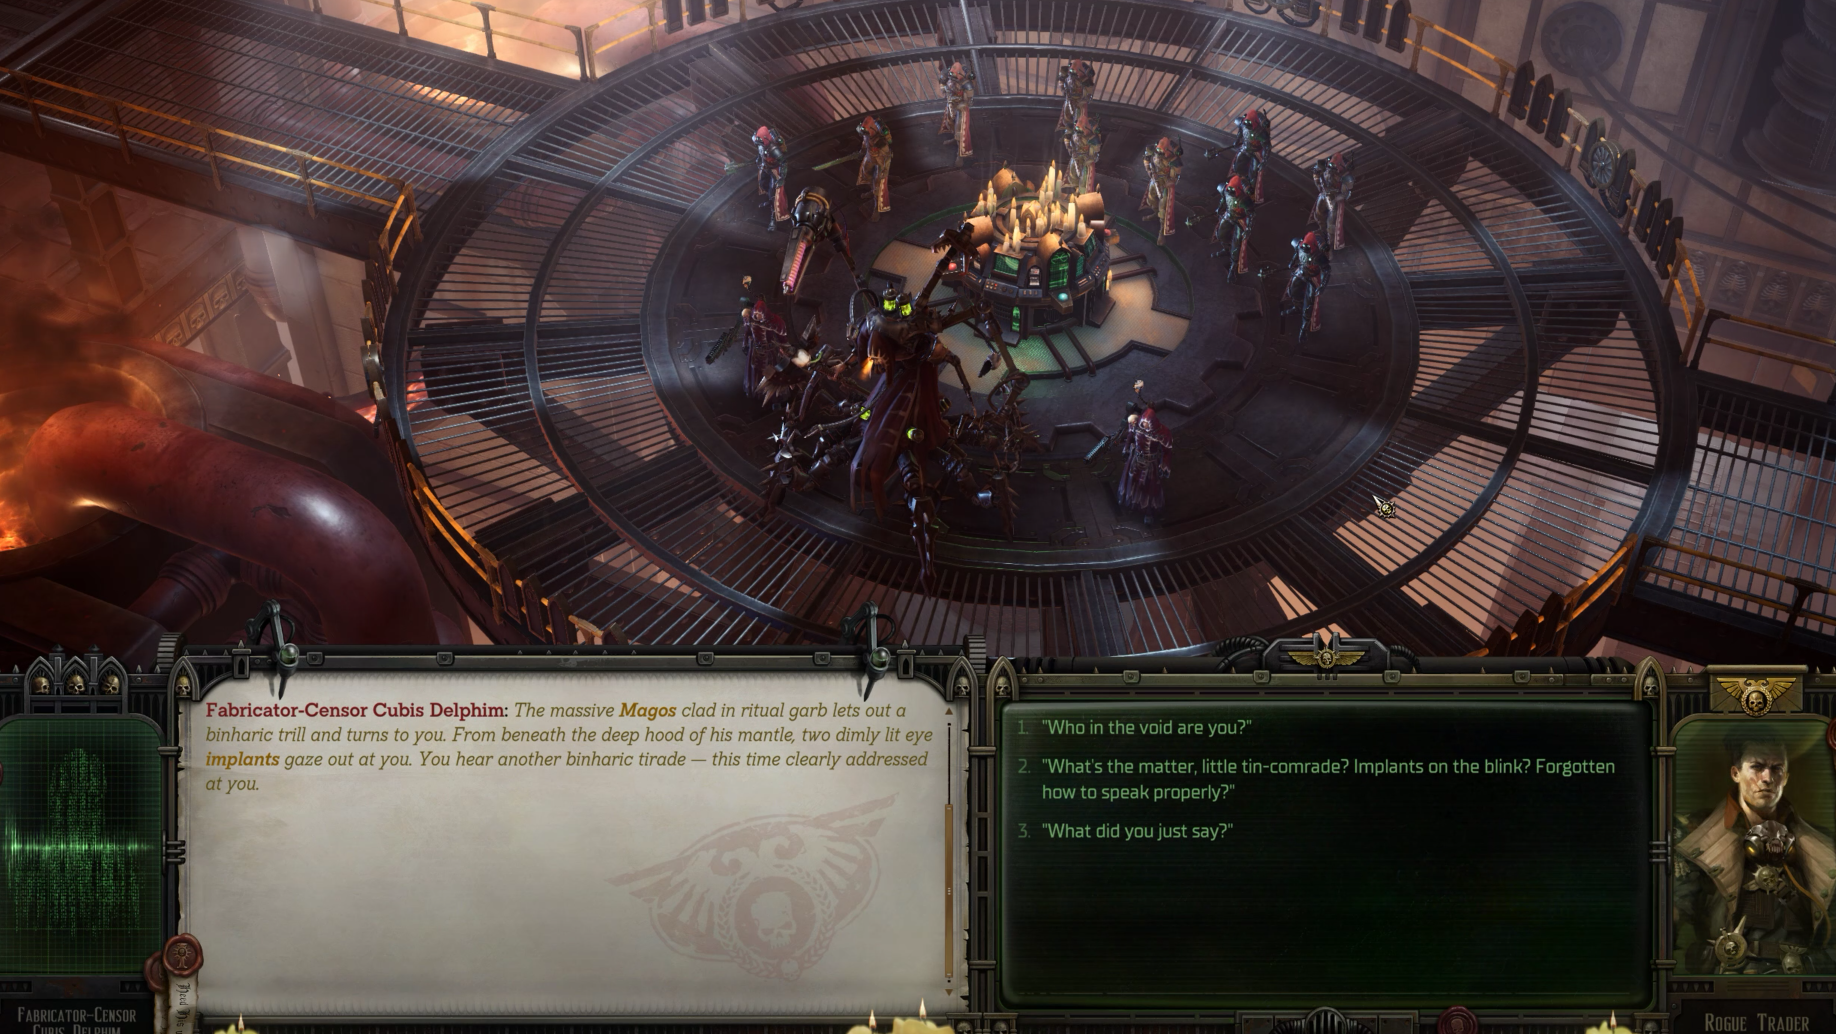
FIND A WAY TO THE HEART OF THE MANUFACTORUM
After the encounter, take note that to the north, there's a staircase on the left side just before encountering some enemies. Avoid engaging in combat at this point. There's a strategic opportunity to eliminate around five enemies before initiating any confrontations. Ascend the aforementioned stairs and access the door in this direction. Upon entering the next room, be cautious of a trap, disarm it, and utilize the console to lower the bridge where the enemies originated. Proceed towards the cracked wall at the rear, save your game, and successfully pass the Demolition check. This step is crucial for bringing the servitors back down here, ensuring their continued assistance.
After demolishing the wall, successfully navigate the Acrobatics check to reach the opposite side, where your servitors should soon appear. They'll join you shortly. Within this room, take a moment to save your game just in case you make mistakes later, and inspect the console located near the corner. Pass the Tech-Use check, then promptly activate the machine spirit to initiate a scene where some enemies outside meet their demise. Impressive! Now, proceed to loot the box situated in the corner, yielding Medikits and weapons. Once prepared, save your game again and use the nearby button to open the large door. Upon any movement command, the servitors left in the previous room will rush toward you, likely triggering the commencement of the impending battle. Exit the room promptly to join the fight.
There are several enemies, but as you can see the Corrupted Skitarius are very weak and easy to deal with. Upon concluding the battle, proceed with your usual post-fight activities, such as looting the corpses. Take note of the bridge that was previously lowered to the northeast. Before crossing it, move north from its location to discover a Tech-Priest on the verge of death. Engage in a conversation with him to glean more information about the ongoing situation. Although his demise is inevitable, successfully passing either the Persuasion or Medicae checks will reward you with some additional experience points.
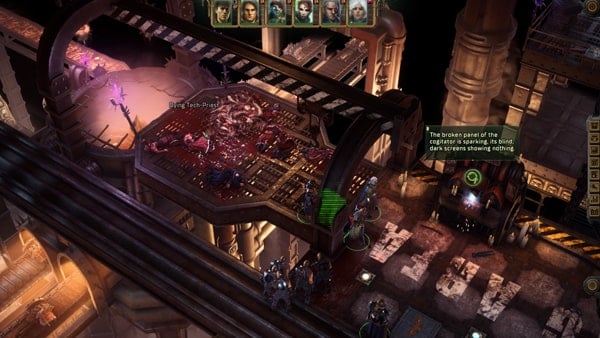
Proceed across the bridge, but halt immediately. This area is riddled with traps, so exercise caution. Assign your primary trap spotter to navigate the surroundings alone and carefully inspect for traps. Subsequently, deploy your trap master to eliminate any detected traps. Before venturing south, take a moment to loot a crate in the vicinity, yielding a Multikey. Optionally, you can check a console to the northeast for additional items. There's not much interest here, so head south across the bridge to reach the circular area where Fabricator-Censor Cubis Delphim was encountered.
Note that the bridge extends further south, but interacting with the central console will reorient the bridges to run in a west or east direction. Although I won't delve into it here as it's not part of the main quest, if you wish to pursue Heinrix's Companion Quest, continue south across the bridge. Be prepared for a confrontation, and refer to the provided link for more details. For the main quest, Secrets of the Cult, use the console in the center and proceed east. Upon crossing the bridge, head north to find yourself at a fork. Descend the stairs to the north and interact with the console on the eastern side to lower a bridge.
Proceed to a locked door and utilize a Multikey to open it. In the next room, discover various goods, including a Melta Ultima. You'll also have the opportunity to hack the cogitator's system after successfully passing a Tech-Use test. Continue to the next room on your right, where you'll find more goods and a new cogitator. Activate the emergency bridge lowering protocol using this cogitator.
Advance to the right wing of the building, where two chests await you, containing a Flamer Digi-Weapon ring, a Master-Crafted Power Maul, and a Krak Grenade. Prepare to face a Chaos Marine and a group of Tough Cultists. After defeating them, search the corpses to acquire the Arch-Stategist's Mant, x6 Chainaxe and x5 Carapace Chestplate.
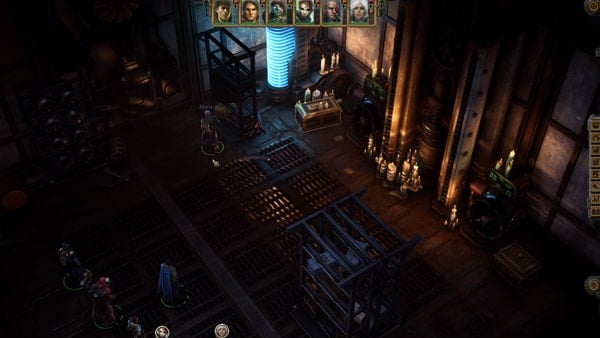
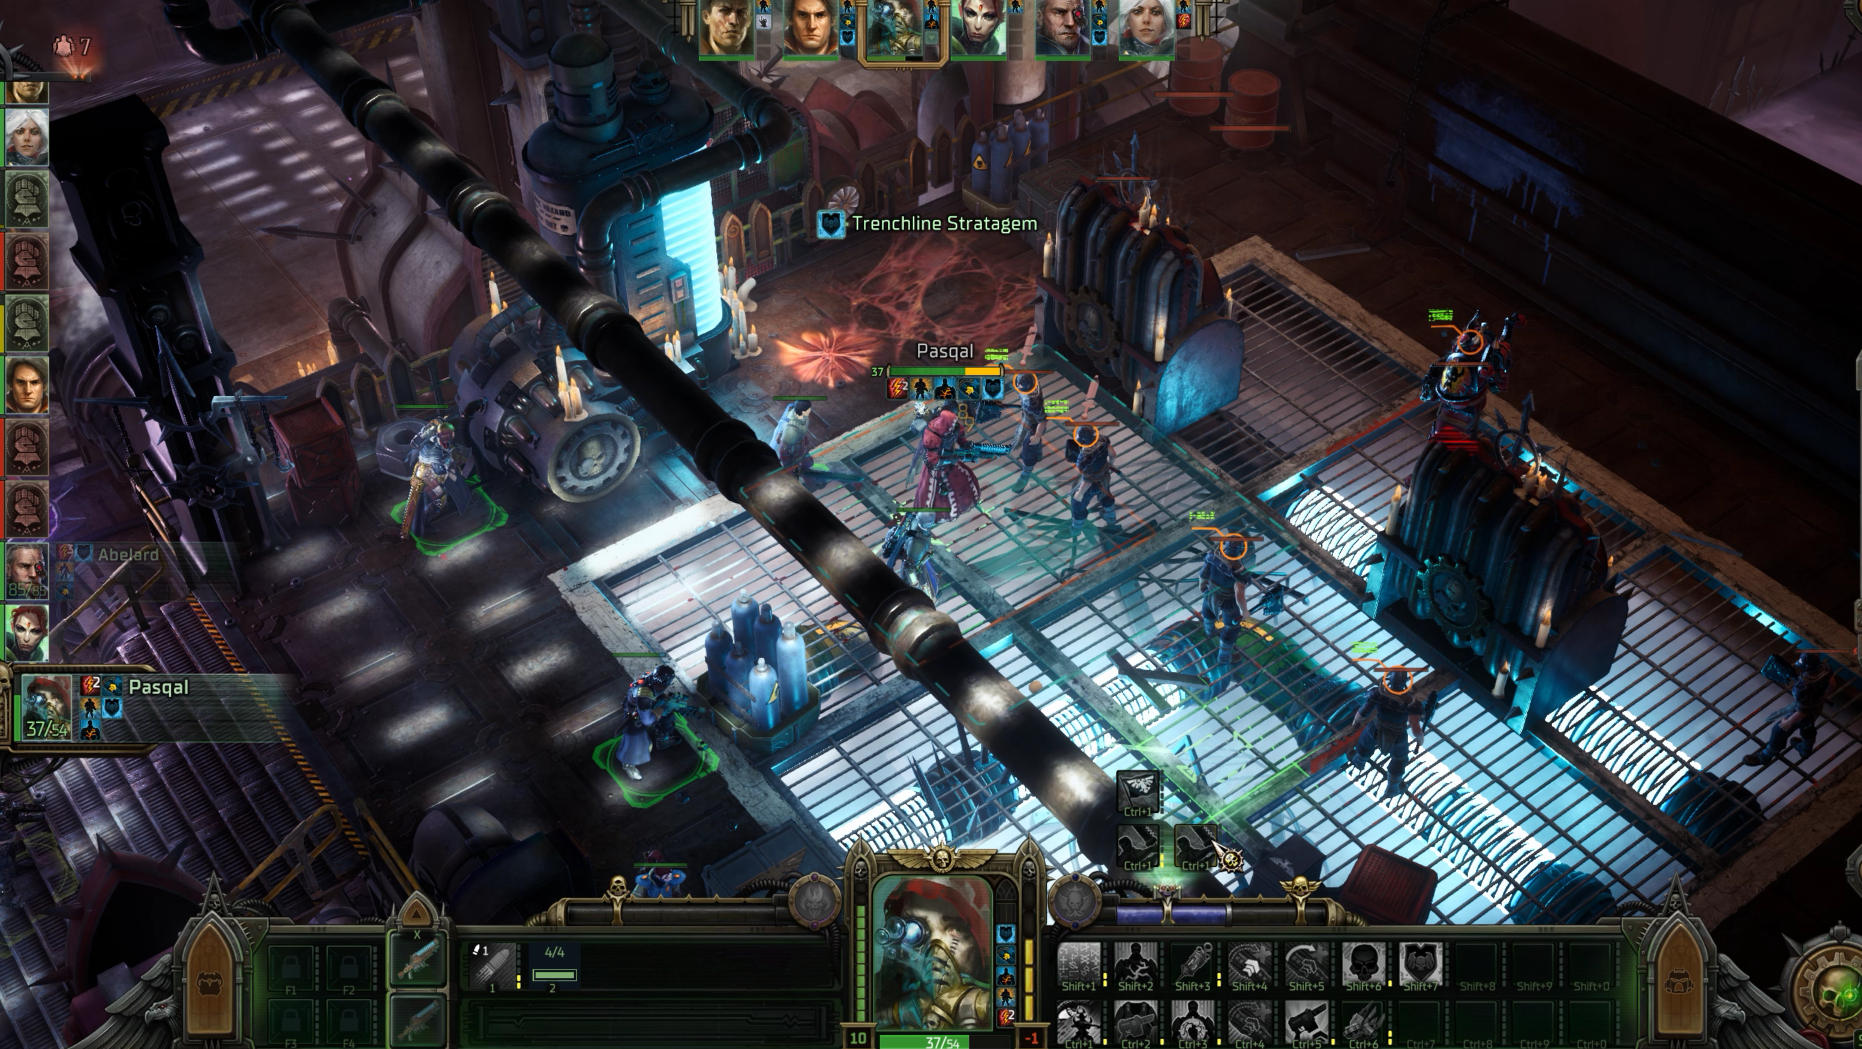
Climbing the stairs to the north will lead you into a confrontation with a Chaos Marine. Overcome this adversary, and just beyond awaits the arena of Fabricator-Censor Cubis Delphim. However, for the time being, bypass this encounter and continue exploring. Head south for a short distance and inspect the mine carts to discover a lootable Valve. With the valve in your possession, return north and enter the room to the east. Inside, loot the container for a substantial amount of cargo, then examine the console and choose the first dialogue option. This attempt to open a wall will get stuck, so use the recently acquired valve on the metal component to open the door manually. Exercise caution with the traps as you enter, but within, you'll find another console. Interact with it and request Theodora's data, which will release some poison gas. Endure it and interact with the console once more to obtain the Data-Bank With Von Valancius Coat of Arms.
After that, I suggest a quick return to your ship to neutralize the poison or toxic effects before coming back to the location of these stairs. Starting from the stairs leading to the Chaos Marine, proceed south until you reach the corner. Save your game just in case. As you continue exploring, you'll discover an Adaptive Flak Vest. Eventually, you'll encounter Dementz; interact with him and, if you choose the option 'You are a heretic!,' the battle against him and some Servitors will commence. One thing to note is the Combat Servitor poses an exceptionally high level of danger due to its nature. Delivering significantly more powerful blows and having a thick defense. The next one is the Ruststalker which normally throws a Mindscrambler Grenade that binds your characters, leaving them unable to act. Plan accordingly and eventually, you will emerge victorious. Upon concluding the battle, collect the Portable Cogitator and the [Mezoa-Pattern] Plasma Gun dropped by Dementz.
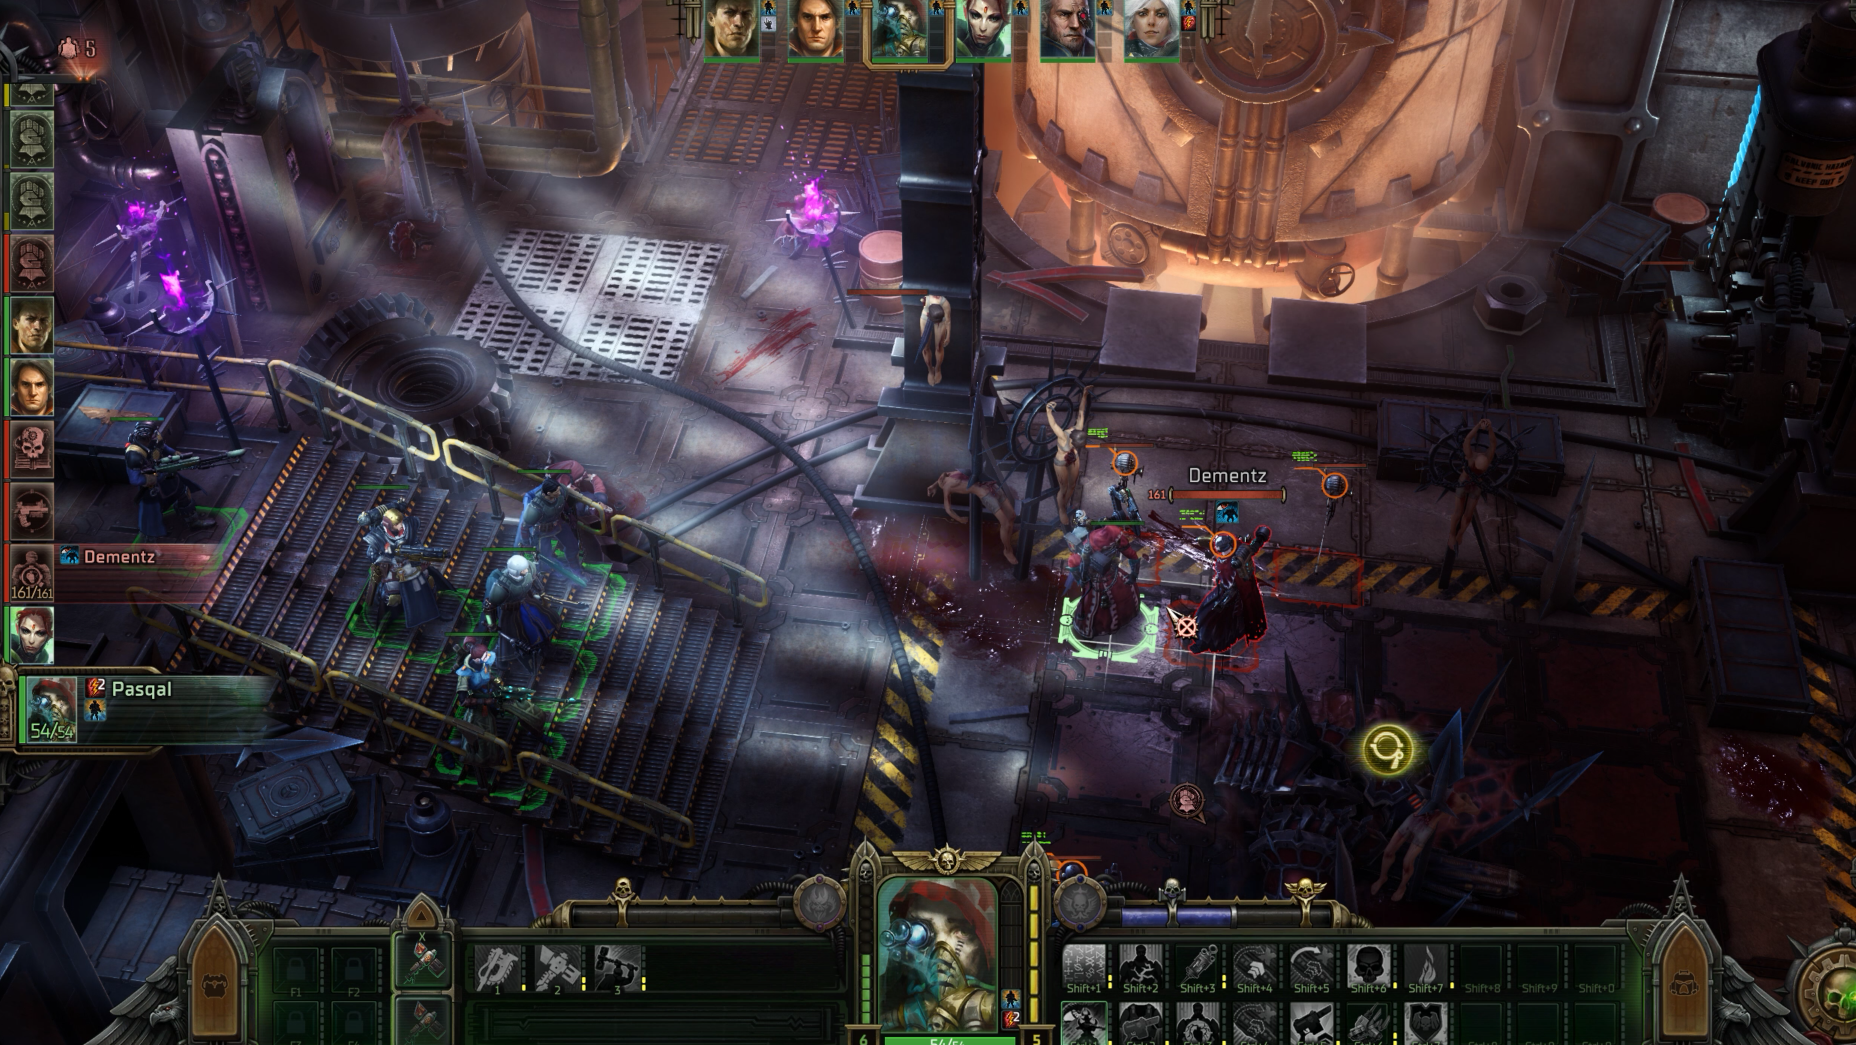
As you progress toward the bottom of the right-wing, you will find the Redemption Gauntlets. If you're inclined, you can reposition the ladder here to access the upper region, which is beyond the steam-filled area where the initial fight took place. This concludes the exploration phase. Head back north to the location where I mentioned the Chaos Marine, and ascend these stairs. As you approach the area, a dialogue will be triggered, or you can opt to initiate the fight. You will be thrown into a battle so prepare. You will be dealing with a Chaos Marine and six other minions. Following the encounter, make sure to collect the Arch-Strategist's Mantle from the Chaos Marine's body. Afterward, utilize the console located in the corner to elevate the metal beams. Proceed northward from this point, disarm the traps situated at the base of the stairs, and come to a stop. It's advisable to create a manual save at this juncture, particularly if the impending boss fight proves challenging. When you feel prepared, head east to encounter Fabricator-Censor Cubis Delphim. Be ready and brace yourself for a formidable battle.
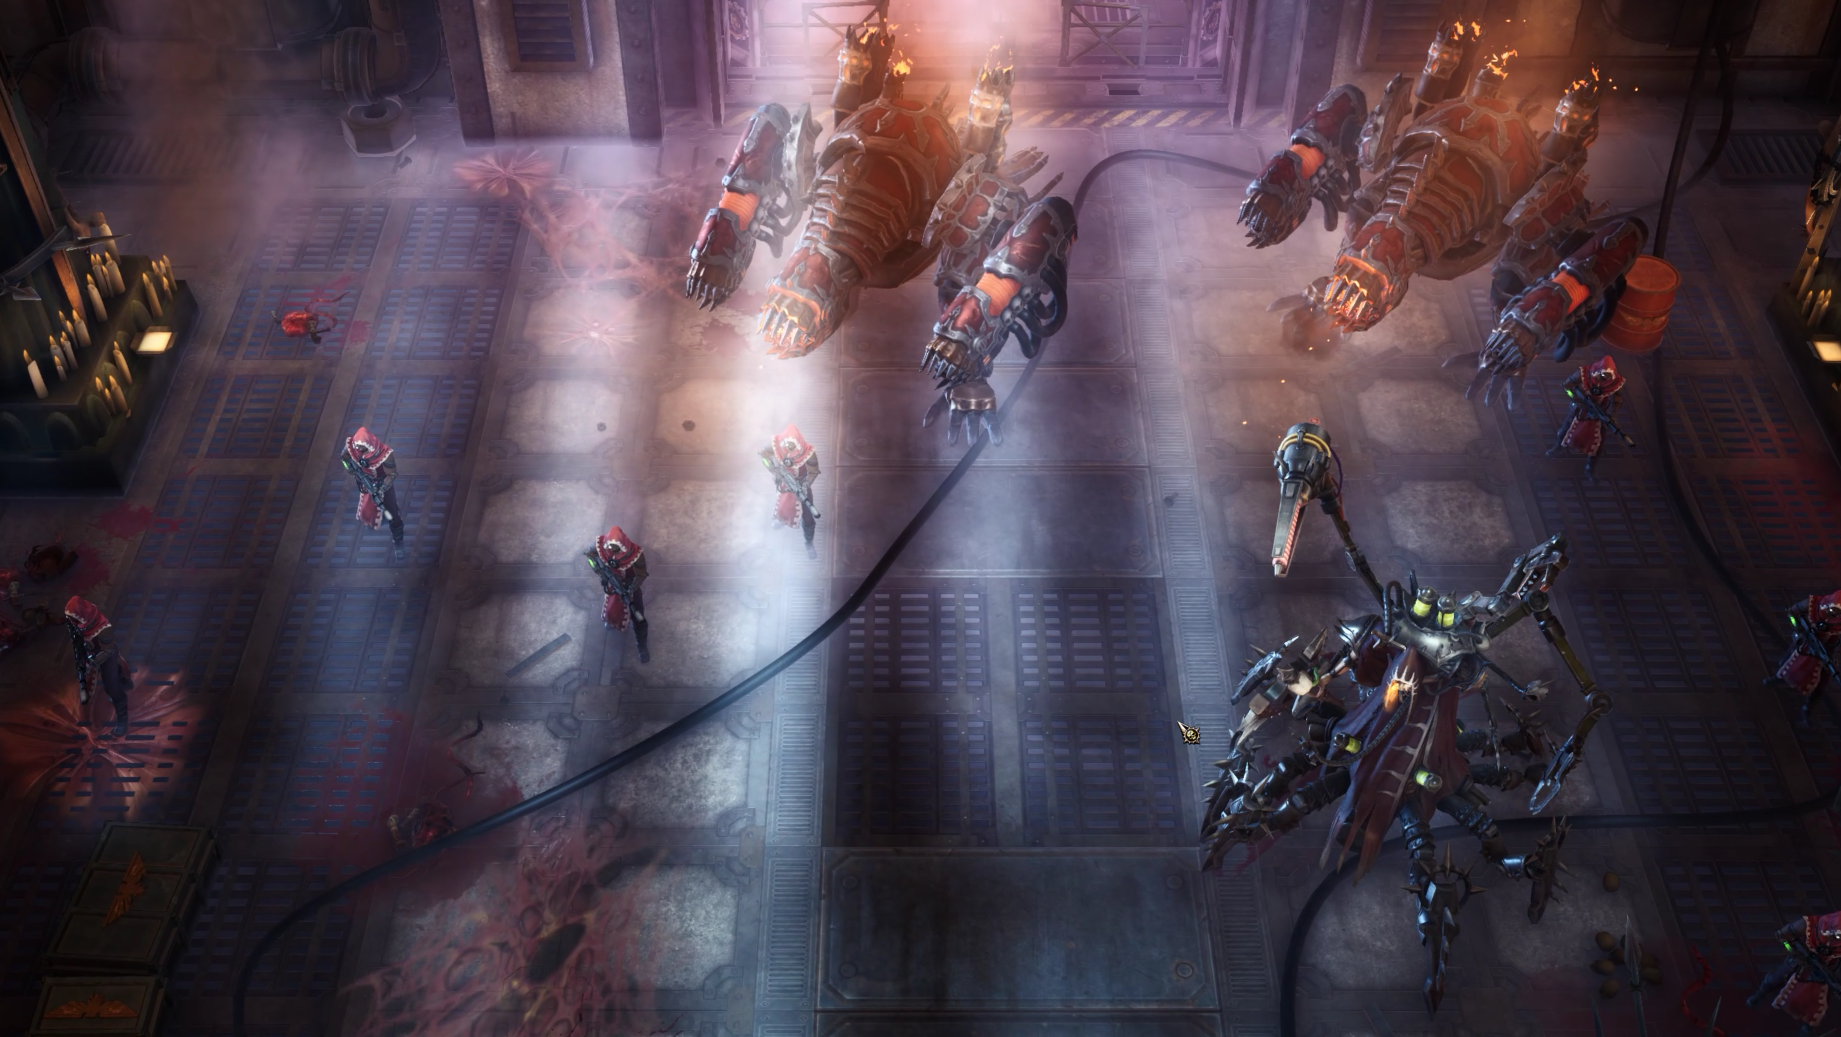
Before you start the battle, use the surrounding covers to your advantage. Depending on your setup, place the characters you think its best behind the said covers. You will be dealing with Forgefiends, Corrupted Technomats, and Fabricator-Censor Cubis Delphim. I suggest taking out the Corrupted Technomats first and the nearest Forgefiend to your party since these are easy targets to eliminate so you can mitigate some of the possible incoming damage later. Do not forget that you still have the Servitors that will help you a ton in this battle. After defeating the first set of Technomats and the first Forgefiend, head to the next batch. It is advisable to not break your party's initial formation and little by little snipe the Technomats on the other side. While in the process, Fabricator-Censor Cubis Delphim will join in the fray but as much as possible, focus on the minions first, and then once the minions where taken out, focus on Delphim. Not for long, he will go down in no time.
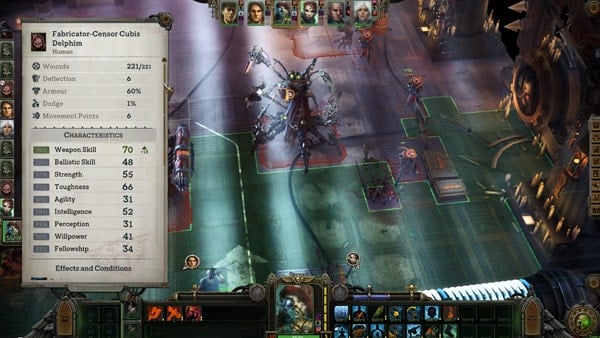
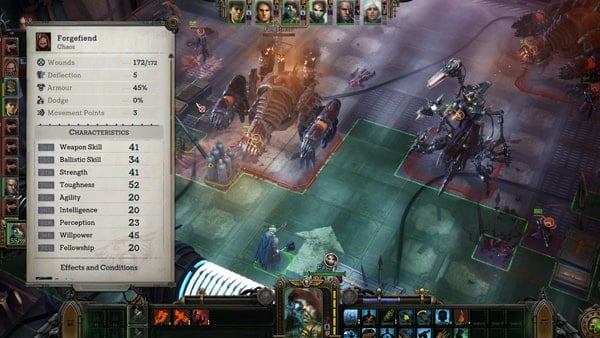
After successfully defeating the Fabricator-Censor Cubis Delphim, this quest will be updated. Be sure to loot the corpses to acquire valuable items, including a Shifting Combi-Tool, a Carapace Chestplate, a [C-Delfim pattern] Omnissian Axe and a [Mars-Pattern] Lasgun.
RETURN TO THE SHIP
As you begin your journey back, you'll pass by a few cages containing piles of human bodies. Interact with them to inspect the mutants' bodies after passing a Medicae test. After passing through the next door, engage with the massive cogitator. If you choose the option 'We need to stop the cogitator, for the sake of the people still alive down there!' you will have to face a Screamer of Tzeentch. Once defeated, a few demons will spawn.
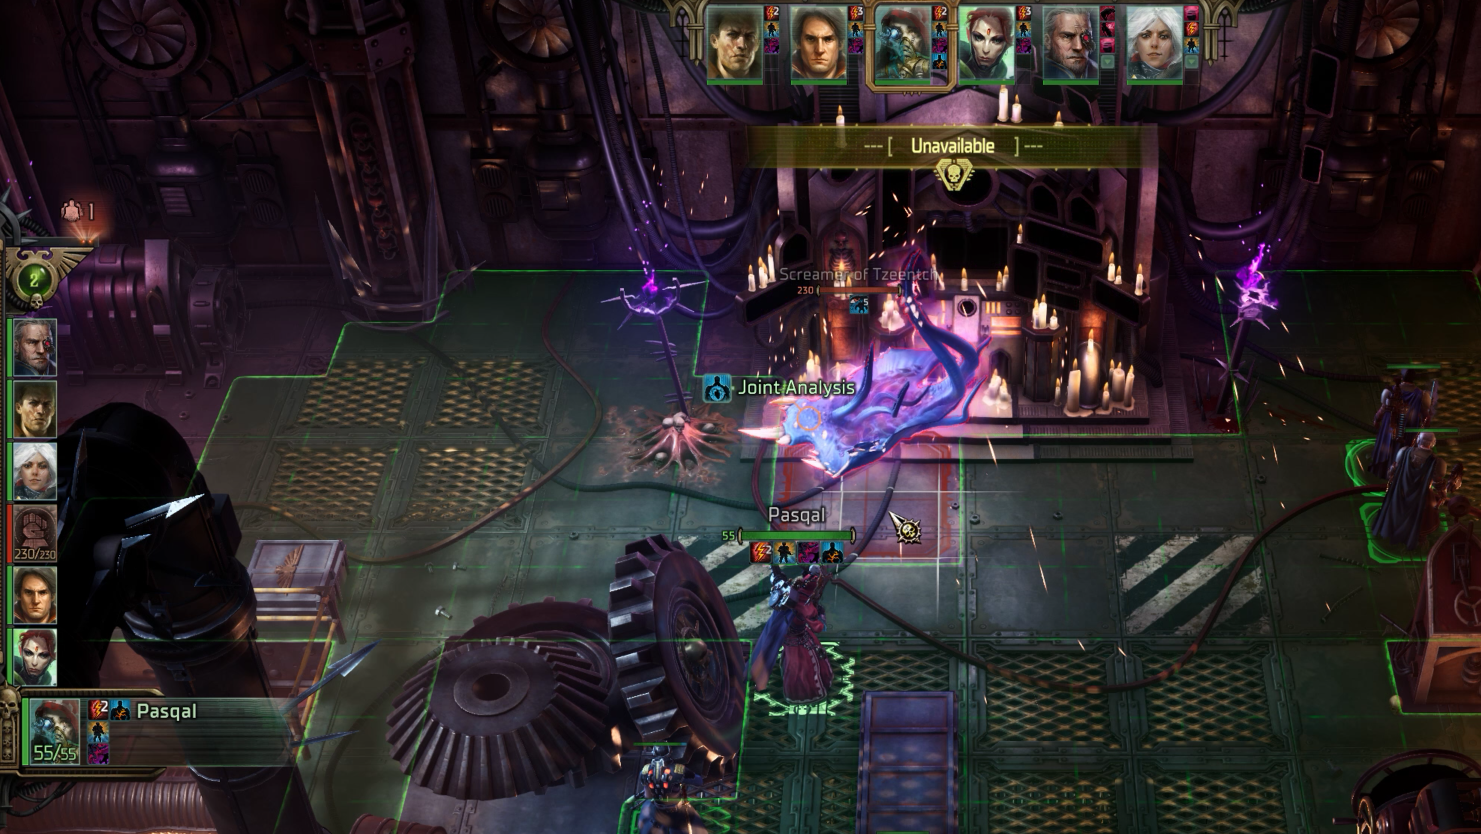
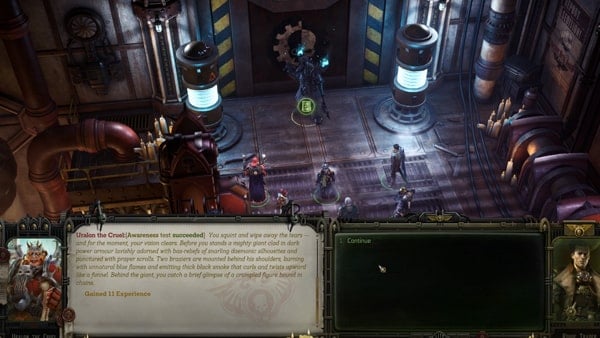
After this battle, continue forward on your path, interact with Uralon The Cruel, and then return to the voidship. This concludes the Main Quest Flame in the Dark. Take this time to rest or do your upgrades and be ready for the next quest.
Hunger's Hand Walkthrough
The Liege of Footfall Vladaym Tocara has come with a request about the station's survival. His people are at risk of starvation, and Vladaym's current patron, Calligos Winterscale, is not rushing to his aid, so Liege Tocara is seeking a new ally and protector. If the von Valancius dynasty does not help him, he will be forced to submit to the rule of the merciless Rogue Trader Incendia Chorda.
WARHAMMER 40K: ROGUE TRADER Hunger's Hand OBJECTIVES
- Supply Footfall with provisions from the agri-world Janus - Footfall is experiencing severe shortages of provisions. If the situation is not remedied soon, a dramatic fall in the station's population is likely.
ROGUE TRADER Hunger's Hand Walkthrough
For this quest, Tocara will request to supply rations to Planet Janus. You can drop by Planet Janus during the main quest "Reclaim What Was Lost" and "World Shapers". This will happen once the World Shapers quest has been completed once you leave the planet. In a set of dialogue options, select the option where you can send food to the planet's food shortage.
Tattered Spirit Walkthrough
Many of the systems on the Rogue Trader's ship have suffered damage in the battle with the cultists. The wounded ship's spirit yearns to reach the only port in the sector - Footfall
WARHAMMER 40K: ROGUE TRADER Tattered Spirit OBJECTIVES
- Make planetfall on Footfall - The dockyard is waiting for the ship in order to begin the full inspection and repairs.
- Visit the Liege of Footfall - While waiting for the ship to be ready to get underway again, the Rogue Trader is free to visit the local administration. Liege Tocara is waiting in his residence.
- Wait for the completion of the ship's inspection - It will take time to confirm that the ship is free of serious damage and to repair what damage there is. The Vox Master will report when the inspection is complete.
- Meet with officer's on the ship's bridge - To coordinate the next steps, the Lord Captain must hold a meeting with his retinue.
ROGUE TRADER Tattered Spirit Walkthrough
After the events of The Escape, head to Footfall with your voidship and dock at Void Dock Alpha-Rho. The Liege Representative will receive you at the port, but an ambush set by a local gang called the Anvers will ambush the Rogue Trader and kill the liege representative.
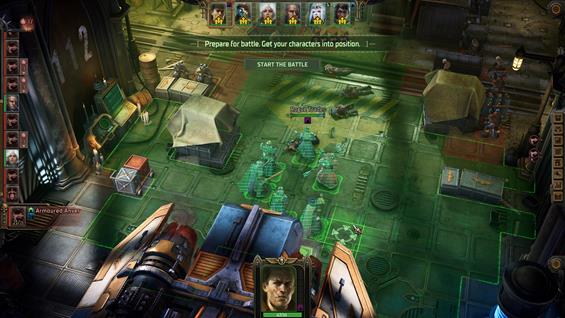
After the fight, a liege servant will approach you and head to the liege regarding your arrival. Head to the other side of the docks and leave to the Atrium.
Head to where the Liege resides. You will find Jae arguing with him, and receive the Persona Non Grata quest from her. After that short conversation, talk to Vladaym Tocara, the liege. He will mention if you decided to arrive incognito or announce your arrival at Footfall.
You can receive the Rot quest from him when talking about the Anvers gang, and Xenos on the Rampage when asked about the situation on the region. When inquiring about Xenos attacks on Footfall, you will receive the Angels of the Emperor in the Expanse Rumour. When talking about Footfall and trade, you can decide between the three available convictions. Dogmatic, Iconoclast, or Heretic when inquiring about it. You receive +3 points in the conviction you choose to pursue.
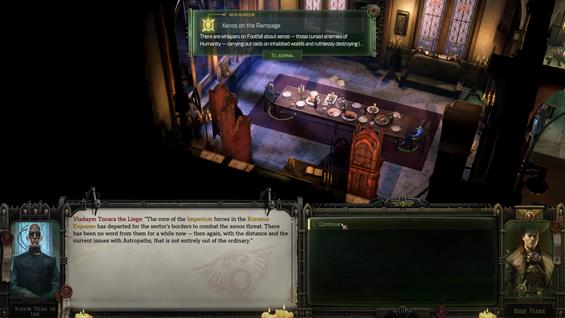
Vladaym Tocara ask the Rogue Trader about ending the famine situation that hits Footfall, thus unlocking the Hunger's Hand quest.
Players can also trade with Vladaym, as he is a representative of the Kasballica Mission.
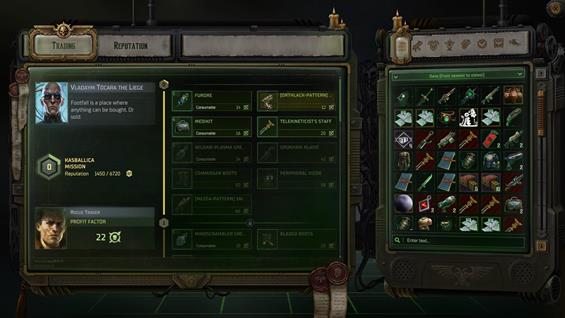
As you leave the liege's domains, Vox Master Vigdis will inform that the ship is ready. Return to the voidship and the quest will automatically end.
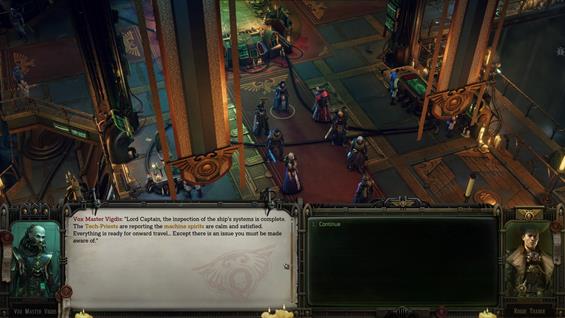
On the Hunt for Knowledge Walkthrough
The representative of the Explorator Cognisance Fleet, Opticon-22, is willing to pay for information on planets studied by the Rogue Trader.
WARHAMMER 40K: ROGUE TRADER On the Hunt for Knowledge OBJECTIVES
-
Study ten planets - Ten planets worth of scanning data from the ship's augurs is a worthy start to the Rogue Trader's working relationship with Opticon-22
-
Give the planetary data to Opticon-22 - The collected reconnaissance data must be delivered to the Adeptus Mechanicus representative based on Footfall
ROGUE TRADER On the Hunt for Knowledge Walkthrough
As soon as you arrive at Footfall, after the initial ambush, head right to find a tech-priest called Opticon-22. The tech-priest is a member of the explorators, and beside his wares, he can offer you this quest. To receive it, select the "I seek the friendship of the Adeptus Mechanicus" option. Option-22 will talk about a previous deal with the von Valancius dynasty. Confirm the payment and you will receive x2 Mobile Extractium.

To complete this quest, you simply have to scan ten different planets as you travel with your voidship. Sail to a planet and once there, select the "begin scan" option, to scan it. Do this ten times on different planets.
Return to Opticon-22 on Footfall to receive a +1 Profit Factor.
Reclaim What was Lost Walkthrough
The von Valancius protectorate has been destabilised by the disturbances in the warp and the severing of trade and transport routes. Restoring links with key worlds will provide the Rogue Trader's planets with the supplies and support they need in this time of crisis.
WARHAMMER 40K: ROGUE TRADER Reclaim What was Lost OBJECTIVES
- Restore shipments from Janus: The populations of numerous von Valancius worlds are in need of food supplies. Only the agri-world Janus has the capacity to meet the needs of several dozen planets.
- Deal with the disrupted shipments from Kiava Gamma: The industrial world Kiava Gamma provides the von Valancius dynasty with heavy machinery and a host of useful minerals not found on other planets. Controlling this industrial world guarantees the manufacturing power the protectorate needs.
- Restore the operation of the administrative apparatus on Dargonus: Dargonus is the capital world of the von Valancius dynasty and home to key administrative assets. Discovering this world will help to restore essential channels for communication and trade between the Rogue Trader's holdings.
ROGUE TRADER Reclaim What was Lost Walkthrough
To achieve the initial goal and advance in the primary storyline, "Reclaim What Was Lost," upon entering the Telikos Epsilon system, you will immediately initiate a new Main Quest called "World Shapers." Upon completing this initial quest and exploring the associated planet, it is recommended to return to Footfall in the Furibundus System.
RESTORE SHIPMENTS FROM JANUS.
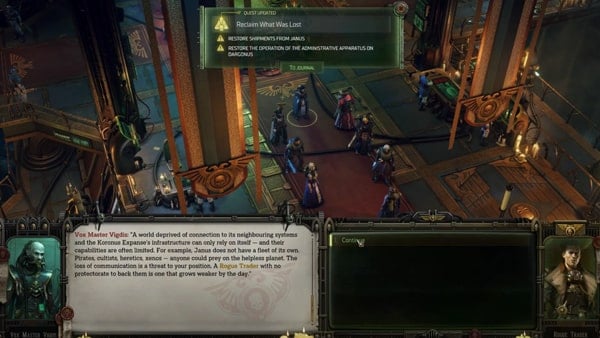
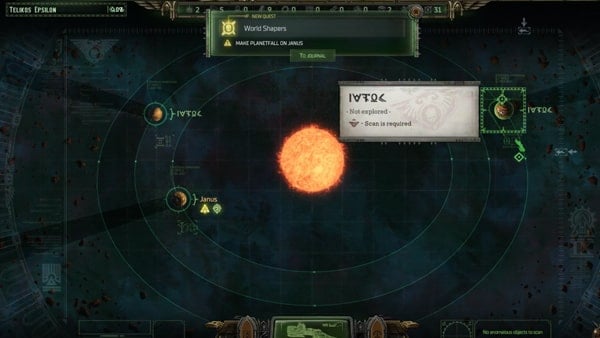
While on your way back, you are likely to encounter events involving Cassia, relayed by Vox Master Vigdis. If this occurs, it will activate Cassia's Companion Quest, titled "Stranger Among Her Own." Additionally, as you navigate the space map, you will undoubtedly receive another quest Idira's Companion Quest, known as "Echo of the Past."
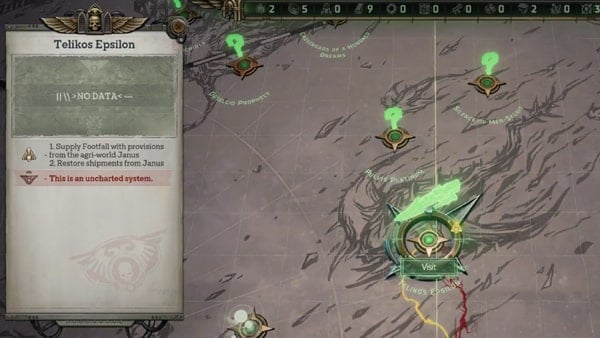
DEAL WITH THE DISRUPTED SHIPMENTS FROM KIAVA GAMMA
Now that we've addressed those points, let's shift our focus to Kiava Gamma. Locating this destination proved to be a bit challenging for me. It is situated in the Cranach System, which doesn't readily appear on the map. To reach Kiava Gamma from Footfall (Furibundus System), travel northward to Telikos Epsilon where Janus is located. From there, follow the designated route should be Orsellio Prophecy, Agathus Archides, Adermatt II, Tenebris Aquae, and Cranach. Certainly, we'll delve into the details of each system along this route, discussing what you can encounter and expect in each of them.
Within this Orsellio Prophecy system, we have planets that are relatively sparse in terms of content. One of them presents an opportunity for a skirmish against just a couple of ships that you can raid. Moving on to the subsequent system, the Crossroads of a Hundred Dreams, it offers a handful of planets available for exploration, albeit with modest rewards. The next planet on our itinerary is Pillars of Viridice, featuring a total of three additional planets. Notably, there is a planet shrouded in ice, housing an area known as the "Inquisition Shipwreck" for you to visit and explore. The remaining two worlds lack significant activity, but let's delve further into the details of the Frosted World.
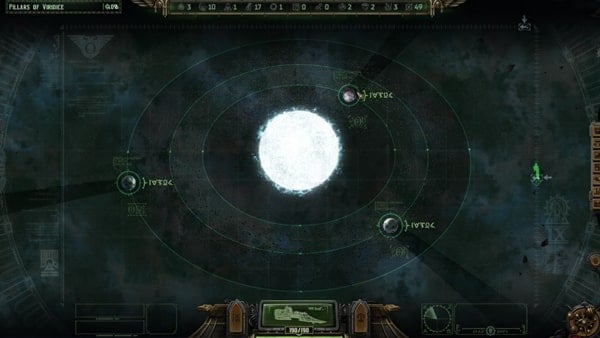
To advance through this Frozen World, you'll encounter actual scenes, while there's loot scattered around, the unfolding narrative reveals the events that transpired in this location. Progressing through the area with cages, you'll enter a hallway where a surprise ambush awaits, featuring several Poxwalkers. Accompanying them are a pair of corrupted turrets capable of unleashing deadly firepower, posing a significant threat to you and other adversaries in the vicinity. This hazard has the potential to swiftly eliminate your party members of your party with a single shot, which is undeniably perilous. It is advisable to navigate the hallway cautiously, utilizing the nearby walls as cover to shield yourself from the turrets and mitigate the risk.
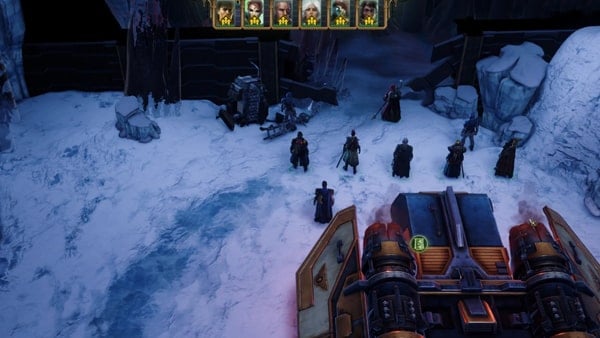
Following this encounter, you'll continue exploring, and there awaits yet another battle, the final one in this location. This particular skirmish is distinctive. Although it involves a straightforward confrontation with additional Poxwalkers, the crux of the challenge lies in dealing with an Occluding Sphere to successfully conclude the fight. The catch is that the sphere itself cannot be directly attacked. Instead, you must repetitively eliminate Poxwalkers several times. Every time the Occluding Sphere takes its turn, various types of Poxwalkers, including a Plaguebearer, are summoned into the fray. Eliminate the new spawns to complete the battle. You get to gather items in the area. You can find a key in one of the bodies that open a chest in the room before the hallway with the turrets. This chest has Inferno Pistol and Tempestus Carapace for you to loot.
Let's now shift our focus to Agathus Archides. This region offers additional planets for exploration, including a ship. Commencing with the ship, there's a minor event to engage in. While not particularly significant, you can uncover the Cargo rumor for Kiava Gamma here. To do this, when prompted, accompany Young-ho Sohn to the bridge, successfully pass the [Willpower] check, and consistently choose the top response to obtain the rumor. Alternatively, if you choose to follow Captain Venti, you'll acquire a substantial amount of cargo, which is also advantageous. Although the planets in this area appear empty, it's worth giving them a little time to gather spoils.
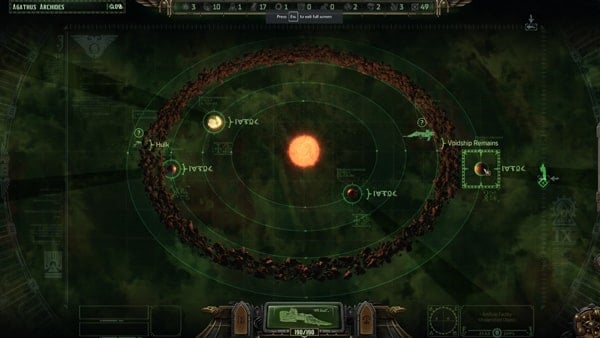
Moving on to Adermatt II, you'll find three explorable planets in this area, though they lack noteworthy content. The Recolligers' Plot, while accessible for interaction, doesn't yield significant outcomes. Entering and conversing with the occupants provides no substantial gains. The Unidentified Voidship, on the other hand, requests Flogiston, and you have the option to provide it if available. Alternatively, you can bid farewell to the voidship or even opt for an aggressive approach. Choosing to engage in combat leads to a formidable and challenging fight. However, if you decide against confrontation and simply bid farewell, you'll obtain the Pilgrim's Way rumor.
Entering the Tenebris Aquae system is the next step. Upon arrival, you'll immediately come across the aftermath of a space battle. This holds significance for Yrliet's Companion Quest, so be sure to investigate. Interact with the scene and have her analyze the xenoship. Employ [Commerce] and [Coercion] to persuade Chorda to grant you access to the area, which, in turn, will advance her quest. Additionally, on the planetoid within this system, you'll find a mirror that you have the option to take. However, it is advised not to do so. Instead, opt to destroy the mirror.
Proceeding to Cranach is our next move, and it's our intended destination! Upon entering, a brief event unfolds, initiating another main quest called "Flame in the Dark." Regarding the planets in this system (excluding Kiava Gamma), there's nothing particularly noteworthy. However, to land on Kiava Gamma, be prepared for a skirmish against a fleet of ships.
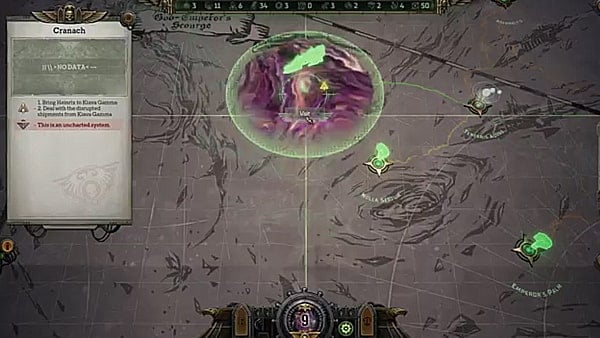
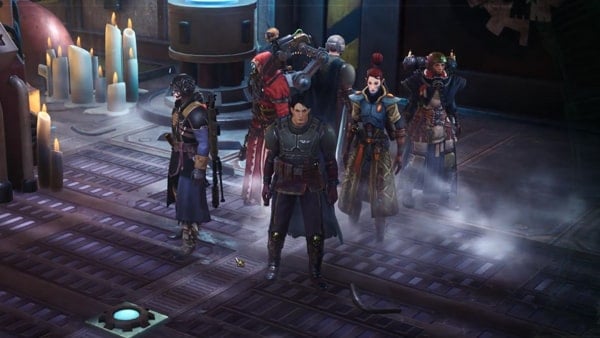
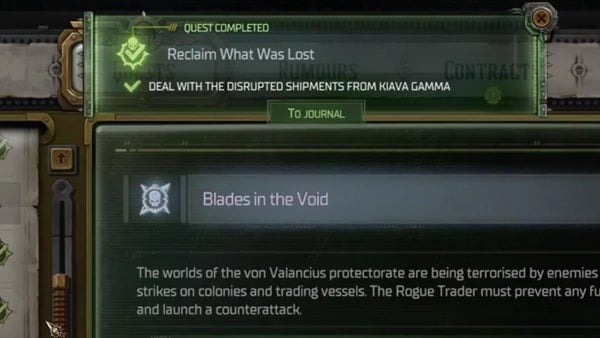
RESTORE THE OPERATION OF THE ADMINISTRATIVE APPARATUS ON DARGONUS
Congratulations on successfully finishing the earlier tasks, and now that we are done with Kiava Gamma for now, let's advance to Dargonus, often referred to as the "Von Valancius" planet. To reach it, backtrack to Telikos Epsilon, this is where Janus is located and where we previously completed the "World Shapers" Main Quest, and from there, head northward. Naturally, as we journey, we can take the opportunity to explore other systems along the way. It's essential to consistently scan for routes whenever you enter a new system.
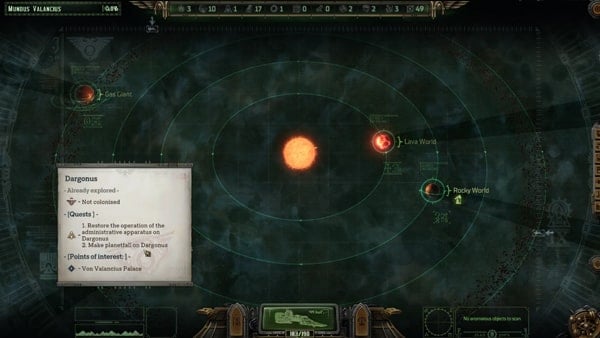
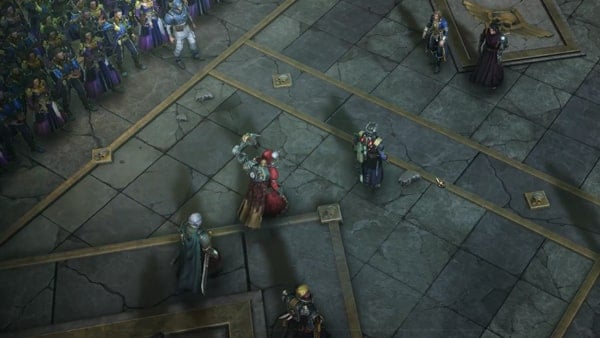
Starting with Pulvis Platinum, there are multiple space dust regions offering substantial cargo, which is a welcome bonus. Alongside a planet, you'll come across a "Gutted Voidship." Engaging with this voidship triggers a battle against several mutants. It's a relatively straightforward encounter, the primary items of interest here are a small chest embedded in the wall, containing a Distraction Cape which reduces enemy perception, and the Staff of House Cassini.
Moving on to the next destination, we have the Silence of Mer-Segrit. Within this system, you'll encounter four planets. The "Desert World" holds a notable discovery, the Archeotech Mechanism Fragment. It appears to be one part of a Mechanism. It's essential to take note of this detail. Additionally, obtaining this fragment will unveil the rumor of the Unknown Mechanism.
Now for the next destination, Langrenn's Belt. In this system, we encounter three planets, each devoid of any useful resources but featuring some scattered cargo and a Ravaged Void Station. Dealing with the pirates in the vicinity is necessary to explore the station. Notably, the station hosts one of the most substantial enemy counts. Many adversaries move in groups, and the majority are of the weaker variety, that are easy to clear out. After clearing all the enemies on the premises, completing this formidable encounter also fulfills the Hotbed of Xenoheresy rumor, initially obtained from Opticon-22 in Footfalls. In terms of loot, keep an eye out for the Ranger's Visor (providing a +10 bonus to Ballistic Skill) and any additional items from the named enemies.
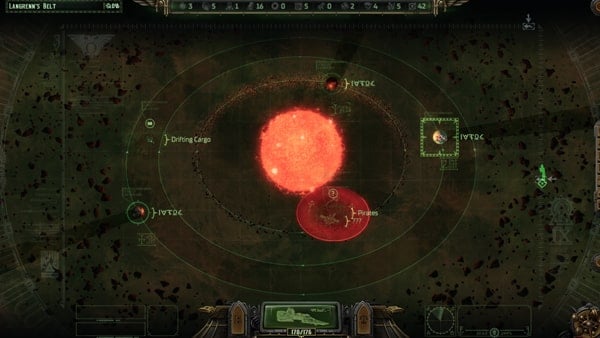
Our next stop is the Nameless Star, featuring four planets that you can check and explore and a Projection of Warp. Notably, the "Oasis V" planet houses an Ancient Bunker area for exploration. Exercise caution in this zone as it is toxic, rapidly draining your HP just by being present. However, you can effortlessly open the bunker's large door by passing a [Tech-Use] check. Opening the door, though, will fulfill the Unending War rumor. The Warp Projection event unfolds as a text-based occurrence where it appears individuals within the ship exchanged places, leading to an unexpected location. Engaging with this event allows you to gain some valuable experience points.
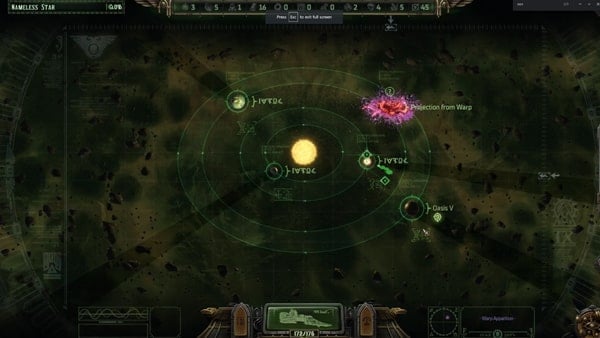
Advancing, we encounter the Forgotten Twins System, hosting a sum of five planets and signs of a space battle. The "Jungle World" has a specific request for provisions, and fulfilling it with two will grant you the Needle Rifle, an armament inducing poison on an enemy for three rounds. The space battle is integral to Yrliet's Aeldari in Distress quest. To scrutinize the region, deploy scouts. After this, our course leads us back in a northern direction.
Moving on, we come to the Mu-Rho 79 system, which consists of just two planets, both lacking any notable resources but within the "Explorator Void Station," a beneficial exchange awaits and you can provide them with two units of fuel, and in return, receive cargo along with a Mechanicus Respirator. Let's move on to the next one, which is the Latotian's Passage.
In this location, you'll find two planets and encounter some "Unknown Ships." The "Dead World" features "Unidentified Ruins" available for exploration, including a Xenos altar, albeit with limited interactions. Activating the altar doesn't yield any immediate consequences, but your entire party will incur a Fresh Injury. While not particularly impactful, it remains intriguing to witness. The "Unknown Ships" in the vicinity are, unsurprisingly, pirates. If you intend to confront them, initiating the attack yourself is advisable to seize the advantage. The next destination is Mundus Nullius and I couldn't find any point of interest that will make the trip beneficial however, feel free to explore.
Advancing to the next system, Mundus Valancius initiates a conversation with your Master Helmsman regarding your arrival at the designated planet. However, before delving into the quest, take the opportunity to explore the system. While the planets themselves may lack noteworthy content, the Adeptus Mechanicus Ship stands out. Approaching it triggers scenes where you reunite with Opticon-22, the Tech-Priest previously encountered in Footfall. Alongside him is a larger Tech-Priest named Tarzus. Despite the array of dialogue options, the outcome inevitably leads to a confrontation with Tarzus and several other Tech-Priests. After the fight you'll get a lot of lore about the Tech-Priests Once ready go ahead and loot the bodies then proceed to do the Main Quest Spiders in a Jar.
Rot Walkthrough
A new, particularly aggressive gang has set up shop in Footfall, showing no fear of either the Liege or Rogue Traders. Their thuggish behavior must be stopped.
WARHAMMER 40K: ROGUE TRADER Rot OBJECTIVES
- Find out more about the strange gang: It is worth taking a closer look at the belongings of those killed by the Anvers and searching for other evidence. The Anvers' brazen actions guarantee that they will give themselves away sooner or later.
- A note found on the body of Cinder, an Anvers leader, mentioned a location. Apparently, it's near the Adeptus Amasecus - the turn-off is visible from the bar's entrance.
- A note found on the body of one of the Anvers' leaders mentions "Sector 2"
- Visit the Anvers' base - The location of the base has been found - its entrance is somewhere in Sector 2 in the Shadow Quarters. The turn-off to the entrance can be seen from the Adeptus Amasecus. This should be enough to find the place.
ROGUE TRADER Rot Walkthrough
During the conversation with the Liege during Tattered Spirit, he will mention a slight problem that you can aid him with, in the form of a disruptive new gang. Asking him about it will officially start the Quest Rot. After you end your conversation and head out, Bastian Chorda, a member of Rogue Trader's Incendia Chorda trust approaches you and tells you to not accept the liege's offer, thus forcing him to accept the only offer remaining, Incendia's. He states that doing so will benefit both parties involved, and they will share their profits with the von Valancius house by allowing this trade to happen.
Before anything else can happen, Bastian is killed by the Anvers Gang and a fight ensues.

After the fight, you will find the Anvers' Notes from the Atrium on one of the dead bodies. These notes mention Sector 2, in the Shadow Quarters as a meeting place. (Updates the quest).

Head to the Shadow Quarters, turn left and as you reach the first house get behind it, and take the stairs down. You will eventually reach a ladder, and as you approach it, a scene will be triggered.
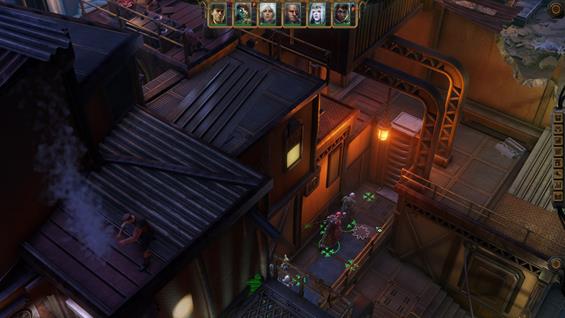
Take the ladder up and face the Anvers' crew. Once defeated, one of them will drop Anvers' Note from Cinder's Crew, which gives more direction regarding the gang's location.
Head to the area marked in the following screens, to find the door that leads to the Dark Hideout.


Enter the Dark Hideout, once inside you will find the Anvers Kingpin, as well as his retinue of guards. After the conversation, the fight starts but before that, he activates the giant fan creating a toxic cloud in the area that inflicts the Toxin effect on all party members.
Head to the Anvers Kingpin location as soon as possible to activate the fan and remove the toxic cloud.
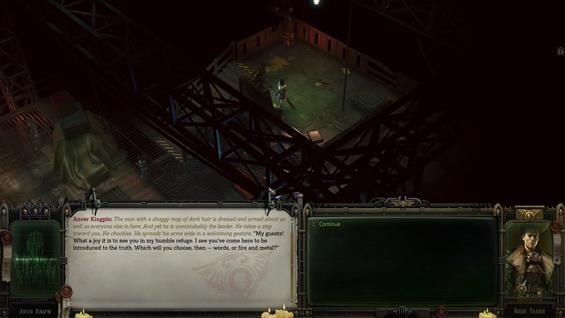
Defeating the Kingpin during the fight will complete the Quest. Players can loot the Pirate's Scarf from the Anvers Kingpin once defeated. Adrenaline Warboots can be found inside one of the crates in the area.
Spiders in a Jar Walkthrough
The capital world of Dargonus is home to the high aristocracy of the von Valancius protectorate. The power of any one of the noble families exceeds that of the colonial governor, and securing the complete loyalty of the nobility is an important step to legitimising the authority of the new Rogue Trader.
WARHAMMER 40K: ROGUE TRADER Spiders in a Jar OBJECTIVES
- Make planetfall on Dargonus - The capital world of the Von Valancius dynasty has been found and is awaiting the arrival of its sovereign.
- Talking to Achilleas - Achilleas Scalander has requested a private audience. It seems his report will contain information that must be kept confidential.
- Tell Chancellor Werserian that you are ready to receive the governor of Dargonus - Governor Drivestem, who has been entrusted to oversee the world of Dargonus, is ready to deliver a detailed report about the planet's current state of affairs.
ROGUE TRADER Spiders in a Jar Walkthrough
To formally start the quest Spiders in a Jar Quest, it automatically as soon as we arrive at the Mundus Valancius System. If you are following this guide, there is high chance that you already activated this since the Reclaim What Was Lost quest will require you to visit Mundus Valancius System.
MAKE PLANETFALL ON DARGONUS
Proceed with landing on the Dargonus planet, specifically at the Von Valancius Palace. You'll encounter scenes where nobles and higher-ranking individuals extend their greetings. Amid these interactions, you'll come across two significant figures within our dynast. Clementia Werserian and Achilleas Scalander.
TALK TO ACHILLEAS
After the unfolding scenes and when control is restored, access your map. You'll notice some of your party members positioned in this vicinity. While direct communication isn't possible, you can click on them to glean their thoughts. Additionally, there are containers on both the western and eastern sides of the area, containing only cargo. When prepared, head north towards the Von Valancius Palace. As we approach the palace, let's explore the area. Upon entry, a servant will greet you, providing information about your palace. Essentially, proceed north using either staircase at the top, head right to reach your chambers, and heading north leads you to the throne room.
For the time being, ascend the staircase and turn right to enter your chambers. Once inside, feel free to explore the surroundings and gather any loot available, and notably, you can obtain the Breezecatcher Boots from the small hole in the wall near the entrance. However, your main objective is to head south into the adjoining room, resembling a treasure chamber, for you to be able to enter, you must open the passage using the button located on the shelf next to the bed. As you settle down, several options will present themselves. Opt for the following choices. Doing this will net you the Data-Bank With Von Valancius Coat of Arms.
- Have a glass of wine
- Pour a glass of Flame of Purity
- Choose a book
- Litanies of the Motive Force
- Change the music
- The Symphony of Honour and Duty, Part 2
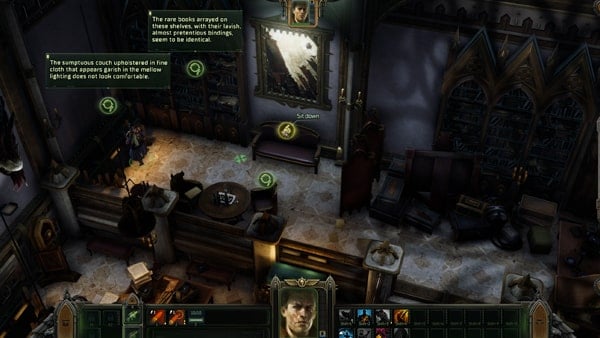
Once you're done in here, leave your chamber and head north to the throne room. Look around for your party members. Just like before you can't talk to them directly. There are some containers we can loot so make sure to do so then it's time to talk. Let's start by talking to Clementia Werserian on the northern side. There's not much to talk to her about in terms of dialogue options, but she gives you a pretty good idea about what a chancellor does and whatnot. Subsequently, initiate a conversation with Achilleas, who is near Clementia. While the dialogue options might be limited, this exchange provides valuable insights into the lives of the local nobility. Once you've concluded these discussions, return to Clementia and express your readiness to engage with the Governor.
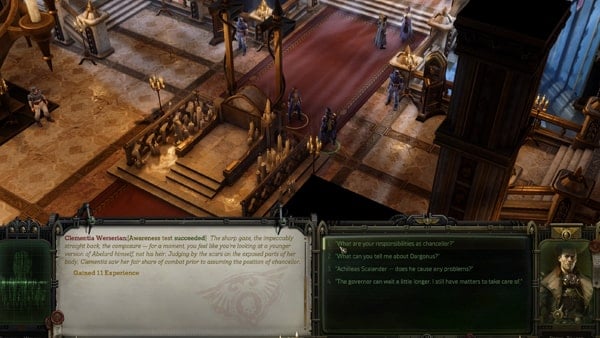
This transition will lead us back to our chambers, where the discussion with Governor Urbend Drivestem will commence. During this conversation, the topic of the outpost Vheabos VI will surface, revealing underlying issues. Additionally, the dialogue may touch upon our experiences in Janus and Kiava Gamma, assuming we've already visited those locations. As we approach the conclusion of the conversation, a new main quest will be assigned, seamlessly continuing from the current one
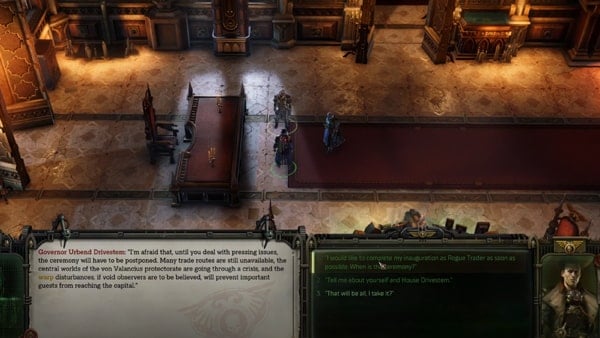
Additionally, there's a decision to be made regarding the selection of a noble house to stand beside us during our inauguration. Any of the noble houses present can be chosen for this honor. With these decisions made, the current quest, along with Reclaim What Was Lost Main Quest will conclude, making way for the automatic commencement of the next quest.
The Emperor and my Right Walkthrough
The Von Valanacius protectorate is emerging from a crisis but that means it is once again an interesting prospect for external predators. To avoid leading the major players of the Koronus Expanse into temptation, the Rogue Trader should assert his right to Theodora's legacy.
WARHAMMER 40K: ROGUE TRADER The Emperor and my Right OBJECTIVES
- Talk to the Vox Master: The Vox Master has requested an audience- the Laxmechanics report on the current situation in the protectorate is ready. Bridge, von Valancius Voidship
- Talk to the master of ceremonies: A grand ceremony is about to take place on Dargonus in the Muncius Valancius system. Overseeing the preparations is the master of ceremonies, who is waiting in the palace. Throne Room, Palace von Valancius, Dargonus, Mundus Valancius
- Enjoy the reception: The nobles of the protectorate and influential guests have gathered at a reception in honour of Theodora von Valancius's heir. The social occasion is a political event where alliances will be forged, which is why the Rogue Trader must seize the opportunities presented to him. The master of ceremonies should be notified of the end of the reception.
- Talk to Rogue Traders Winterscale and Chorda
- Order the master of ceremonies to end the reception
- Throne Room, Palace von Valancius, Dargonus, Mundus Valancius
- Have a difficult conversation
ROGUE TRADER The Emperor and my Right Walkthrough
The Emperor and My Right quest becomes available while progressing the Blades in the Void and after traveling to Von Valancius Palace in Dargonus. As you land in your palace, you will be greeted by Celestia Werserian who appears to be disheveled and will report to you about the recent Xenos attack which will also update the Blades in the Void quest. As you explore the palace and defeat the invaders, you will have another conversation with Celestia Werserian informing you that you have cleared the estate, this will add the new quest The Emperor and My Right to your Quest Journal.

You will notice that some items and goods can be picked up that were left by the invaders. You can take your time going through them and when you are done, return to the Voidship to progress the quest. You can return to the Voidship by returning to the area where you first spoke with Celestia Werserian and the prompt to return to the Voidship bridge. After the loading screen, Vox Master Vigdis will welcome you and he will be giving his report and updates regarding the estate. This conversation will also complete the Blades in the Void quest. Shortly after, he will inform you about the preparations for the Magnae Accessio- the grand ceremony of the Rogue Trader's public induction as the heir of the honorable Theodora von Valancius.

You'll have the following options to respond to the announcement:
- "Why would I need some ceremony?"
- "I have only just returned from Dargonus. What kind of celebrations can they hope to hold amid the ruins?"
- "What is this ceremony? I swear an oath, then I shake a lot of sweaty hands?"
Choosing the second option will have your Vox Master bid you not to take likely how much they want to gain your favor, and that they're already cleaning up in preparation for the celebration as you speak. The first information will affirm why you need to enact the ritual, and finally, the final dialogue choice will reveal how big of a celebration it will be and that other Rogue Traders will be present. You'll then have more options to continue the conversation:
- "Must I decide how to entertain my subjects now too?"
- "Did the Rogue Traders from the other dynasties flock to Theodora's Magnae Accessio as well?"
- [Iconoclast] "Let the poor be fed and fuel cells handed out to those in need. My reign shall begin with an act of benevolence."
- [Dogmatic] "Execute every known embezzler, scoundrel, and conman. I will begin my reign by purging my realm of vermin."
- [Dogmatic] "I wish to hear prayers and witness the people's faith."
- [Heretical] "Now what does the rabble like to see... Give out enough amasec for everyone and hold fights between tougher serfs."
- "Let them decide for themselves, both on this matter and the rest."
You can get information by choosing the first two options first if you want. Choosing the third option grants you a +3 in Iconoclast. You'll then have to choose two Companions who will accompany you during the celebrations. This may or may not affect your relationship with them. After you make your choice, your conversation with the Vox Master will end.

When you're ready to progress the Quest, head back to the Von Valancius Palace in Dargonus. Head straight to the throne room inside to speak to the Master of Ceremonies. You'll have the following initial dialogue options to start with:
- "You have been entrusted with arranging the festivities?"
- "Is everything ready?"
- "Then let us begin."
- "The ceremony will have to wait."
You can confirm his purpose, as well as the current state of preparations with the first two options, and then choose the third option to progress the Quest. You'll get 70 Experience for doing so. After you end the dialogue, a cutscene will automatically ensure that begins with an announcement made on your celebration, as well as how you chose to start your reign, like distributing rations and a personal fuel cell for the citizens. It will then proceed to show you along with your chosen Companions in the proceedings of the Magnae Accessio. After some introduction, stating some of your deeds and achievements, you'll have the following options to address your people:
- [Dogmatic] "Praise the Emperor, faithful souls! The darkness around us may be fierce, but the blaze in our hearts is fiercer still! Evil will burn!"
- [Iconoclast] "Fear not the coming day. Henceforth, you are all my charges."
- [Heretical] "Remember that you have no other ruler but me. For any who dare to forget this, the howls of daemons from the warp will sound like the babbling of babes, and xenos blades will seem like a soft feather bed compared to the horror of the punishment I'll inflict!"
- "Serve faithfully, and I will lead you to prosperity. The Kronus Expanse will enrich us all!"
The Iconoclast option grants you a +3. You'll then be asked to make an oath as the heir to your Rogue Trader empire and will have just one dialogue option to click on. After the proceedings, you'll find yourself inside the palace where you can talk to your charges and various other important people. If you head to the passageway near one of the sets of tables, you'll find Governor Urbend Drivestem addressing a group of people, including Xavier Calcazar himself. You can speak to the group to get various information as well as meet new important characters and get a feel for each of their personalities. Meeting the Inquisitor will also complete the Rumour Warden of the Expanse. You can also get various bonus points and experience depending on how you navigate your conversations. Following through to the end of Astartia's conversation can start a new Contract for Void Beacons. When you say that you're ready to receive their congratulations, they'll start giving you gifts. These will include the Severed Hand weapon, and the Coordinate Oracle helmet.

When you've had your fill of these nobles, you may head to the large room in the palace where you'll be able to find other important characters, including your Companions. You may speak to the groups of people in a similar fashion to possibly get several bonus points and experience. One of these groups consists of your guest Rogue Traders, Calligos Winterscale and Incendia Chorda. Calligos will offer you a gift for aiding him previously. Make sure to thank him through the dialogue options to actually get the Eye of Hecaton weapon. As you continue the conversation, you'll get some information about Incendia's predecessor Aspyce Chorda, who seems to have a really bad reputation.
When you're ready to complete the Quest, head to the Master of Ceremonies in the middle of this room and tell him that you're tired. He will accompany you to your chambers, which will mark the end of the celebration. Unfortunately, things are never simple and easy and your Master of Ceremonies will be knocked out by Heinrix along the way, as the Inquisitor Xavier Calcazar wants to talk to you in private. You'll have the following options to react to the incident:
- "Remind me, who are you?"
- "Will my servant live?"
- "Heinrix, I thought we were friends. But friends don't break into each other's chambers in the middle of the night with weapons, do they?"
- "If the inquisition wishes to have a talk with me - I am glad to be at its service."
- "You think you can just barge into my chambers? Are you quite mad, Inquisitor?"
- [Aim your weapon at the intruder] "If something looks like an assassination and smells like an assassination... perhaps I ought to start treating it like one?"
If you ask about your Master of Ceremonies, they'll reveal that he will live and was just not allowed to hear about your impending conversation. If you continue with the fifth option, he'll outline your recent achievements and status, giving you the following options to respond with in return:
- "This feels an awful lot like an interrogation."
- "What do you wish to know about the events on Janus?"
- "What questions could you have for me about Kiava Gamma?"
- "The Drukhari have shown an interest in me? Are you referring to my ruined capital?"
Each of the topics for options 2-4 will have subsequent discussions you'll have to navigate. You'll get an inkling as to how the Inquisition works and the negative position you have as someone who has inevitably inherited all of your predecessor's mistakes and all that she had allowed to fester in her colonies. The fourth option will reveal that you are being accused of something even bigger. These accusations will lead to slight blackmailing, which is a surprising turn of events, considering how straight-laced Xavier seems. You'll have the following options to respond with:
- "Theodora cooperated with you?"
- "Why such an interest in my person?"
- "Blackmail? To what end? I am a Rogue Trader, and this is a flagrant violation of my privileges."
- "Is Heinrix staying in my retinue? Or are you taking him back?"
- "What kind of a deal are we talking about?"
If you choose the first option, he'll straightforwardly tell you that she did indeed and that even Idira Tlass's existence is something that he merely allows. The second option reveals that the other Rogue Traders have become preoccupied with other things so you and the Inquisition stand to be the only protectors of the expanse. If you choose the fourth option, you'll ultimately have the choice to either let Heinrix go or have him continue as your party member. When you finally choose the fifth option, you'll be gifted with the White Signet of the Inquisition. When you accept the gift, and therefore the deal, The Emperor and My Right will finally be complete.

Underworld Walkthrough
A strange ceremony is taking place in the heart of Footfall. What will happen if the Rogue Trader decides to join the proceedings?
WARHAMMER 40K: ROGUE TRADER Underworld OBJECTIVES
Find out what is happening at the strange ceremony - A strange gathering in the centre of Footfall is raising questions. The Rogue Trader wants to find out what is going on.
- The Ceremony turned out to be the funeral of an honourable gentleman by the name of Bellardo
- Idira senses growing possibilites, but also growing danger.
- The honourable Master Bellardo turned out to be a former pirate by the name of Jerrycan Denz
Uncover Fidelio's identity - Who is the mysterious final guest everyone is waiting for at the ceremony? The answer to that may be the key to understanding what is happening.
- People definitely want Fidelio dead.
- Chaplain believes that all the clues to Fidelio's identity have been found. Only one step remains - to unmask this mysterious figure...
- Someone - possibly Fidelio - left a strange note in the book of remembrance.
- The word "repentance" could have some connections to the Fidelio mystery.
- The Administratum Clerk promises to provide you with documents made out in the name of Fidelio if you help him rescue some valuable cargo from the crematorium's furnace.
- Fidelio is the heir to Denz Bellardo's riches.
- In the last months before his death, Denz raved about "dead eyes" watching him.
Settle the inheritance question.
- Denz Bellardo left a sizable estate behind. The Rogue Trader has the chance to step in and influences who inherit the lot.
Return and demand answers
- It seems the ceremony guests were trying to kill Fidelio, whom they believed the Rogue Trader to be. The Lord Captain should return to the crematorium and demand answers for these actions.
ROGUE TRADER Underworld Walkthrough
PLAYING ALONG AS FIDELIO
Past Hieronymus Doloroso area, to the southwest of Footfall's atrium, there is a large gathering, as you head there, a scene will automatically start. A NPC called First Mate Daggen will greet you as Master Fidelio. You can play along or identify yourself as a Rogue Trader.
Play along to enter the celebration. The chaplain will give a speech, and you will regain control of your party.
Interact with the coffin. Abelard will point out that Bellardo, the deceased, was a famous pirate in the region. This will update the quest. Sister Argenta will remember Master Bellardo, as being mentioned by Hieronymus Doloroso as one of the biggest donors to the temple.
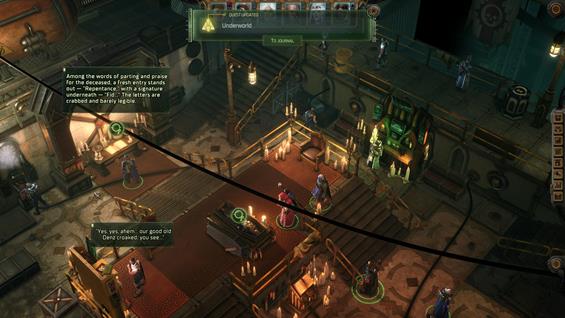
Inspect the book of Remembrance on the other side, to update the quest once again.
Head to the backside to detect a trap, disarm it and enter through the back door.
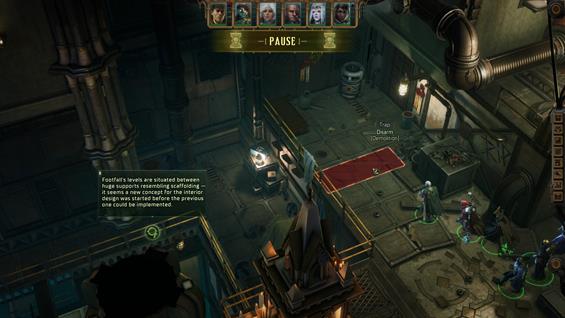
As you attempt to enter, the clerk will meet you there and ask for your help. He replaces the implants of the deceased with identical replicas and sells the originals to make some profit. The problem lies in that Bellardo's implants are in the crematorium's furnace. Agree to help him to update the quest. You will also receive the Hidden in the Furnace quest.
If you tell the clerk that you are indeed Master Fidelio and want a copy of every document that has your name on it, he will comply, and the quest will update.
There are a few other NPCs the Rogue Trader can talk to learn more about the situation and also update the quest. The Chaplain will update the quest regarding the inheritance. Near him, you can find Adelia, Master Bellardo's granddaughter, crying behind a big box. She will tell you his father, and Bellardo's son, Kas Bellardo is also in the ceremony. Keep talking to her to update the quest when she mentions the "dead eyes" always watching him. She also says that she didn't write in the book.
Kas Bellardo can be found at the other way of the ceremony, he isn't as affected as his daughter, and he will tell you a little more about the repentance situation.
Head to the crematorium. Loot the area first and then pass the Athletics check to enter the furnace. Loot the box on the side, and as you do, the door will close with the whole team inside, and the furnace will start burning you alive.
Between the belt and the furnace, you will notice a breakable area. Shoot it to create a path and get there as soon as possible.
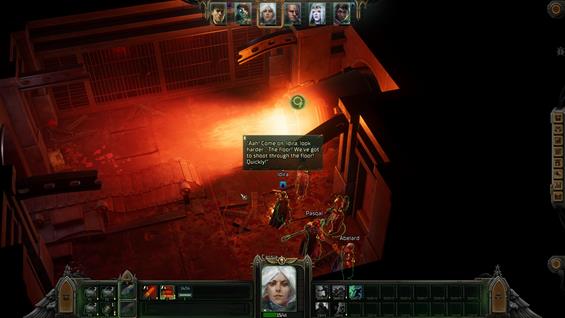
The party will fall down to the sewers, where a few vagabonds will help you up. In the sewers, there is nothing remarkable to be found. Explore the area until you find the stairs that lead to a warehouse.
Head to the warehouse and fight the clerks and servitors. As in the sewers, there is nothing incredibly remarkable to be found here. Leave the area and return to the ceremony.
As you enter the ceremony area, all guests will point weapons at you. First Mate Daggen, and Kas Bellardo, decide to unite forces to fight against you because the deceased has decided to leave his fortune to Fidelio. This leads to another fight.
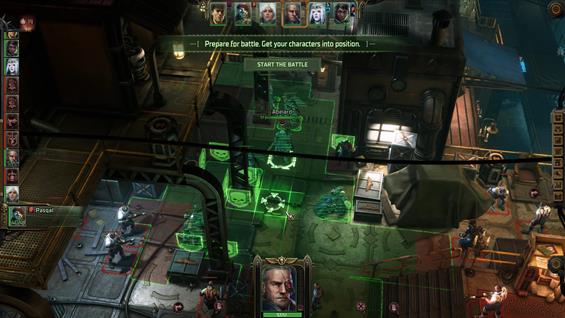
Once the fight is over, you can decide to treat their wounds, kill one Daggen or Kas, or kill both of them. You gain +3 Profit Factor after winning the fight.
By killing both of them, you receive +1 Profit Factor and are considered Fidelio, since no one has identified as them, thus receiving the inheritance.
IDENTIFYING AS THE ROGUE TRADER
If you identify as Von Valancius as you start the quest, things can go differently. Both Kas and First Mate Daggen will ask for your assistance regarding the inheritance. You can also notice that the person overseeing the event, ordered the servitors to remove the Amasec for the guests. By passing an Awareness check, you will notice that they have been poisoned.
You can also loot the chest on the far side of the area, if you identify yourself as Fidelio, it will explode before you reach it. The clerk situation regarding the crematorium is not available if you identify yourself as the Rogue Trader.
Talking to the Chaplain will reveal that Denz suffered a serious attempt on his life 12 years ago, and that Fidelio could possibly be the attacker. Apparently, Denz had burned her husband or father, according to the Chaplain. Thus, he decided to left her his fortune as an act of repentance.
After this, you can identify Fidelio as a different looking servitor found near First Mate Daggen. Talk to the servitor and select the Repentance option. You will learn that Fidelio is actually related to the incident mentioned by the Chaplain. Bellardo sent assassin's after she attempted to kill him, twelve years ago and made her into a servitor.
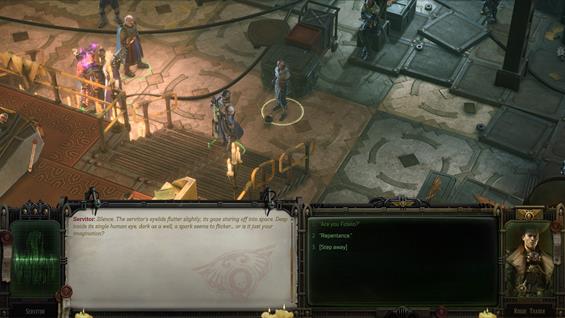
You can decide to kill all the guests, spare Kas and kill only the pirates, or decide to leave all in the past and don't fight. in that case, you will have to decide who inherits the fortune.
You can decide to talk to the Chaplain and determine who will inherit the fortune. There are four options and they are as follows:
- Ask for Fidelio to show herself - By selecting this option, nothing will happen if you haven't uncovered her identity
- Leave the inheritance to Adelia, Bellardo's granddaughter. (Requires Iconoclast: Follower). You earn +7 Iconoclast Conviction by selecting this option. Kas is killed by a servitor after attempting on his own daughter life and the quest ends.
- Leave the inheritance to his son, Kas Bellardo.
- Leave the inheritance to First Mate Daggen.
When the Shadow are Deepest of All Walkthrough
Part of the Shadow Quarters, the poorest asteroid in Footfall, has been placed under quarantine. The authorities suspect an outbreak of disease or an infestation of parasites.
WARHAMMER 40K: ROGUE TRADER When the Shadow are Deepest of All OBJECTIVES
Assess the Situation - It is vital to keep an eye on any potential threat. The local inhabitants or the Liege of Footfall can provide more information.
- There are people still inside the quarantine zone and no one is prepared to help them.
Deal with the Mutants - It appears the source of the contagion was a population of mutants hiding in the backstreets of the Shadow Quarters. Eliminating them will wipe out the disease's breeding ground.
ROGUE TRADER When the Shadow are Deepest of All Walkthrough
Talk to the fire team located in the shadow quarters to learn about a quarantined area. They will not let you pass.
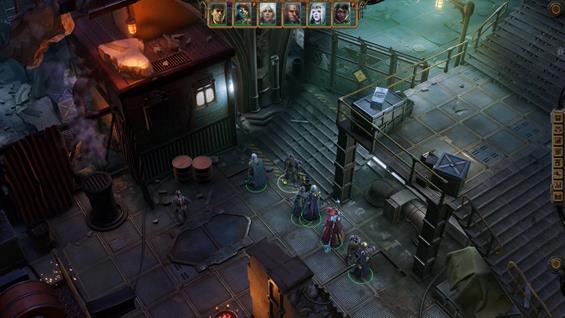
Return to the Liege and ask for passage.
After completing one of the three worlds (Janus, Kiava Gamma, or Dargonus), players will have access to the area.
Explore it and they will find the mutant's lair, located on the southern side of the district (where the team is located in the following picture)
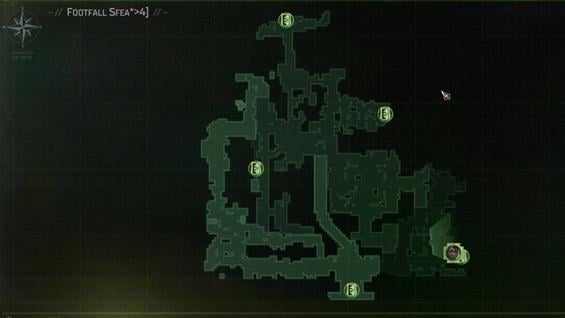
Enter the lair to fight the mutants. Once dealt with, the mission will be completed.
After the fight, players can find Imperial Pride, a two-handed bolt, on one of the bodies. There is also a box that contains an item called Pack of Reagents
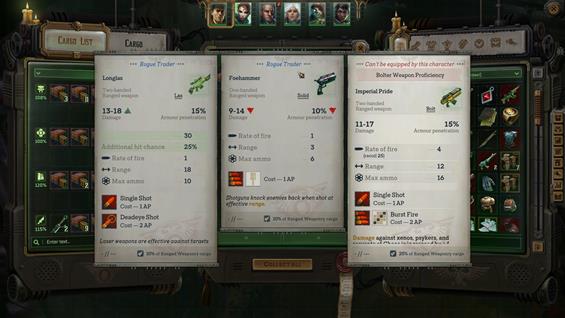
World Shapers Walkthrough
The agri-world Janus is a key source of food for planets in the von Valancius protectorate. The Rogue Trader should do everything possible to reintegrate the planet into Koronus Expanse economy quickly.
WARHAMMER 40K: ROGUE TRADER World Shapers OBJECTIVES
- Make planetfall on Janus
- Fight off the forces attacking the Estate
- Visit the Governor
- Gather more information about the rebels
- Find leads to track down the rebel leaders
- Conduct the Search Operation from the Voidship by Scanning the Planet
- Track down the rebel leaders
- Return to the Governor
- Return to the Ship
ROGUE TRADER World Shapers Walkthrough
This quest begins in chapter 2 as players are invited and welcomed to Janus and it becomes available for travel once you enter the Telikos Epsilon system. Your first objective for this quest will then be to see it through and accept the invitation by traveling to Janus. The governor will personally welcome the Rogue Trade at a ceremony.
- Make planetfall on Janus
The governor of Janus is looking forward to the Rogue Trader's visit, where she will personally welcome him at an official ceremony.
Travel to Janus to fulfill the first objective of the quest. Upon landing, Vistenza Vyatt will welcome you on behalf of the noble House Vyatt ab Aram. As you continue the dialogue, choose any response. Eventually, a cutscene will interrupt.
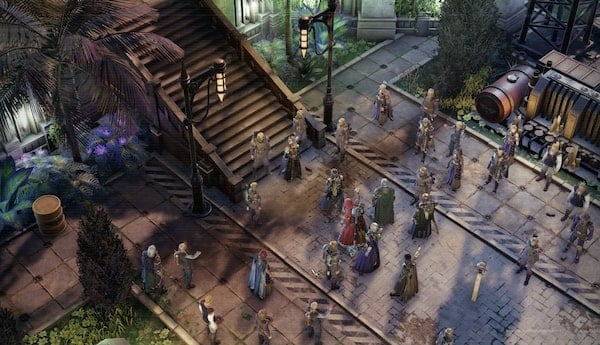
- Fight off the forces attacking the Estate
The cutscene shows a scene of the ambush. A combat interaction will immediately begin. There will be few opponents for this first fight, so it should be quick and easy to clear, but get ready for the combat encounter that follows. Watch for any incoming opponents from the edges of the area. Following the completion of the first fight, another will soon begin. As they approach, you can use your ranged attacks on those further out. Complete the fights to complete the objectives. A dialogue will soon immediately follow the combatant the quest will be updated. You will have the option to kill the officer in this location for his incompetence in keeping the safety of this event you can also choose to follow the Estate Warden who will offer to escort you to the governor. Choosing this option will begin the next scene.
- Visit the Governor
If you choose to follow the warden, you will find yourself in the governor's palace in Governor Vyatt's Estate. Here, you can open the door on the left to find the governor.
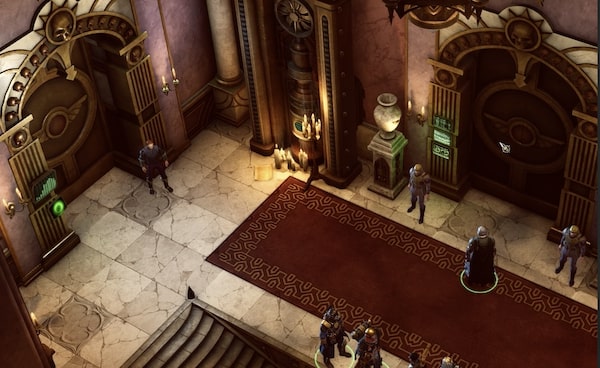
Choose how you want to respond. There will be an option to respond aggressively and remove her from her position or to press about the previous events. She will want to know who was behind the ambush by searching for any survivors from the attack. This will update the quest.
If you continue talking to the governor, eventually, you will also be able to ask about her companion standing by the governor. If you bring it up this will begin another quest: The Governor's Aide.
- Gather more information about the rebels
Additional information about the rebels causing unrest on Janus will help to narrow the search for the rebel leaders'' base and speed up the process of pacifying the local populace.
![]() The coordinates of the attacks indicate a definite vector of movement for the rebels, making it possible to narrow the search area
The coordinates of the attacks indicate a definite vector of movement for the rebels, making it possible to narrow the search area
- Find leads to track down the rebel leaders
The governor has suggested starting the search of the rebels' base by questioning the servants and other witnesses to the assassination attempt. It may be possible to extract key information from the conspirators themselves(regardless of their vital status)
Leave the palace and there will be four quest markers on your map you can approach, marking the people that will progress the quest. You will need to interact with 5 characters. One of them will not be marked on the map. Look for the following:
- Atilius Quint: When interacting with Atilus, you'll have the option to take a [Dogmatic] approach where you claim that you have uncovered the servant who betrayed the governor. Other options will allow you to ask to find out more information about his background and Janus. Ask him about the rebels and where they struck and you could trigger a new Rumour quest: Unending War.
- Vinzelex: Vinzelex will be in a red cloak by a chest of goods. Ask about Janus and find out as much as you can about his background. Get through the conversation to complete this part.
- Yrliet: Speaking to Yrliet will complete the Governor's Aide. During your interaction, there will be a few aggressive options when speaking to her. You can avoid this to avoid trouble and ask her questions to find out more about her background and about the uprisings on the planet. Eventually, you will have the option to ask her to join you. 'If you want you can join me. None of the locals will dare to look askance at you in the Rogue Trader's presence. You will also have a [Dogmatic] Attack option, which will cause her to leave. If you ask her to join you, you will be able to view all her abilities and the option to choose your party members will appear.
- Security Officer: The Security Officer can be found in a building. You will need to use Coercion, Awareness, Strength, Tech-Use to get inside and properly interact with him by either breaking down the door, picking the lock, introducing yourself as the Rogue Trader or Examining the door. You have the option to allow him to kill the rebel he has in the building or get inside anyway. If you manage to get in with the rebel still alive you can also interact with the Wounded Rebel. This will allow you to gain more information which will complete the objective 'Find leads to track down th rbeel leaders. You may need to pass additional Persuasion and Coercion checks in order to gain more information. With the Security officer, you have the option to let him go, take him into custody under your protection, or execute him before you end the dialogue with the following:
- Old Servant: The old servant will not be marked on your map, but you will need to speak to him to find out more information and continue. When interacting with the servant, he will immediately react as you approach and you will have the option to execute him or continue to press about his thoughts on the governor using either a Dogmatic, Iconoclast, or Heretical approach.
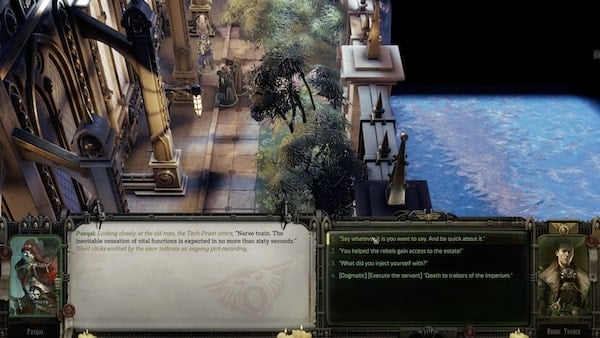
Speak to these characters and you will be able to ask a few questions and sometimes have a few hostile options. Go through the conversation and complete the dialogue. When you've successfully completed your interactions, the quest will be updated. You will have successfully Gathered more information about the rebels and found leads to the rebel leaders.
- Conduct the Search Operation from the Voidship by Scanning the Planet
A vox with recordings of the rebels' conversations will make it possible to launch a large-scale reconnaissance operation. The Rogue Trader must return to the ship to engage its systems in the search.
Return to the voidship. Yrliet will strike a dialogue interaction. Complete the dialogue and the next scene will continue and will take you into the Forests of Janus.
- Track down the rebel leaders
The information obtained during the operation has made it possible to pinpoint the location of the rebel leads on Janus. The rapid deployment of a small team and armed reconnaissance on the ground will solve the rebel problem on Janus for good.
Head out to the Forests of Janus (Janusian Jungle). Head north to map out the area. There will be a path that branches out west. You will need Athletics to drop down. This will lead to the rebel camp. You can choose to avoid the battle or clear them and take the loot nearby, but we will return to this location. The location of this rebel camp is on the map below.
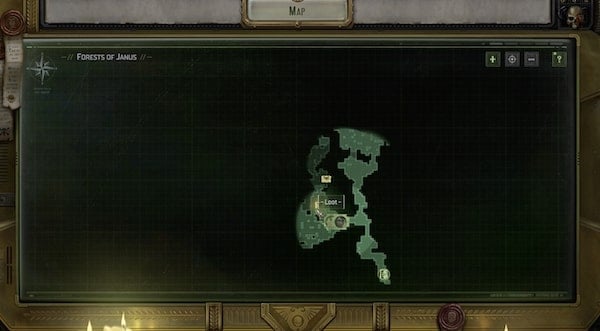
You can clear this rebel camp now or later, since we will be coming back to this location. If you wish to avoid the fight, head back up and continue north. There will be other rebel camp battles and wildlife encounters scattered through the jungle. From here, you can continue to head north. If you head back on the original path, you will eventually come across a river and a plank bridge.
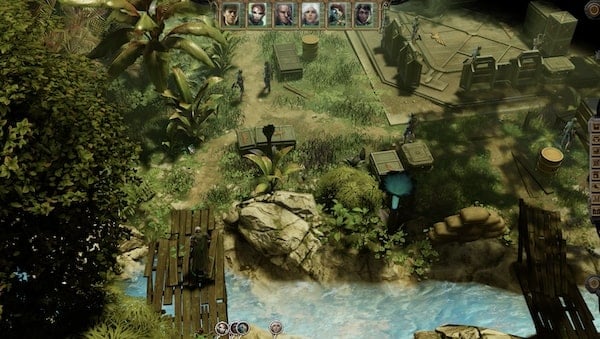
Just across the bridge is a rebel camp. A battle will begin when you approach. Clear them out to continue on the path. Loot the area before you move on and keep heading north. Past the waterfall north of the camp there will be a cliff that can be climbed by the group with Athletics and another crossing just opposite the cliff. There will be a plank bridge that will help you cross the river to reach this cliff.
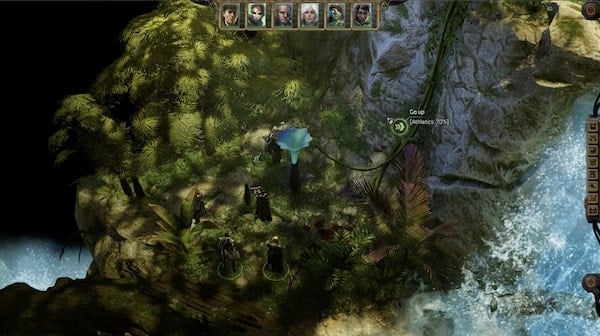
Just above the waterfall, there will be a mutilated body you can observe. There won't be much else to see so you can head back down and head take the path across the cliff. Mind your step since just across the crossing, there will be a trap ahead that needs to be disarmed. Get past the trap and continue.
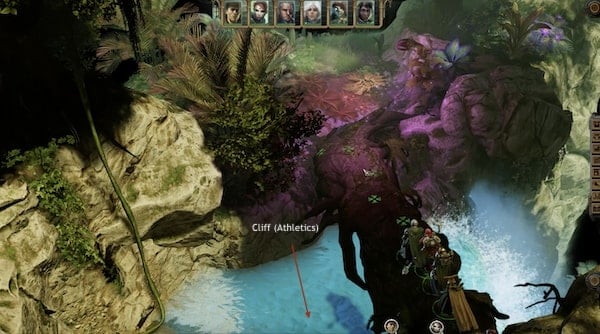
On the map you will find your location here:
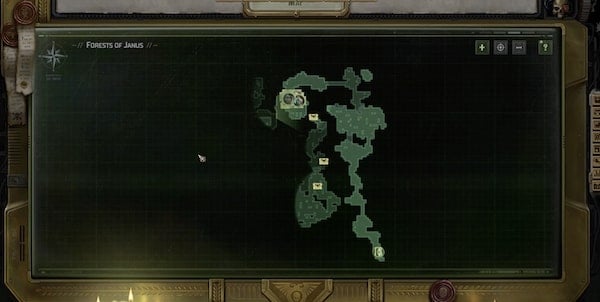
It will take you to an open area and an examinable vox-tower. If you enter this clearing, get ready for battle. against a few Janusian Lacerax one of them is the Alpha. Try to keep a distance for the start of the fight so you can start with your ranged attacks. Watch your back for this encounter. Focus your attacks on two of them at a time so you can focus your energy on the remaining two once they're cleared.
Clear the fight and you can continue. There will be a Goods bax on the other side of some rocks. You will need to pass a check to reach it and open it. With the area now safe, you can also loot the rest of the arrow. Now that you've gathered all the loot in this area, you can head back down the same path and this time, return to the location where the path branches off west where the initial rebel camp is. If you previously cleared this area, this should be clear for you to pass.
Following the rebel interaction, Yrliet will engage in some dialogue, but you will need to keep moving. Get through the interaction to continue. Loot the area. The loot boxes will be marked on your map. Be careful of any traps as you continue. Take the southwest path before heading back north and continuing to map out the area.
You'll be crossing the water and going through an area with red shrubs. Soon after you will encounter more Janusian Lacerax. Encounters with them usually occur in small numbers. Continue north and you will eventually find the wooden bridge and stonehead rock.There will be a trap you will need to disarm just before the bridge.
This will lead you to the location of the rebel leaders, so get ready for battle. Continue across the bridge and a short scene will play followed by dialogue interaction with Muaran. Continue through the dialogue until it ends.
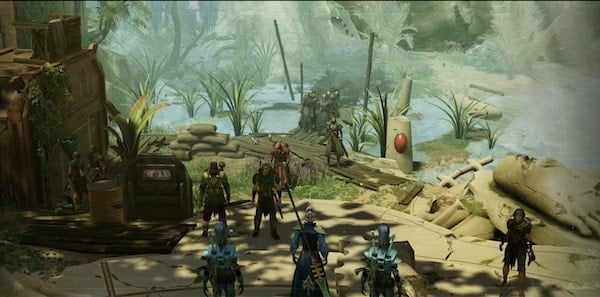
You will also have the option to say nothing when prompted or immediately [Attack.] As the dialogue continues there will be additional responses where you can choose a Heretical, Dogmatic, Iconoclast approach if you have the required characters in your party. you can also attempt to use Persuasion to convince them to stand down
- [Nod at the rebels] What have you done to these people? They believe you are their commanders?
- [Iconoclast] [Address Yrliet] I can't convince your kinsman, but I know you are on my side... Will you help me save the Lilaethan from the true enemy?
- [Heretical]
- [Persuasion -40] I cannot give Janus to the Aeldari -- humans will only be ruled by humans. But I promise that no harm will come to you.
The end of this interaction will complete your current objective and you will have successfully tracked down the Rebel Leaders. A fight could still follow the interaction. Get through the fight so you can continue to fulfill your next objective. Depending on the success of your interaction, you can convince the rebel camp to turn against the leaders and fight with you. Otherwise, you will need to clear the Rebel leaders along with the rebel camp. For the best outcome, choose to Nod at the rebels to acknowledge them then succeed in a Coercion check to fight alongside them against the leaders. Fighting both the rebel camp and leaders is still doable, but makes the fight a lot longer, and will take a toll on your characters.
When facing the Aeldari, note that they will be significantly stronger than those encountered in previous fights. Having the rebels by your side will spread out some of their attacks. Muaran has the ability to evade attacks and is immune to falling prone because of his Combat Master passive so be strategic when targeting him. His other Active Abilities include Prophesy of Doom, Eldritch Storm, and Mind War.
- Prophesy of Doom: Doomed creatures suffer a 50% penalty to dodge and parry and a -4 penalty to deflection. Also, enemies gain +50% hit chance against doomed creatures.
- Eldritch Storm: The Farseer calls down a vast psychic, storm, dealing 10 energy damage in a 40cell radius area. After 2 turns the storm returns to warp, dealing 35 energy damage
- Mind War: The Farseer inflicts slowed on an enemy makes them unable to use psychic powers. The target must pass an Awareness test with a -30 penalty to avoid the effects.
Once the fight is finally completed, another dialogue will begin. Here, you will have the option to use a Dogmatic approach to kill her with the response 'Might as well send you off along with the rest.' End the Dialogue and you will receive an update for the quest 'Aeldari in Distress,' Before you leave, loot the area.
- Return to the Governor.
Explore the rest of the Janus Forest as you like. When you're ready to continue the questline, exit the area and return to the voidship so you can return to Governor Vyatt's Estate on Janus. Enter the mansion through the main doors and go back to the governor's room through the doors on the left once you reach the set of three doors. Update Vistenza Vyatt on your findings. Choose your responses. You can choose to accuse the governor of where her loyalties which will eventually also give you the option to attack or keep her secrets.
- I've already heard enough, Vistenza. But if you wish me to repeat myself -- we know that your loyalty lies with the Ruinous Powers.
- [Heretical] Everyone has their secrets, I suppose. Everything between us can remain as it was
- [Attack] I'm sick of your games and secrecy. Die!
Choosing the first option will expand the dialogue and present an additional set of choices. The responses that follow will give you additional similar Heretical and Dogmatic responses You will also have a new Iconoclast response.
- [Iconoclast] I will not allow a miscreant like you to continue wreaking evil!
Choosing this option will give you Iconoclast +3, and the dialogue will soon end. This will also lead you to your final objective: Kill the governor.
- Kill the governor
The governor will soon be shielded away and will escape into a backroom. You will need Tech-Use to remove the obstacle ahead. There will be a wall candle on a pillar you can interact with to remove the wall and get through.
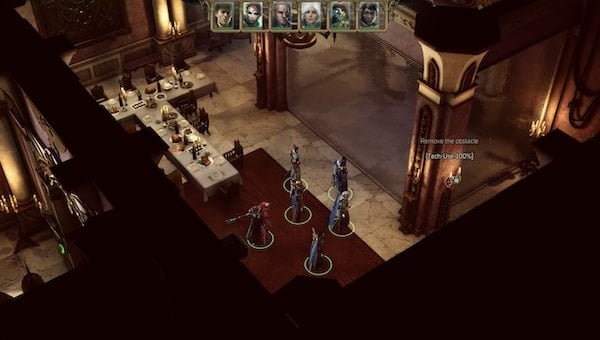
Head in and watch for traps on the floor. Save your game here. Maneuver around them or disarm them then loot the goods chest at the corner before turning the corner and heading through the next set of doors. Unlock the doors here and the next scene will begin.
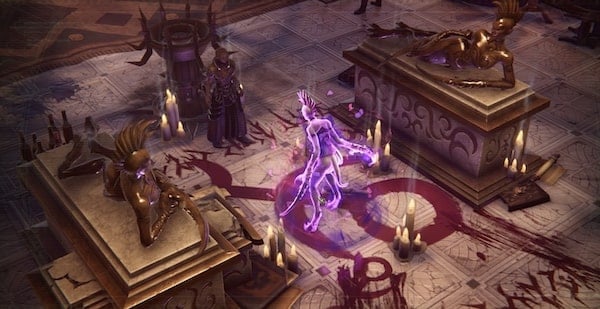
A Battle will follow. Spread out your party, since the enemies in this battle will have a few AoE attacks that will be able to damage your party if clumped together. Watch out for the Maid of Honour who has the Summon Daemonette active ability. Clear those closest to you while also prioritizing clearing the Maid of Honour to minimize the opponents in the arena. Also, look to clear Vyatt since she will be able to restore the health of the summoned Daemonettes. Use the statues in the area for cover when needed. If you don't clear the Maid of Honour and Vyatt, Daemonettes will continue to litter the arena, but they will clear out once you get rid of her.
Following the battle, a dialogue will begin. See it through and you will be able to continue to invite Yrliet with you. If you choose this response, she will accept your offer and the dialogue will end.
- Return to the ship
The Vox Master is awaiting orders regarding the fate of this world.
Return to the voidship at the bridge. Once you reach the ship decide the fate of Janus.
- [Iconoclast] Send provision to Footfall
- [Dogmatic] Leave footfall to the depredations of Incendia Chorda
- [Heretical]
Make a choice here to complete the quest. Choosing the Iconoclast approach and the inhabitants of the Football station will praise the Rogue Trader for sparing them from starvation..You will gain 350 EXP and +35 Iconoclast.
ACT 3
General Details
- ACT III
- Location: TBA
Relevant Characters
- TBA
Bosses
- n/a
Items
Consumables and Other Items
- n/a
Equipment & Upgrades
- TBA
Enemies
- TBA
Following Breadcrumbs Walkthrough
Yrliet was able to contact a group of Aeldari survivors from the lost craftworld Crudarach. Before the unstable interstellar connection was severed, the xenos told her that they knew of the craftworld's current location. Yrliet has asked the Lord Captain to travel to the Atlas Reach System so that she may learn of her homeworld's fate.
WARHAMMER 40K: ROGUE TRADER Following Breadcrumbs OBJECTIVES
- Travel to the Atlas Reach System: The system where the Aeldari refugees are currently hiding is situated at the edge of the Koronus Expanse. Establishing contact seems impossible, so the Rogue Trader should personally head to their last known coordinates.
- Explore the Atlas Reach System
- Explore the Voidship
ROGUE TRADER Following Breadcrumbs WALKTHROUGH
After the events of The Emperor and My Right, you'll find yourself starting from your quarters in the Von Valancius Palace. After the reports from Clementia Werserian, you'll be free to move out of the room. Yrliet will stop you and ask for a private audience. She'll tell you of what little clues she's found in her search for Crudarach and her people. Confirm your desire to continue helping her and the Quest Following Breadcrumbs will officially start.

When you're ready, head out to your voidship and make your way to the Atlassian Reach System. Depending on how much you've explored thus far, you'll likely have to do some warping before you can actually get to the target system. When you enter the system, your Vox Master will inform you that your scans have not detected any sort of activity on any of the planets. However, they've found a faint signal on a ship near one of the said planets. Yrliet will press you to head to the shuttle, which you'll have to do anyway to progress the Quest.

You can begin exploring the system and scanning the bodies herein. The vessel from which your crew found a signal is at the lower left side of the star system's map, called the Chartist Vessel. When you're ready, fly to it and as per usual choose your party members for exploration.
As soon as you move just a little bit forward, you'll be stopped by a cutscene with some officers of the ship. As it starts, the Quest Following Breadcrumbs will officially be completed. However, there will be a couple of events and dialogue options that will follow before the subsequent Quests actually start.

After you get ambushed and essentially drugged, you'll find yourself in a large chamber, trapped in a cage with blades. Marazhai will approach you as you wake up. You can ask him the following questions or give the last option as a violent reaction:
- "What do you want from me?"
- "Why am I still alive?"
- "Where are the others? What have you done to them?"
- "Burn in the Emperor's scorching light, you filthy xenos!"
If you ask about your Companions, he'll claim to not know where they are, apart from Yrliet who he says you'll meet soon. If you ask the other questions, it'll be revealed that you've been a pawn in Marazhai's plans all along and that you have a role to play. If you ask about said role, he'll reveal that you apparently have been used all this time by someone else, and it's your role now to help him expose that someone. If you choose the Persuasion check dialogue option here and succeed, you'll have the option to taunt him or strike him as he leans in to listen to you. He'll initially relent to your provocation but eventually compose himself and instead set an unknown parasite by your skin. This bug will begin to burrow its way through your body all the way to your brain.

You'll black out and then wake up to some sort of vision. You'll find yourself in your own voidship, filled with blood and the corpses of your crew. You'll see outlines of people and scenes you've witnessed in the past that try to spell out the theory that Marazhai just revealed to you. When you reach the large model of the Koronus Expanse, you'll find the dead bodies of your Companions on the right side. Make your way past the model and toward your usual seat to find Heinrix, Theodora, and Lord Inquisitor Xavier seated on your throne. Theodora will be accused of collaborating with xenos, thus allowing all her charges to do the same and plunge her protectorate into heresy. This includes you, as her heir. Heinrix will then ask if you admit to these crimes yourself.
You can get some desired bonus points here if you want to, but regardless of your dialogue choice here, the next ones will have you plead guilty or admit to the charges. Essentially, submitting yourself to the illusion you've found yourself in. You'll then be more specifically accused of staging the recent conflicts with the xenos that you resolved yourself to get ahead of your competition. You can try for a Willpower check and bite back if you want to, and get 11 Experience points if you succeed.

Next, they'll call over Yrliet as a witness. To hit the nail in the coffin, she'll present the irrefutable evidence of finding a shard of Crudarach in your room, showing that you had something to do with its destruction. Convinced of your guilt, the "trial" will allow you some final words as a mercy. You'll have the following options for it:
- "Now I see that I have been blind. The xenos have been fighting one another all this time and I was their unwitting cat's paw."
- "I am still struggling to make sense of what is going on here..."
- "M-mercy?"
- "I... am nothing but a puppet in this charade. Everything that has taken place at this trial is a vicious lie!"
Whichever you choose, you'll finally wake up from the illusion and find yourself in a large chamber with Marazhai, Yrliet, and other powerful xenos council members, including a menacing one sitting on a high throne. If you want to, you can try making observations of the people present here before continuing to listen to their conversation. A stranger will disrupt the archon's dismissal of Marazhai. You can take a Lore test by clicking the first dialogue option and observing the new Aeldari. Succeeding will grant you 11 Experience points.
If you continue to listen in on the conversation, you'll find that Marazhai is successful in convincing the council of his master's treachery, but is also seen as a disgrace for not resolving the problem himself and instead crying to the council about it. The council will turn their attention to you, calling you by a different name, and Arebennian will make a laughing remark. The Archon scolds him for it and he retreats with another volume of prose. The scene will end with the guard behind you striking you and knocking you out cold.

You'll wake up on a pile of bloodied corpses, with the aid of the poetic jester that interrupted the trial. You can try to ask him for your current situation, and the situation of your Companions, but you'll just be answered by more poems. Having no choice but to move forward, you'll have to choose to try to stand up or at least figure out your physical state yourself. The jester will give you the Gift From Beyond the Grave weapon to protect yourself with. Your initial attempt to rise will be futile but if you have the Iconoclast conviction, you can choose to rouse willpower from thinking of your people, giving you the permanent Power of Honour effect.
Standing up will start the new Errand Not the Biggest Problem, and the next Main Quests, One Foot in the Grave, and Reunion.
Troubling Developments Walkthrough
After being kidnaped to Commorragh, you need to find your way back. Depending on whether you have Yrliet on your team, this quest can play a little differently. If you already executed Yrliet, a random traitor will lead you into the trap.
WARHAMMER 40K: ROGUE TRADER Troubling Developments OBJECTIVES
- Wait for news from the von Valancius spies: House Winterscale and House Chorda are displaying unusual activity at the borders of the protectorate. As soon as the Lord Captain‘s servants obtain additional information on their movements and intentions, it will be possible to plan further steps.
- The xenos Yrliet is insisting on a personal meeting with the Lord Captain — at some time when he is not busy with his direct duties.
- Find a way to escape Commorragh: Being captured imposes certain unfortunate limitations on controlling the von Valancius protectorate directly. Until these circumstances are remedied, the Rogue Trader's duties of maintaining and enriching the dynasty are considered negligible.
ROGUE TRADER Troubling Developments Walkthrough
You will find yourself alone in Commorragh, without your gears. You can find Yrliet after you meet with Malice, and find Argenta and Abelard in the place of the Commissar. (You need to have them in your active team when you get kidnapped for them to appear, without them, the following fight becomes much harder. )
You need to defeat Malice or Commissar with these team members. Then you will be teleported to the Arena and initiate another fight. After the fight, you can visit Tervantias in the Anatomical Opera, get your gear back and reunite with other companions. (quest Reunion)
One Foot in the Grave Walkthrough
The xenos underestimated the Lord Captain and discarded him to the corpse dump. But their torture failed to finish off the Rogue Trader. The path to escape and vengeance starts at the very bottom of the grave.
WARHAMMER 40K: ROGUE TRADER One Foot in the Grave OBJECTIVES
- Escape the corpse dump: The Lord Captain came to his senses atop a mountain of corpses in some dreadful place. He needs to escape this place as soon as possible if he does not want to join them.
- Find help
ROGUE TRADER One Foot in the Grave Walkthrough
After the events of Following Breadcrumbs, and all the scenes that ensue afterward, you'll find yourself waking up amid piles of corpses in The Chasm. With some unexpected help from the jester from the previous Quest, and possibly some noble motivation to live for your charges, you rouse yourself up, and this officially starts the Quest One Foot in the Grave. Reunion will also begin alongside this Quest, as you look for your Companions, and Not the Biggest Problem, as you look for your missing boots.

When you're ready, you can make your way out of the corpse dump. The beggar standing up can serve as your source for at least some equipment if you talk to him and end up dispatching him. He'll also have your boots for the Not the Biggest Problem Quest. Head on the path on either side of the corpse piles. When you head up the stairs, the first objective of the Quest will be completed. The path on the right leads to a dead end with some search points though, so if you don't want to explore it head up the path to the left.
You'll eventually come across two beggars thinking of a way to get past some xenos guards. One of them will elect to just try and sneak past, attempt it, and unfortunately die trying. The other will move to the edge of the path where there's a chain link leading to the other side. Click on the prompt near it to presumably use it to cross and get behind the guards. You'll need to pass an Athletics skill check to do so. Otherwise, getting close to the guards will initiate a fight against them, which can be difficult because, if you haven't noticed, you're afflicted with a few debuffs currently.

Past the guards will be some Shriekers doing some training. They'll ignore you for the most part. Head past them and exit out into the Pit. There, move toward the center of the room to meet Malice. If you pass the automatic Lore test, you'll recognize that Malice is a Sslyth and gain 11 Experience. Choosing and succeeding a Medicae test will grant the same amount of Experience, and give you a rundown of how intoxicated most people in the room are, and how much danger you are actually in. If you finally try to speak, Malice will ignore you and one of his servants will try to turn you away in his stead. You'll have the following options left to respond with:
- "I require aid. I am wounded."
- [Requires: Heretical - Adherent]
- "I can pay you handsomely for your assistance."
- "Lovely day we're having, isn't it?"
- "Help me, I beg of you!"
- [Attack] "Die, heinous beast!"
- [Step away from the xenos]
If you choose the first option, he'll just reiterate that he couldn't care less about you. If you choose the third option, he'll challenge you saying you don't have anything to pay him with. You'll then have the following options to respond with:
- "I have power. I can make you right."
- "I will render valuable services in exchange for assistance."
- [Coercion -75] [Shoot the Drukhari in the head] "Is there a problem with your hearing? I come to you with a business proposition."
- [Grab the injector from his hands and use it on yourself] "I need this more than you do, serpent."
- "I see"
If you choose the fourth option and try to use the injection he's holding on yourself, you'll burn up from the inside. However, at least he'll be impressed. He'll finally address you and ask you what you want. You can either tell him you want to return home, or that you need a healer. If you say you'll need a healer, he'll ask what you can give in return. If you ask to return home, he'll reveal he doesn't even have a voidship to do that with. Unfortunately, your fortitude will meet its limit at this point and you'll collapse.
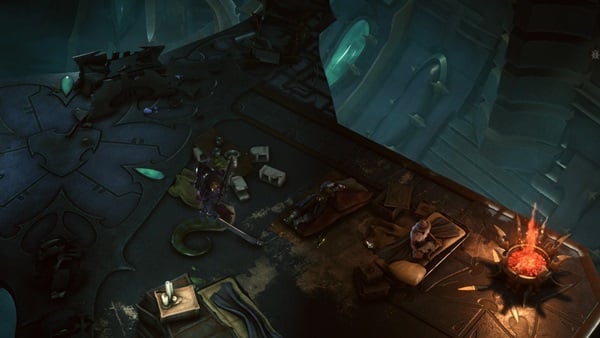
When you wake up, you'll find yourself still in rough shape, but at the very least your life is no longer in danger. As you continue conversing with Malice, he'll reveal that you have a Mind Maggot latched onto your spine. He kept it there even as he was rescuing you from the brink of death so that you could do something for him before he fully heals you. He'll want you to kill someone called the Commissar who is trying to mount a rebellion. He'll also mention someone who fits the description of Abelard making his way to the Mangled Sector. Agreeing to the deal, though you probably don't have any other choice, will start the next Quest The Chasm.
Reunion Walkthrough
Depending on your team composition, your teammates' location can vary.
- YRLIET LANAEVYSS can be found just when you leave Pit.
- SISTER ARGENTA can be found near the Commissar.
- ABELARD WERSERIAN can also be found in the area with Commissar.
- JAE HEYDARI can be found at the entrance of Anatomical Opera, after you survived first combat in Arena.
- IDIRA TLASS can be found in the Anatomical Opera. In order to get her help, you need to convince her first.
- ULFAR can be recruited in the Anatomical Opera, persuasion check needed.
- HEINRIX VAN CALOX can be found in the Anatomical Opera, persuasion check needed to release him.
WARHAMMER 40K: ROGUE TRADER Reunion OBJECTIVES
- Find the missing companions: By collecting rumours and information on his missing companions, the Lord Captain will be able to find them and learn about their fate.
ROGUE TRADER Reunion Walkthrough
After the events of Following Breadcrumbs, and all the scenes that ensue afterward, you'll find yourself waking up amid piles of corpses in The Chasm. With some unexpected help from the jester from the previous Quest, and possibly some noble motivation to live for your charges, you rouse yourself up, and this officially starts the Quest One Foot in the Grave. Reunion will also begin alongside this Quest, as you look for your Companions, and Not the Biggest Problem, as you look for your missing boots.
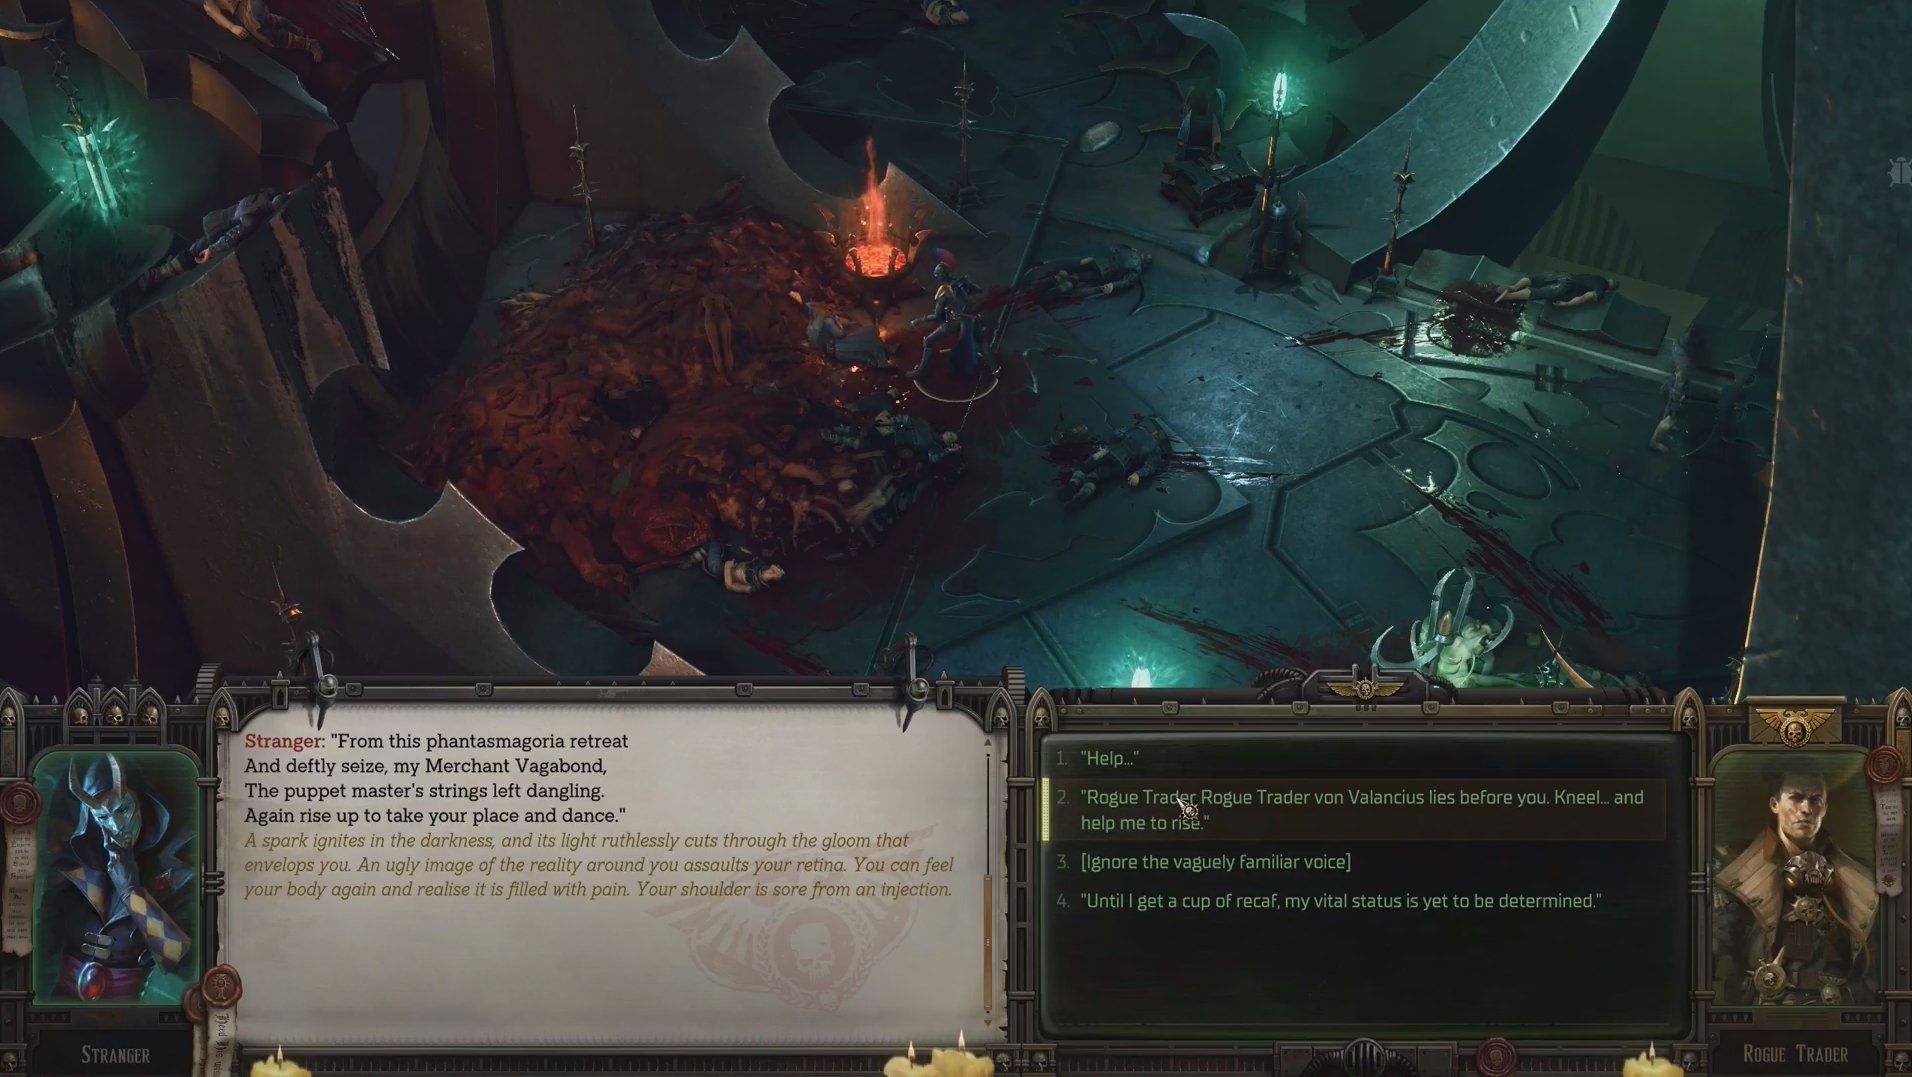
You can start finding your companions exclusively within the main quest, The Chasm. Check it out for more information about this quest and detailed instructions on where to find each companion.
The Chasm Walkthrough
The Rogue Trader was unlucky enough to end up in the part of Commorragh called the Chasm. To escape the Dark City, the Lord Captain first will need to break free from this place drenched in suffering and peril.
WARHAMMER 40K: ROGUE TRADER The Chasm OBJECTIVES
- Bring Malice the Commissar's head: The xenos called Malice promised to aid the Rogue Trader in exchange for killing his enemy - a man named the Commissar hiding in the Mangled Sector of the Dark City.
- Pit - Kill Malice: The Rogue Trader has formed an alliance with the Commissar. To successfully escape Commorragh, they will need to eliminate the xenos called MAlice. Securing Malice's lair will be the first stepping stone to freedom.
- Mangled Sector - Enter the Dimensional Portal
- Survive the battle
- Find the Maestro of Flesh: The Lord Captain's enigmatic ally, who prefers to speak in riddles, has advised him to search for a "maestro" of a "haggard chorus" who "flesh is employed to serve his art." It seems that this mysterious person might provide the Rogue Trader with the means to escape the Dark City... Though it is hard to decipher the exact meaning behind the bizarre stranger's words.
- Talk to the Bloodstained Proselytes: The champions of the arena, the Bloodstained Proselytes, have entered the Anatomical Opera for reasons known only to themselves. Tervantias has advised the Rogue Trader to take a good look at them - such a chance may not present itself in the Fatal Thirst's arena.
- Anatomical Opera - Win the Arena battle: Tervantias is ready to offer his patronage to the Lord Captain. But first, he will have to teach the Wych Cult a lesson by killing serveral of their fighters in the arena.
- Report the victory to Tervantias: The Rogue Trader's opponents have fallen, so now he can demand the Haemonculus's promised help to escape.
- Anatomical Opera - Finish off the Wych Keykeross
ROGUE TRADER The Chasm Walkthrough
After you talk with Malice in the Pit, loot the area and arm your character as best as you can for the upcoming fights. There are several pieces of equipment in this area, including the Aeldari Ranger Sight, Hand of Offence, and an Icubus Klaive. When you leave the pit, you can meet Yrliet if she was on your active team during the events of Following Breadcrumbs.

You'll have to involuntarily stop every now and again as a result of the Mind Maggot that's in your brain. From here, head up the makeshift path to the streets of the Chasm. Make your way to the upper right corner of the map. You won't be able to go to the Anatomical Opera, so take the portal nearest to it, at the edge of the area, to get to the lower right section of the map. The lift nearby leads to the Mangled Sector but loot and arm yourself as best as you can in this area as well, before moving forward.
If Abelard and Argenta were in your active team, you can recruit them here in the Mangled Sector. They might be suffering from the same illusory suffering you were subjected to previously, or in some other kind of trouble, so you'll have to talk to them and try to get them out of it. If you do, you'll have them join your party and finally have some helping hands. They likely would've been stripped of all their prior Equipment, so you'll have to arm them as well.
When you're ready, make your way to the upper right area of the map to meet the Commissar. Here, you can choose to work with him and betray Malice or attack him. If you choose the former, the Quest's objectives will be updated accordingly, now asking you to kill Malice. You can keep talking to him to get more information about him, his followers, and what their plan is for this place.
If you decided to work with the Commissar, make your way back to the Pit. Look for Malice and talk to him. If you want, you can exhaust all the dialogue questions to get more information about him and this place. When you're ready, choose the option to attack him to start the inevitable fight.

You will have to survive alone for the first 2 turns, and then the Commissar and his men will join you. If you want to, you can keep as much distance as you can from Malice so that you don't get flanked and trapped inside his little room. Your new allies will be entering the same way you did, so you can try and limit your movements to that side of the map. This fight is definitely losable if you don't watch your health bars so make sure to keep yourself topped up.
After the fight, the Commissar will open up a portal that he says leads to a dock with a ship you can use to escape. He'll be fending off enemies from the rear while you lead the breakout. You'll have the chance now to loot the battlefield before you take the portal. Malice's body in particular will yield a Fine-Edged Hekatarii Blade, and Reinforced Kabalite Armour. When you're all done, exit through the portal.
On the other side, you'll unfortunately find yourself in the Arena instead of any dock. A powerful-looking xenos, aptly named the Rage of the Arena, will address you and reveal that you've been tricked to arrive here as fresh new participants, as is the usual routine, all while the Commissary makes his escape back through the closing portal. After he gives you the rundown of how things will work, you'll have the following options to respond with:
- [Address the monster] "I would like a deal. We have no desire to participate in fights."
- "What is this place?"
- "What will I receive should I emerge victorious?"
- [Requires: Dogmatic - Adherent]
- "I am ready to fight."
- [Give the monster a vicious smile] "Are you offering me a chance to skin a few of your friends? I can hardly wait!"
- [Draw your weapon] "You think you can force me to do your bidding, do you?"

You can get information through some of these options. If you choose the sixth option, the dialogue will end and you'll be beckoned to the arena. Someone named Keykeross will unleash some large alien hounds upon the battlefield, and introduce other notable participants - Marazhai, and someone bearing the title of Fleshgorger. Enjoy the epic entrance of the Fleshgorger. When it's your turn, you'll enter the battlefield alongside the grunts that had followed the Commissary. You'll be up against just two Wild Khymeras, but be careful as they have large health pools and strong attacks.
After you defeat them, you'll then sadly have to defeat the grunts you fought alongside with. This should be a way easier fight. When you're done, you'll find the other participants were also able to survive. When you regain control, loot the battlefield as necessary, and then make your way back up the stairs. Head out the portal to the streets of the Chasm.

The jester from the previous Quests will come greet you here. As usual, he'll be speaking in cryptic poems. You can try asking him about your Companions if you want to, but you'll just be met with the same cryptic messages. Luckily it seems like your character might understand him somewhat, even if you yourself do not. He'll apparently bid you find someone called the Maestro of Flesh. This will update the Quest objectives, as well as start a new Survivor's Revenge Errand.
Move away from the portal, and head past a trio of Drukhari, avoiding the stairs to a dead end. Turn right near another trio of Drukhari and follow the path to the end to find Yrliet, if you brought her along previously. Help her out and forgive her for leading you to a trap to have her join your party again. Do the same for Pasqal by going to the lower right area of the map. Don't forget to arm them both, and then head through the nearby portal to get to the upper right area of the map. You'll now be able to try the lift nearby by talking to Wrack. You can choose dialogue options to provoke him and eventually kill him to loot his body. Don't forget to arm the Companions you reunited with. If you have any looting left to do that previously required stats and Skills that your party now has, feel free to do so.
You can also head back to the Mangled Sector to try and get Argenta back in your party. Chtonos can also be found here trying to attack an Enthralled Marauder. You can engage in a battle with it to kill it to complete the Errand The Chtonos. Be careful though, as it's strong enough to kill one of your characters in a single turn. If you're successful and if you have Pasqal with you, he'll gain the Trenchline Strategem ability. You can then loot it for the Chtonos's Pain Converter, and the Life Sunderer.

When you're ready, head back to the streets of the Chasm, and then head up the lift to the Anatomical Opera. Push through the illusions and make your way forward until you meet Tervantias the Archmachinator. You'll black out and wake up finally healed thanks to the large xenos before you. It seems the Mind Maggot was created by him and he was able to extract it easily. The Stranger vouced for your usefulness, along with Yrliet's, so the haemonculus is ready to put you to work. Ultimately, he wants to use you to humble some fellow xenos. For now, he wants you to meet the Bloodstained Proselytes. Before you regain control, you'll finally be given all your previous Equipment and Items. Make sure to re-arm yourself and your party as necessary. In this endeavor, you should also speak to Tervantias about Idira to get her back, if you brought her with you here previously. Jae can also be found in this area if you brought her previously as well.
Explore the area to also find the Fleshgorger in one of the cages. It seems his name is Ulfar. Speak to him to start the Fury in Chains Errand. You can keep conversing with him to get more information but he'll be a bit guarded for now, understandably. If you head back to Tervantias, you can pan the camera to the balcony above to find Marazhai and Aebys and talk to them, as apparently they are the Bloodstained Proselytes who are supposedly the champions of the arena. You can try to strike a deal with Marazhai, but his current slavedriver, Aebys, will eventually pull him away.
When you're ready, head back out to the streets of the Chasm. Head back to the Pit to find the Commissary running things again. You can talk to him and try to claim some sort of payment for his schemes, and he'll give you the Commissar Cap. Otherwise, you can also try to kill him and slaughter everyone there if you want a bit of revenge. Alive, he'll serve as a new merchant for you to transact with. You Companions will be scattered throughout this place if you want to talk to them and check on them. When you're ready, head back out to the streets of the Chasm and make your way to the large portal leading to the Arena.
The first fight shouldn't be too difficult and you'll be able to easily, and happily, finish it with all your party members and Equipment back. A cutscene will ensure with the Bloodstained Proselytes. If you nudge Marazhai just a little bit more, he'll finally make the decision to betray you. He'll promptly slay one of the enemies before flipping over to your side, literally. This next fight shouldn't be too hard either, especially with Marazhai on your side this time. You'll have some words with Marazhai after the right, along with your party members, and you'll urge to postpone the discussion to the Shrieker's den. When you regain control, loot as necessary and then make your way to the Pit. Speak with Marazhai to get heaps of information, or confirmation for a lot of suspicions, with regard to everything that's befallen you and your party thus far. When you exit the Pit, you'll find him officially in your party and you'll be able to customize his Skills and Equipment.
Head to the Anatomical Opera and speak to Tervantias to advance the Quest. Apparently the people in charge of the arena are after him now too, along with your party, because you ended up humiliating the Bloodstained Proselytes by defeating their best fighters, and getting Marazhai on your side. Tervantias is evidently panicked. He has deigned to hide in the embrace of Marazhai's previous mistress. He'll bid you enter the arena and fight Keykeross to give all of you a window to escape.
After you end the conversation, explore the area and loot as necessary. If you head up the cages you'll find a mini-puzzle you can solve to get your hands on some more valuable things. Have one person stay with the levers and flip them until you can move forward through the cages. You'll find the Provocative Emitter, Stinger Ring, and Spiked Boots for your troubles.
When you're ready, exit out to the streets of the Chasm. You'll be ambushed by some grunts led by a Grotesque. Shouldn't be too difficult of a fight. Once you clear everyone out, you'll be approached by the Stranger again, this time named the Nocturne of Oblivion. He'll have some words for Marazhai, which he smirks to, and if you're of the Iconoclast conviction, you'll understand that he has an escape plan for you: head to the Arena, fight until he presents a portal for your escape, and then promptly leave the Dark City. When he leaves, loot the battlefield as necessary and then head for the Arena.

A Wrack will greet you in Tervantias' behest, and then the real fight begins against a Skilled Beastmaster, and two Khymera Fiends. The creatures will be defending their master while she attacks from afar, so your melee units will have to go through them first. Keep your party members topped up 'cause this is just the first fight. After you defeat her, a Sslyth Military Artist will take her place. Use cover and dispatch of the snake promptly, while still being wary of your own health parameters. Next up will be a singular high-level Grotesque called the Perfect Specimen. Try to spread out against this one so he doesn't deal damage to multiple party members simultaneously, and be wary of its poison gas. Afterward, you'll finally go against Keykeross and her lackeys.
Not too much to be said with this fight actually. They have powerful units, but Keykeross will fall to a few attacks especially if you gang up on her with just a few party members. That being said, they have strong attacks themselves, and their Agonis Pain Engine can hit multiple units at once so don't clump your party members together. After you kill them all, dozens more will take their place, but the Nocturne of Oblivion will pull through and throw smoke on their faces to allow for your escape. The Quest will officially be completed at this point. Loot the arena and then follow where the jester came from and rush out.
Strings of the Puppeteer Walkthrough
Nocturne of Oblivion has decided to involve the Rogue Trader in his enigmatic escape plan. Kept in the dark about the nuances of the Harlequin's true intentions, the Lord Captain can only follow his lead while looking for opportunities to cut the strings tying him to the tips of the xenos puppeteer's fingers.
WARHAMMER 40K: ROGUE TRADER Strings of the Puppeteer OBJECTIVES
- Find a way to escape Commorragh.
- The Spire of the Reaving Tempest contains a way to escape Commorragh. It must be found.
- Yrliet knows how to open the Webway Gate, but she needs a special key hidden in the spire to do so.
- Marazhai promised to open the Webway Gate if the Lord Captain allows him to leave the Dark City with him.
- Kill Yremeryss Aezyrraesh.
- Activate the webway gate and escape Commorragh.
ROGUE TRADER Strings of the Puppeteer Walkthrough
Once you enter the Reaving Tempest Spire, head up the stairs and a dialogue will play. If you have Marazhai recruited, he'll be forced to be in your main party. After the dialogue with Marazhai, this quest will begin, and you will also have an update for the companion quest Path of the Drukhari.
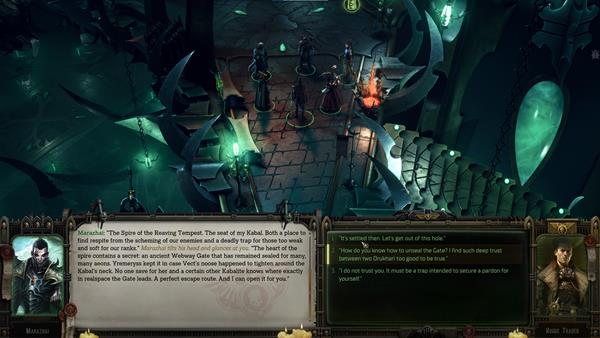
Do note that this area is huge and it can be confusing to navigate. There are also traps placed on floors you'll need to keep an eye out for, and machines placed on walls that shoot automatically. There is a console somewhere in the area that you can interact with to stop these machines from shooting, but you'll need to pass a Lore (Xenos) check to deactivate them.
Now head north and interact with the giant door to go inside. From here, go down the stairs on your right and you'll see a barrier you can remove on the south side. You'll need to pass an Awareness check to remove the barrier. This is mostly to avoid the traps and the machines that are shooting from the other side of the central pillar in the area.
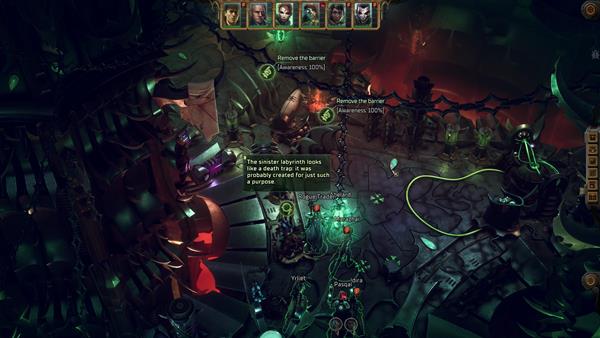
Continue heading east and at the fork, head northwest and you'll spot a console that lets you connect the platforms. After activating the console, return to the fork and head northeast, check the northeastern corner of the area to find a Farseer. From here, you can go ahead and disarm a nearby trap then go east and take the stairs down to the south. You'll see a large standing tube and you'll find another Farseer. This is needed for Yrliet's companion quest, The Path We Lost.
Now continue heading east, and you'll reach an area where you'll have to engage in combat. You'll go up against some Bloodthirsty Experiment and Disciples of Pain enemies. This is a fairly easy fight, a useful tip here is to immediately get rid of the Disciples of Pain, as they have an ability that buffs the Bloodthirsty Experiments called Frenzy Injection. This lets the Bloodthirsty Experiments attack three times per turn and they take less damage from your attacks.
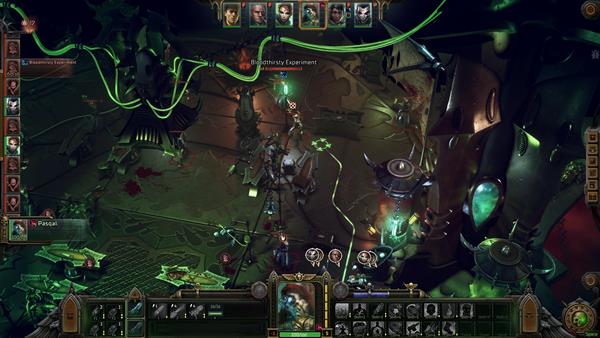
Once you've cleared the enemies, you'll notice a cage right above you and they are asking for help. This is one of the Aeldari that Yrliet wants you to help from her quest. To set them free, you'll need to activate two consoles, each one located just on each side of the room.
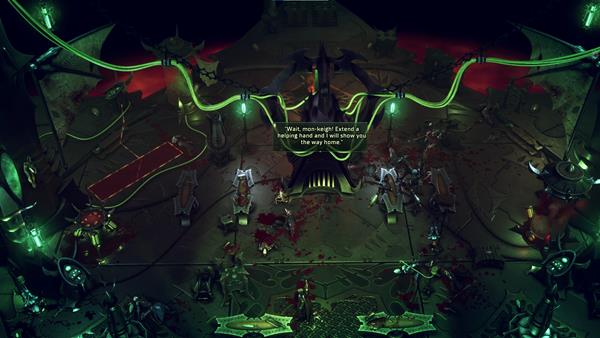
After helping the Farseer, you'll have a conversation with them. You can ask what happened with their world and how they ended up in the cage, there will be multiple dialogue options from here, and if you manage to pass the Persuasion check, Yrliet will ask the Farseer to join you and you can help escort them to the webway gate.
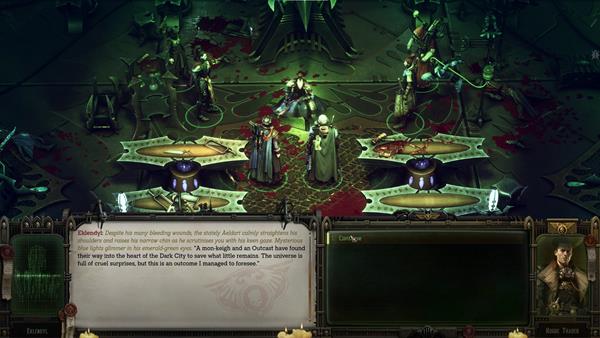
Now go to the eastern side of the room, and you'll find a chest you can loot for a Webway Resonance Device. This is an important item that Yrliet needs in order to activate the warp portal to get you out of here, but this is only really needed if you don't have Marazhai in your party.
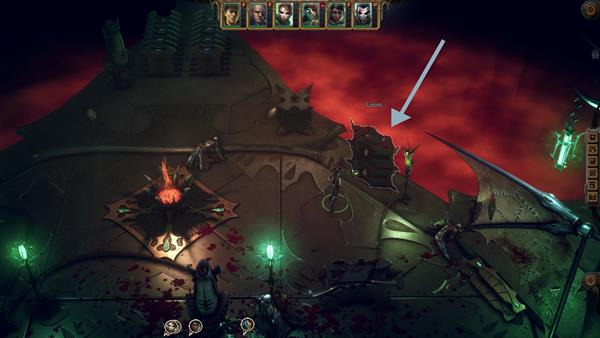
You can go ahead and explore the area to find more loot, there are lots of good pieces of equipment scattered around the area. Once you're done, head northwest. Once you go up the step, head southwest to trigger a scene with Marazhai where he shows you his torture devices. Now continue heading north and follow the path until you reach an elevator, this will take you to the next area.
For the next area, disarm the traps that are laid around, make sure to save your game before proceeding, as you will have to fight tons of enemies as you progress. Most of the enemies you'll encounter during this part are pretty easy to deal with, but you might have trouble against two of them. Once you've cleared the enemies, you can loot the area if you wish to do so. Afterward, head north and go up the staircase leading up to the center of the room. Once you reach the top, you'll find Tervantius the Archmachinator. Interact and speak to him, In one of the first dialogue options, there is an Iconoclast check you'll have to pass if you want to continue without engaging him in combat.
Now head to the elevator to the north and use it to reach the final area. Once you reach the next area, go northwest and a scene with Marazhai will play out. This is a part of his quest where he wants to retrieve his electric whip. You have the choice to either let him keep it or take it away. If you choose to take it away, his quest will end in failure, so keep that in mind.
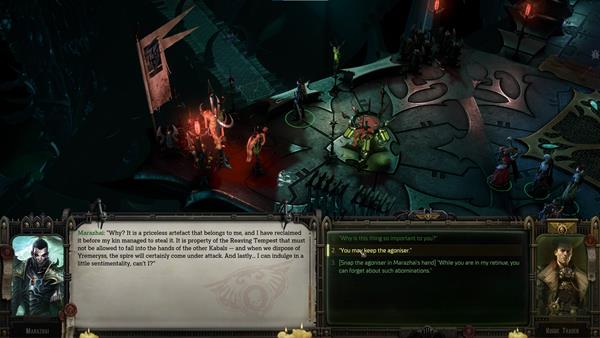
After that, head north to where the large staircase is, it is recommended that you save your game before you proceed, and make sure to prepare your party, once you go up the staircase, you will engage in the final fight for act 3. Once you go up the staircase, you'll see multiple enemies in the area, once you approach them, it'll trigger a scene with Yremeryss. You can ask her as many questions as you want and exhaust the dialogue options before you fight her.
Do note that if you have Marazhai in your current party, make sure that you let him deal the killing blow to Yremeryss to complete the errand Killing Blow. For this fight, you'll find four Incubi in front with Yremeryss behind them with two Grotesque enemies. Once you position your characters, two more Grotesque enemies will appear behind you.
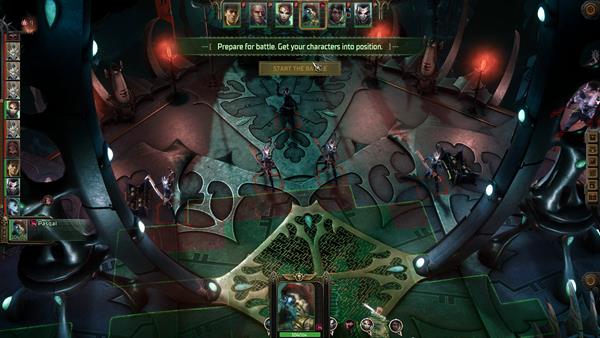
Once you shave off half of Yremeryss health, a scene will trigger where she regains all of her health back and activates two turrets in the area. These turrets will shoot at anything in a straight line, so make sure your characters aren't in it's line of sight. But once you've taken care of Yremeryss, both of the turrets will also be destroyed.
Once you've defeated Yremeryss and her companions, a scene with Marazhai will trigger where you get Yremeryss's soul in the crystal. After this, either Marazhai or Cassia will open the gate and a couple of Mandrake NPCs will appear in the area. You can then proceed to loot this place before heading to the portal, once you head to the portal, act 3 will officially end as well as this quest.
